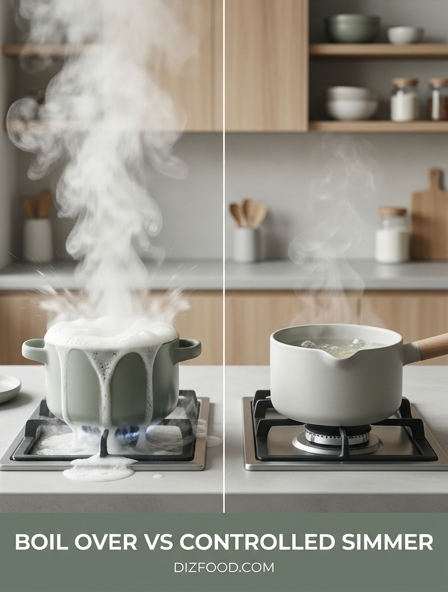
Achieving culinary excellence often comes down to mastering the subtle dance of heat management on your stovetop. While a frantic boil-over might get your pasta water ready in a flash, it can be the silent enemy of delicate sauces and tender proteins, leading to toughened fibers and lost nutrients. In contrast, the controlled simmer is the secret weapon of professional chefs, offering a steady, gentle environment where flavors have the time to meld and deepen without the risk of evaporation-driven saltiness or structural breakdown. Understanding the distinction between these two thermal states isn't just about preventing a mess on your burners; it's about choosing the precise level of agitation and temperature that transforms basic ingredients into a perfectly textured, gourmet meal.
| Feature | Boil Over (Rolling Boil) | Controlled Simmer |
|---|---|---|
| Temperature Range | 212°F (100°C) at sea level | 185°F - 205°F (85°C - 96°C) |
| Bubble Dynamics | Large, aggressive, vigorous breaking | Small, lazy, occasional "shimmering" |
| Best Culinary Use | Dry pasta, grains, blanching greens | Braises, stews, stocks, poaching |
| Protein Impact | Toughens fibers via rapid coagulation | Breaks down collagen for tenderness |
| Evaporation Rate | High; rapid liquid and volume loss | Low; preserves moisture and balance |
| Flavor Profile | Can result in bitter, "muddy" notes | Encourages complex, layered extraction |
The Science of Boiling Versus Simmering Temperatures
Understanding the thermodynamic transition of water is fundamental to culinary success. At sea level, water reaches a rolling boil at 212°F (100°C), characterized by the rapid formation of large steam bubbles that break the surface with significant kinetic energy. This phase occurs when the vapor pressure of the liquid equals the atmospheric pressure surrounding it. In contrast, a simmer occurs just below this threshold, typically ranging between 185°F and 205°F. At these temperatures, the water contains enough energy to soften tissues but not enough to cause violent mechanical agitation.
| Stage | Temperature Range | Physical Characteristics |
|---|---|---|
| Sub-Simmer | 160°F - 180°F | Tiny bubbles on the bottom, no movement. |
| Simmer | 185°F - 205°F | Small, gentle bubbles breaking the surface occasionally. |
| Full Boil | 212°F | Large, vigorous bubbles that cannot be "stirred down." |
The distinction is critical because water cannot exceed its boiling point regardless of how high the heat is turned up; it simply evaporates faster. Managing the energy input allows a cook to choose between the aggressive heat of a boil and the gentle, steady heat of a simmer. This control determines whether proteins will coagulate softly or toughen instantly under the stress of high-velocity water molecules.
Why Pots Boil Over and How to Prevent the Mess
A boil-over is a frustrating kitchen mishap rooted in the chemistry of the cooking liquid. When cooking starchy foods like pasta or potatoes, or protein-rich liquids like milk, the boiling process releases organic molecules into the water. These molecules act as surfactants, creating a stable, stretchy film on the surface of the liquid. As steam bubbles rise, they become trapped under this film, forming a thick foam. Because the foam is reinforced by starches or proteins, it does not pop easily, allowing the bubbles to stack until they spill over the rim of the pot.
- Add Fat: A small amount of oil or butter breaks the surface tension of the foam, causing bubbles to collapse before they multiply.
- The Wooden Spoon Trick: Placing a wooden spoon across the pot provides a dry, water-repelling surface that pops the bubbles upon contact.
- Temperature Management: Reducing the heat immediately after reaching a boil slows the rate of bubble formation.
- Rinsing Starches: Washing rice or pasta briefly can remove the excess surface starch that contributes to foam stability.
The speed at which a boil-over occurs is often underestimated. As the liquid reaches the boiling point, the volume of the foam can expand to several times the original volume of the water in seconds. Using a larger pot than necessary provides "headspace," which acts as a buffer zone, giving the cook more time to react to rising foam before it hits the stovetop.
How Controlled Simmering Enhances Flavor Profiles
Controlled simmering is the secret to deep, complex flavors in soups, stews, and sauces. Unlike a boil, which can be destructive, a simmer allows for a slow extraction of aromatic compounds and essential oils from herbs, spices, and aromatics. High heat can cause delicate flavors to "boil off" or become bitter, whereas a gentle heat maintains the integrity of the ingredients. This process is particularly vital for the Maillard reaction's lingering effects and the slow breakdown of sugars in vegetables.
- Melding: Slow heat allows different ingredient molecules to bond, creating a unified flavor rather than separate notes.
- Infusion: Fats in the dish have more time to absorb the fat-soluble vitamins and flavors from spices like turmeric or peppercorns.
- Softening Aromatics: Onions and garlic soften without browning, releasing sweetness rather than acridity.
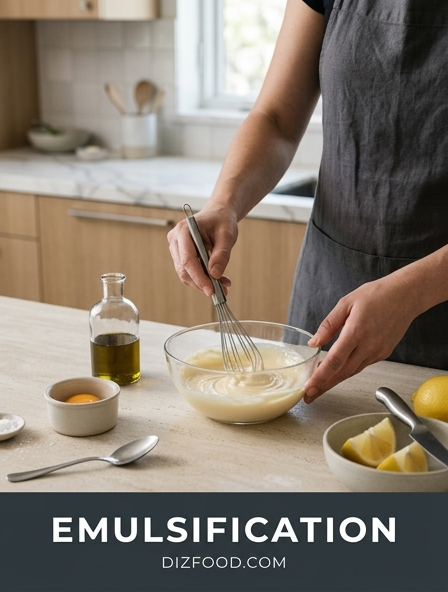
Furthermore, simmering prevents the emulsification of fats into the liquid. In a stock, a rolling boil would force fats and impurities to mix permanently with the water, resulting in a cloudy, greasy mouthfeel. A gentle simmer allows these impurities to float to the top in a foam that can be easily skimmed away, leaving behind a clear, clean-tasting broth that highlights the primary ingredients rather than masking them in a heavy emulsion.
Impact of High Heat on Meat and Vegetable Texture
The texture of food is directly influenced by the intensity of the heat applied. Meat, which is composed of muscle fibers and connective tissue, reacts poorly to the violent agitation of a rolling boil. High heat causes muscle fibers to contract rapidly and squeeze out moisture, resulting in a tough, rubbery texture. Conversely, a simmer provides the gentle environment needed to convert collagen-the tough connective tissue-into gelatin, which gives meat a succulent, "melt-in-your-mouth" quality.
| Ingredient Type | Boiling Effect | Simmering Effect |
|---|---|---|
| Tough Meat Cuts | Tough, stringy, and dry. | Tender, gelatinous, and moist. |
| Root Vegetables | Mushy exterior, raw interior. | Uniformly soft and creamy. |
| Green Vegetables | Loss of color and vital nutrients. | Bright color and crisp-tender. |
Vegetables also suffer under excessive heat. The cell walls of vegetables are held together by pectin. A rolling boil can break down this pectin too quickly, turning the vegetable into mush before the center is cooked through. A simmer allows the heat to penetrate the core of the vegetable at a rate that matches the softening of the exterior. This is why potatoes for salad are simmered rather than boiled vigorously; the goal is structural integrity combined with a fully cooked interior.
Best Culinary Uses for Rolling Boils and Gentle Simmers
Choosing between a boil and a simmer is a strategic decision based on the desired outcome of the dish. A rolling boil is primarily a mechanical tool, used when movement is necessary. For example, when cooking dried pasta, the vigorous movement of the water keeps the individual pieces from sticking together. Similarly, blanching green vegetables requires a large volume of boiling water to cook the exterior rapidly and set the chlorophyll before plunging them into ice water.
- Rolling Boil: Best for pasta, grains like farro, blanching vegetables, and reducing thin liquids into thick syrups quickly.
- Gentle Simmer: Ideal for poaching eggs or fish, cooking delicate legumes, making bone broths, and braising meats.
- Rapid Simmer: Used for reducing sauces where a bit more speed is needed but flavor integrity must remain.
The "gentle simmer" is the workhorse of the professional kitchen. It is the preferred method for any dish containing protein that isn't being seared. Poaching a chicken breast in boiling water will result in a chalky texture, but poaching it in a 190°F simmer ensures the meat remains juicy. Even for grains like rice, the initial boil is merely a precursor; the actual cooking is done at a low simmer to allow the grains to absorb water evenly without breaking apart due to excessive turbulence.
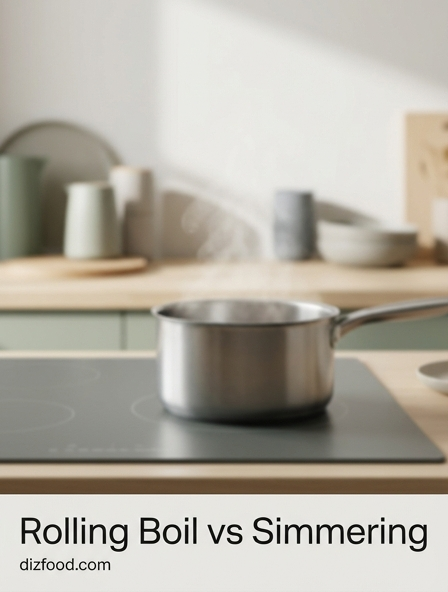
Visual Cues to Distinguish a Simmer from a Boil
Since most home cooks do not use a thermometer for every pot on the stove, learning visual cues is essential for heat management. The transition from cold water to a boil passes through several distinct stages, each with its own culinary purpose. Recognizing these stages allows for precise adjustments to the burner before the liquid reaches an undesirable temperature. Visual monitoring is the most reliable way to maintain a "steady state" during long cooking processes.
- The Shiver: Tiny bubbles the size of pinheads form on the bottom and sides. The surface may wisps with steam, but there is no movement.
- The Lazy Simmer: A few small bubbles rise to the surface every few seconds. This is perfect for very long, slow braises.
- The Standard Simmer: A constant stream of small bubbles breaks the surface. The liquid is moving, but not aggressively.
- The Rolling Boil: Large bubbles erupt across the entire surface. Even when stirred with a spoon, the bubbling does not stop.
If you see the liquid moving violently and the bubbles are large and "angry," you have moved past a simmer. Conversely, if the surface of the water is completely still, you are likely in the poaching or "shiver" range, which may be too cool for certain starches. A "true simmer" is often described as having "smiling" bubbles-frequent enough to show life, but gentle enough to maintain the peace of the pot.
Evaporation Rates and Sauce Reduction Techniques
Reduction is the process of thickening and intensifying the flavor of a liquid by simmering away the water content. The rate of evaporation is influenced by the surface area of the cookware and the intensity of the heat. While it may be tempting to use a rolling boil to speed up a reduction, this often leads to scorched edges and a loss of nuances. A rapid simmer is generally the "sweet spot" for reductions, balancing speed with flavor control.
- Wide Pans: Using a wide skillet instead of a narrow saucepan increases surface area, allowing water vapor to escape much faster.
- The Lid Factor: Keeping a lid off is mandatory for reduction. A lid traps steam, which then condenses and drips back into the sauce.
- Consistency Checks: As a sauce reduces, the concentration of sugars and fats increases, making it more prone to burning.
During reduction, the volume of the liquid decreases while the concentration of salt and seasoning increases. This is why chefs often wait until a sauce is reduced to its final volume before doing a final seasoning. If you salt a thin stock at the beginning and then reduce it by half, the resulting sauce will likely be twice as salty as intended. Managing the simmer ensures that the evaporation happens at a pace where you can monitor these flavor changes effectively.
Essential Cookware for Heat Distribution and Control
The quality of your cookware directly impacts your ability to maintain a consistent simmer. Thin-bottomed pots often develop "hot spots," where the liquid directly above the flame boils violently while the rest of the pot remains at a low simmer. This uneven heating can lead to scorched food and inconsistent textures. High-quality cookware is designed to distribute heat laterally across the base, ensuring that the entire volume of liquid responds uniformly to the burner settings.
| Material | Heat Properties | Best Use |
|---|---|---|
| Stainless Steel (Tri-ply) | Even distribution and responsive. | General simmering and reductions. |
| Cast Iron (Enameled) | High heat retention, slow to change. | Long braises and heavy stews. |
| Copper | Extremely responsive to dial changes. | Delicate sauces and sugar work. |
Heavy-bottomed pots, such as Dutch ovens, act as a heat reservoir. Once they reach a simmer, they require very little energy to stay there, and they are less affected by minor fluctuations in the stove's flame or kitchen drafts. For delicate tasks like simmering milk or thick purees, a "flame tamer" or "heat diffuser" can be placed between the burner and the pot to further soften the heat and prevent the bottom from catching.
Common Cooking Mistakes When Managing Heat Levels
One of the most frequent errors in heat management is the "set it and forget it" mentality. Stove burners are rarely perfectly calibrated, and as the volume of liquid in a pot decreases through evaporation, the remaining liquid will heat up faster. A flame that maintained a perfect simmer for two liters of liquid will likely cause a half-liter of liquid to boil. Constant adjustment is the hallmark of an attentive cook.
- Crowding the Pot: Adding too many cold ingredients at once drops the temperature significantly, turning a boil into a lukewarm soak.
- Using the Wrong Burner: Using a large burner for a small pot causes heat to escape up the sides, potentially scorching the handles or the sauce.
- Boiling with the Lid On: Putting a lid on a boiling pot increases the internal pressure and heat, almost guaranteeing a boil-over.
- Walking Away: Most kitchen fires and messes happen in the few minutes a cook leaves the room while waiting for a pot to reach temperature.
Another mistake is failing to account for "carryover cooking." A thick stew or a large pot of beans will continue to cook for several minutes after the heat is turned off due to the thermal mass of the liquid. If you wait until the food is perfectly tender to kill the heat, it may end up overcooked by the time it reaches the table. Learning to pull the pot off the heat just before the peak of doneness is a vital skill.
Mastering Temperature Control for Better Home Cooking
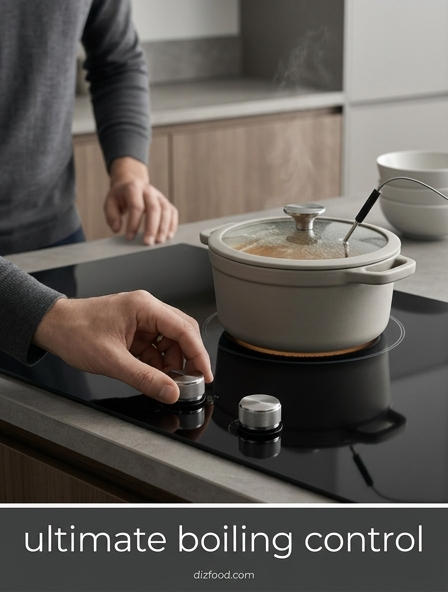
Mastering temperature control is about moving from reactive cooking to proactive cooking. Instead of waiting for a pot to boil over and then frantically turning the dial down, a skilled cook anticipates the rise in energy. This involves learning the specific quirks of your stove. For instance, gas burners respond instantly to dial changes, while electric glass-top stoves have a significant lag time, requiring the cook to move the pot physically to a cool burner if the heat gets too high.
- Initial Blast: Start on high heat to bring the liquid to the threshold of a boil quickly.
- The Step Down: As soon as the first large bubbles appear, drop the heat to medium-low to "catch" the temperature at a simmer.
- The Fine Tune: Observe the bubble activity for 60 seconds and make micro-adjustments until the "smiling" bubbles are consistent.
Developing an intuitive sense for heat allows you to multitask with confidence. When you know your pot is at a stable, gentle simmer, you are free to chop vegetables or prepare other components of the meal without fear of a kitchen disaster. Ultimately, the transition from boiling to simmering is the transition from raw power to culinary precision. It is the difference between simply applying heat and truly cooking with intent.

Comments