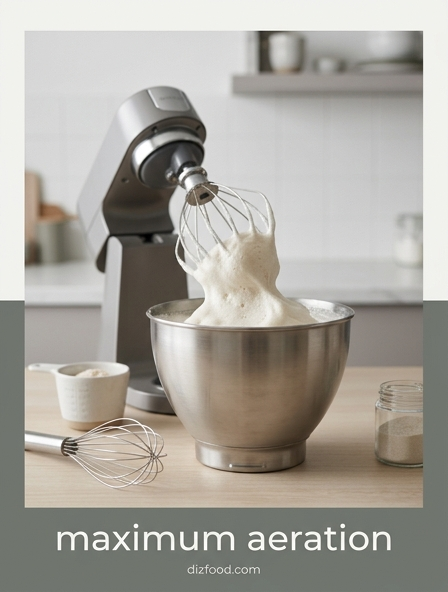
Selecting the Ideal Whisk Shape
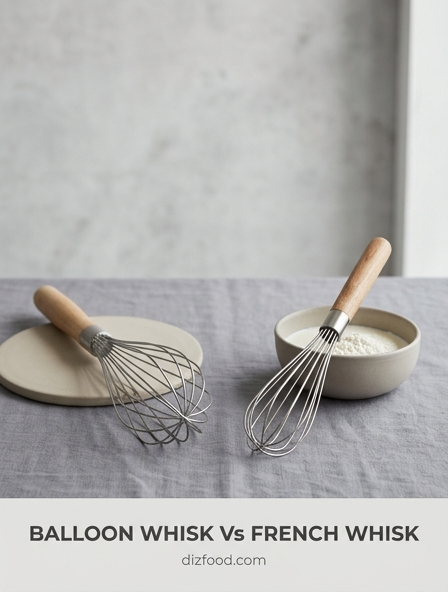
The efficiency of aeration is fundamentally linked to the geometry and construction of the whisk. For maximum volume, the balloon whisk remains the gold standard. Its rounded, bulbous end and multiple flexible wires are designed to trap the greatest amount of air possible by increasing the surface area that moves through the liquid. When choosing a whisk, the number of wires and their gauge are critical factors. Thinner wires cut through proteins and fats more cleanly, creating smaller, more stable bubbles, while a higher wire count increases the frequency of air incorporation per stroke.
- Balloon Whisk: Best for egg whites and heavy cream due to its expansive reach.
- French Whisk: Better for emulsifying sauces, but less efficient for high-volume aeration.
- Flat Whisk: Ideal for deglazing but ineffective for trapping air in deep bowls.
To achieve peak results, the whisk should feel balanced in the hand, allowing for rapid, repetitive motion without causing premature fatigue. A whisk with wires that are slightly offset or varying in length can further disrupt the liquid, preventing the formation of stagnant zones and ensuring that every ounce of the ingredient is subjected to the aeration process.
Optimizing Bowl Geometry for Volume
The vessel used for whisking is just as important as the tool itself. Maximum aeration requires a bowl with a deep, hemispherical bottom. This shape allows the whisk to reach all areas of the liquid, ensuring that no portion remains unagitated. High, sloped walls are essential to contain the expanding foam as it grows in volume, preventing overflow and allowing the cook to use more vigorous motions. If a bowl is too wide and shallow, the liquid spreads too thin, making it difficult for the whisk to catch and pull air into the mixture.
- Select a bowl that is at least four times the volume of the initial liquid.
- Ensure the base is rounded to eliminate "dead corners" where liquid can hide.
- Use a bowl with a stabilized base, such as a silicone bottom, to allow for two-handed whisking power.
When the bowl geometry matches the whisk arc, the mechanical energy is transferred more efficiently. This synergy reduces the time required to reach stiff peaks and results in a more uniform bubble structure throughout the entire mass. For domestic kitchens, a high-sided stainless steel or copper bowl is typically the most effective choice for achieving professional-grade expansion.
Temperature Control for Maximum Expansion
Temperature serves as a primary catalyst or inhibitor in the aeration process, depending on the ingredients involved. The molecular behavior of fats and proteins changes drastically with thermal fluctuations, necessitating specific environments for different tasks. Egg whites, for instance, favor warmer temperatures because the protein strands relax, allowing them to stretch and encapsulate air more easily. Conversely, heavy cream requires extreme cold to maintain the integrity of its fat globules, which provide the structural framework for the foam.
| Ingredient | Target Temperature | Reasoning |
|---|---|---|
| Egg Whites | Room Temp (70°F) | Lower surface tension for easier stretching. |
| Heavy Cream | Cold (35-40°F) | Stabilizes fat globules to prevent melting. |
| Utensils | Chilled | Prevents friction heat from breaking cream. |
Failure to respect these thermal boundaries often results in total collapse. If cream is too warm, the fat will liquefy rather than form a lattice, leading to a greasy texture. If egg whites are too cold, the proteins remain tightly coiled, significantly increasing the physical effort required to produce volume.
Mastering the Side to Side Motion
While many home cooks instinctively use a circular stirring motion, the most effective technique for maximum aeration is a rapid side-to-side or "looping" motion. By moving the whisk in a straight line across the diameter of the bowl and lifting it slightly at the ends of the stroke, you create more shear force. This force breaks the liquid into smaller droplets and forces a higher volume of air into the mixture simultaneously. Circular whisking often creates a vortex that merely moves the liquid without incorporating significant air.
- Shear Force: Tearing the liquid apart to allow air to enter the gaps.
- Vertical Lift: Pulling air from the surface down into the center of the mass.
- Wrist Snap: Increasing the velocity of the wires at the point of impact.
This side-to-side method also reduces physical strain. By utilizing the wrist rather than the entire arm, the cook can maintain a higher frequency of strokes over a longer period. The goal is to maximize the number of times the whisk wires pass through the surface of the liquid, as each pass is an opportunity to trap more atmospheric air within the protein or fat matrix.
Structural Integrity of Whipped Egg Whites
The aeration of egg whites is a process of denaturing proteins to create a network that traps air. To ensure this structure does not collapse, several mechanical and chemical factors must be managed. Initially, the whisking breaks the chemical bonds of the proteins, which then realign around air bubbles. However, this structure is fragile. The introduction of an acid, such as cream of tartar or lemon juice, helps to stabilize these proteins by preventing them from bonding too tightly and squeezing out the trapped air, a phenomenon known as syneresis.
- Foamy Stage: Large, translucent bubbles; the beginning of denaturation.
- Soft Peaks: Peaks form but fold over; ideal for folding into batters.
- Stiff Peaks: Peaks stand upright; the maximum volume before over-beating occurs.
Achieving the perfect balance requires constant monitoring. The whites should appear glossy and moist. If they begin to look granular or dry, the protein network has become over-extended, and the structural integrity is compromised. Proper aeration results in a foam that is both lightweight and resilient enough to withstand the weight of other ingredients during the folding process.
Aerating Heavy Cream for Stability
Unlike egg whites, which rely on proteins, whipped cream achieves its volume through the suspension of air within a network of fat globules. For maximum aeration and stability, the cream must have a high fat content, ideally between 36% and 40%. When whisked, the fat globule membranes are partially stripped away, allowing the fat to stick together and form a protective wall around air bubbles. This process is highly sensitive to heat; if the fat becomes too warm, the structure will collapse into butter.
- Chill the bowl and whisk for at least fifteen minutes before starting.
- Start whisking at a medium pace to establish a uniform bubble size.
- Watch for the transition from liquid to a "trailing" effect where the whisk leaves marks.
The stability of aerated cream can be further enhanced by the addition of stabilizers like powdered sugar (which contains cornstarch) or a small amount of gelatin. These additives help reinforce the fat lattice, ensuring that the whipped cream maintains its volume and texture even when stored in the refrigerator or used as a topping for desserts.
Progressive Speed Increases for Consistency
The temptation to start whisking at maximum speed is often counterproductive to long-term stability. For the most resilient foam, it is essential to use a progressive approach to speed. Starting at a low to medium velocity allows for the creation of a vast number of small, uniform "starter" bubbles. These small bubbles act as a foundation for the larger structure. If you start too fast, you create large, irregular air pockets that are prone to popping, leading to a foam that collapses quickly.
- Level 1 (Low): Breaks surface tension and creates a uniform liquid state.
- Level 2 (Medium): Introduces the bulk of the air and builds volume.
- Level 3 (High): Finalizes the texture and brings the mixture to peak stiffness.
By gradually increasing the speed, you ensure that the protein or fat network is built systematically. This results in a much finer "crumb" within the foam, providing a smoother mouthfeel and better resistance to deflation. This methodical increase is particularly important when using electric mixers, where the transition between speeds can be abrupt and disruptive to the forming matrix.
Minimizing Over Mixing to Preserve Air
The line between a perfectly aerated mixture and a ruined one is incredibly thin. Over-mixing occurs when the mechanical energy continues after the peak volume has been reached. In egg whites, this causes the proteins to coagulate into clumps, forcing out the air and leaving a watery mess. In heavy cream, over-mixing leads to the complete breakdown of the fat-air emulsion, resulting in the separation of buttermilk and butter solids. Recognizing the visual and tactile cues of peak aeration is the only way to preserve the trapped air.
| Sign of Peak | Sign of Over-Mixing |
|---|---|
| Glossy sheen | Dull, matte appearance |
| Smooth texture | Grainy or curdled look |
| Holds shape | Liquid begins to weep |
To avoid this, one should reduce speed as the mixture nears completion and finish the final few strokes by hand. This manual control allows the cook to feel the resistance of the foam and stop the exact moment the desired consistency is achieved. Once air is lost through over-mixing, it is nearly impossible to re-incorporate it without starting over with fresh ingredients.
Impact of Bowl Materials on Aeration
The material of the whisking bowl can have a profound chemical impact on the success of aeration. Copper is famously the best material for whisking egg whites. As the whisk scrapes the copper surface, a small number of copper ions are released into the whites. these ions bond with a protein called conalbumin, creating a highly stable complex that is much less likely to over-beat or collapse. This allows for a more flexible and voluminous foam that is easier to work with.
- Stainless Steel: Durable and non-reactive, though lacks the chemical advantages of copper.
- Glass/Ceramic: Good for temperature retention but can be heavy and slippery.
- Plastic: Generally discouraged; plastic can retain oily residues that prevent aeration.
When using stainless steel or glass, it is vital to ensure the surface is completely free of fat or grease. Even a microscopic amount of oil can prevent egg white proteins from bonding, effectively capping the maximum volume you can achieve. A quick wipe with lemon juice or vinegar prior to whisking can strip away any lingering residues, ensuring the purest environment for aeration.
Timing Your Whisking for Peak Texture
Aeration is a race against time and gravity. As soon as you stop whisking, the air bubbles begin to migrate and merge, leading to a gradual loss of volume. Therefore, the timing of the whisking process must be perfectly synchronized with the rest of the recipe. For soufflés, meringues, and mousses, the aeration should be the final step before the mixture is placed in the oven or refrigerator. Allowing an aerated mixture to sit on the counter even for five minutes can result in a noticeable loss of height and lightness.
- Prepare all other ingredients and preheat the oven before starting to whisk.
- Whisk until just before the desired peak, then finish once the other components are ready.
- Fold aerated mixtures into heavier bases immediately using gentle, sweeping motions.
The physical structure of a foam is inherently unstable. Environmental factors such as humidity and ambient heat can accelerate the collapse. By mastering the timing, you ensure that the maximum amount of air is carried through to the final product, resulting in the characteristic lift and delicate texture that defines expert-level culinary aeration.

Comments