Safety Procedures and Power Disconnection
Before initiating any maintenance on the internal chassis of kitchen equipment, prioritizing personal safety is mandatory. The process begins with complete power isolation to prevent accidental electric shocks or activation of heating components. If the unit is hardwired, the dedicated circuit breaker should be switched to the "off" position and tagged according to standard lockout-tagout procedures. For plug-in models, disconnect the cord from the wall outlet and secure it away from moisture sources.
In addition to electrical safety, temperature management is vital. The chassis must be completely cool to the touch before cleaning agents are applied, as hot surfaces can cause chemicals to volatilize, creating hazardous fumes. Protective gear should be worn throughout the process to mitigate risks from sharp metal edges and caustic residues. Consider the following safety checklist:
- Verify that the unit is disconnected from gas lines if applicable.
- Wear heavy-duty nitrile gloves to protect against degreasers.
- Utilize safety goggles to shield eyes from chemical splashes.
- Ensure the workspace is well-ventilated to disperse any odors or fumes.
Required Supplies for Internal Chassis Detailing
Properly detailing an internal chassis requires specialized tools that can reach narrow crevices and handle hardened debris. Unlike general surface cleaning, chassis maintenance involves tackling baked-on grease and carbon deposits that bond to the metal framework. Utilizing the correct implements prevents damage to sensitive components while ensuring a thorough deep clean. A combination of mechanical agitation tools and absorbent materials is necessary for a professional result.
A well-prepared technician should have an organized kit containing both chemical and physical cleaning aids. The following list identifies the essential supplies needed for a comprehensive detailing task:
- Long-handle wire brushes and stiff nylon detail brushes.
- Non-abrasive scouring pads and microfiber cloths.
- Plastic or wooden scrapers for heavy carbon removal.
- Industrial-grade degreaser and a neutralizer.
- High-intensity LED flashlight for inspecting dark corners.
- Vacuum cleaner with a crevice attachment for dry debris.
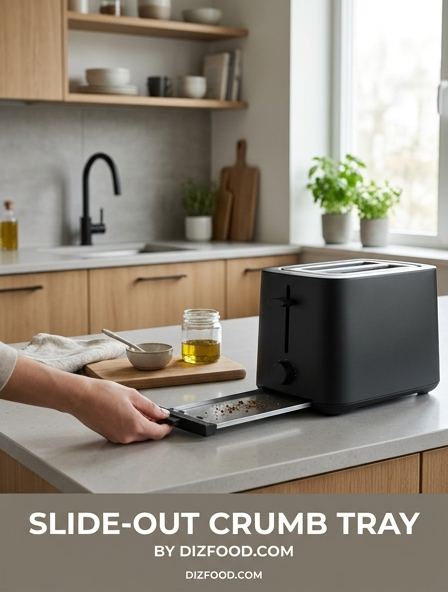
Removing Racks and Removable Crumb Trays
To gain unimpeded access to the internal chassis, all modular components must be removed first. Racks, shelving, and side supports often obscure the corners and floor of the unit where the majority of grease accumulates. Carefully slide these parts out, noting their orientation for later reassembly. Once the larger racks are clear, the focus should shift to the crumb trays or grease troughs located at the base of the frame. These parts typically contain the highest concentration of organic waste and should be handled with care to avoid spills.
The removal process follows a specific sequence to prevent cross-contamination within the kitchen environment. Follow these steps to clear the chassis interior effectively:
- Extend all racks fully and lift upward to clear the safety stops.
- Unscrew side-wall rack guides if they are designed to be removable.
- Gently slide out the bottom crumb tray, keeping it level to contain loose debris.
- Discard large food particles into a waste bin before soaking the trays.
- Store all hardware, such as clips or screws, in a labeled container.
Identifying Grease Buildup Areas within the Frame
Effective cleaning requires a systematic inspection of the internal chassis to locate hidden deposits. Grease and oil often migrate toward the coolest parts of the frame or collect in areas where airflow is restricted. Over time, these deposits can polymerize, forming a sticky or hardened layer that poses a fire risk and affects the efficiency of the appliance. Special attention must be paid to the structural joints where the side walls meet the floor, as gravity naturally pulls liquid grease into these seams.
Identifying these "hot spots" ensures that no area is overlooked during the scrubbing phase. Common areas of accumulation include the following sections of the chassis:
- The undersides of support brackets and horizontal struts.
- The rear perimeter of the chassis near the exhaust or ventilation ports.
- Behind the tracks where shelving slides into the unit.
- The recessed areas surrounding the door hinges and gaskets.
- Corner welds and rivet points where liquids tend to pool.
Safe Cleaning Solutions for Metal Interiors
Selecting the appropriate cleaning chemistry is critical to maintaining the structural integrity of the kitchen chassis. Different metals react differently to pH levels; for instance, caustic cleaners might be suitable for stainless steel but can severely pit or corrode aluminum and galvanized surfaces. It is essential to use solutions that provide maximum degreasing power without causing hydrogen embrittlement or surface oxidation. Always test a new chemical on a small, inconspicuous area of the frame before full application.
The table below provides a guideline for selecting cleaning agents based on the specific material of the internal chassis found in most commercial and residential kitchens:
| Material Type | Recommended Solution | Avoid Using |
|---|---|---|
| Stainless Steel | Alkaline Degreasers | Chlorine Bleach |
| Aluminum | Neutral pH Detergents | High-Alkaline Bases |
| Galvanized Steel | Mild Soap/Vinegar | Strong Acids |
| Porcelain Enamel | Baking Soda Paste | Steel Wool Brushes |
Techniques for Removing Baked on Carbon
Carbonized food particles present a significant challenge because they bond chemically to the metal chassis through repeated heating cycles. Removing these stubborn deposits requires a balance of chemical softening and mechanical force. The most effective technique involves applying a concentrated degreaser or specialized carbon remover and allowing it to dwell for fifteen to thirty minutes. This "soak time" breaks down the molecular bonds, making the carbon brittle and easier to dislodge without scratching the underlying metal surface.
If the carbon remains resistant after the initial dwell time, a more aggressive approach may be required. Consider the following techniques for heavy-duty carbon removal:
- Utilize a steam generator to inject moisture and heat directly into the carbon layer.
- Apply a paste of baking soda and water for a gentle, abrasive scrubbing action.
- Use a plastic scraper to peel away thick layers once they have been softened.
- Repeat the chemical application process specifically on localized "islands" of carbon.
- Always scrape in the direction of the metal grain to minimize visible scratching.
Cleaning Between Heating Elements and Brackets
The areas surrounding heating elements and their mounting brackets are often the most difficult to reach within the internal chassis. These components are delicate; excessive pressure can bend the elements or damage the electrical insulation at the connection points. It is vital to clean around these parts without getting liquids inside the terminal blocks or electrical housings. A "dry-first" approach is recommended, using a soft brush to remove loose dust and charred bits before applying any liquid cleaners.
When cleaning these intricate zones, precision is more important than speed. The following steps ensure a clean and safe outcome for elements and brackets:
- Vacuum the area to remove loose carbon flakes and debris.
- Wrap a damp microfiber cloth around a thin detailing tool or chopstick.
- Gently slide the cloth between the element and the chassis wall.
- Use a small nylon brush to scrub the metal brackets holding the element.
- Ensure no lint or threads are left behind on the heating surface.
Scrubbing Internal Walls and Chassis Corners
The bulk of the cleaning process involves the systematic scrubbing of the vertical walls and the tight corners of the chassis. Since gravity causes cleaners to run down, it is best to work from the top of the unit downward. This prevents dirty runoff from contaminating areas that have already been cleaned. Corners require special attention, as they are primary collection points for grease that can eventually lead to foul odors or smoke. A combination of circular scrubbing motions and targeted corner pressure is necessary to achieve a thorough result.
Focusing on the chassis structure ensures that every square inch of the internal frame is sanitized. Use these tips for better wall and corner maintenance:
- Apply cleaning solution using a spray bottle for even coverage on vertical surfaces.
- Use a stiff-bristled brush to reach into the 90-degree angles of the chassis corners.
- Pay close attention to the seams where the back panel joins the side walls.
- Scrub until the surface feels "squeaky" and no longer slippery to the touch.
- Use a mirror to inspect the top interior panel, which is often missed.
Proper Rinsing and Drying to Prevent Rust
Once the grease and carbon have been loosened and scrubbed, the chassis must be thoroughly rinsed to remove all chemical residues. Leftover cleaning agents can react with heat during the next use, creating toxic fumes or damaging the metal over time. However, introducing water to a metal chassis carries the risk of oxidation and rust, especially in seams and crevices where moisture can hide. Ensuring the unit is completely dry is just as important as the cleaning itself.
A meticulous drying process preserves the life of the appliance. Follow these guidelines to manage moisture and prevent corrosion:
- Wipe down all surfaces with a clean, damp cloth to neutralize the degreaser.
- Use a dry, lint-free microfiber towel to absorb all standing water.
- Focus on drying the joints, rivets, and screw heads where rust typically begins.
- Use compressed air or a hair dryer to blow moisture out of inaccessible crevices.
- Leave the door or access panels open for several hours to allow for natural evaporation.
Post Cleaning Inspection and Unit Reassembly
The final stage of chassis maintenance is a comprehensive inspection followed by the careful reinstallation of all internal parts. Before reassembling, use a high-powered flashlight to verify that no streaks, grease, or cleaning residue remain. Check that no wires were displaced and that all insulation remains intact. This is also the ideal time to inspect the condition of the chassis itself for signs of structural fatigue, such as cracks in the metal or loose fasteners that may need tightening.
Reassembly should be performed in the reverse order of the removal process. Follow these steps to return the unit to service:
- Ensure the interior is bone dry to prevent steam pockets upon heating.
- Replace the side-wall rack guides and tighten any mounting hardware.
- Slide the clean crumb trays back into their slots at the base.
- Reinsert the racks, ensuring they sit level and move smoothly on their tracks.
- Restore power and perform a brief test run to ensure the unit functions correctly.


Comments