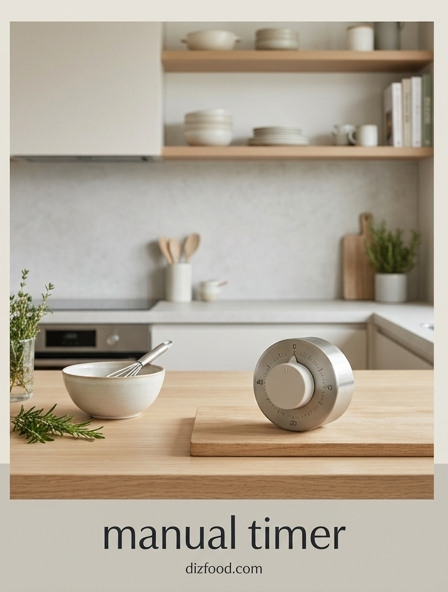
Mechanical Timing Mechanics Explained
The core of a manual kitchen timer lies in its clockwork mechanism, which operates without the need for batteries or electronic components. When you turn the dial, you are essentially winding a mainspring, storing potential energy within a coiled metal strip. As the timer ticks, this energy is released through a series of gears known as a gear train. The rate of release is strictly regulated by an escapement and a balance wheel, which creates the rhythmic ticking sound synonymous with traditional kitchen timing. This mechanical process converts rotational force into a linear progression of time.
- Mainspring: The power source that stores energy when the knob is turned.
- Gears: A series of wheels that translate high-torque, low-speed movement into precise timing increments.
- Escapement: The "braking" mechanism that prevents the spring from unwinding all at once.
- Bell Hammer: A small metal arm that strikes the casing once the gears return to the zero position.
This mechanical simplicity makes the manual timer a favorite for heavy-duty kitchen environments where steam and heat might compromise sensitive digital circuitry. By relying on physics rather than software, these devices provide a tactile and audible experience that allows chefs to track progress through sound and vibration.
Accuracy Factors in Manual Dials
While mechanical timers are celebrated for their reliability, several physical factors influence their overall accuracy compared to quartz-based digital counterparts. The most significant factor is the tension of the internal mainspring; if the spring is not wound significantly past the intended time mark, it may lack the necessary torque to start the escapement consistently. Furthermore, the friction between the gears can be affected by ambient kitchen temperatures, where extreme heat may cause slight expansion in metal components, potentially altering the timing by a few seconds over an hour.
| Factor | Impact on Precision | Mitigation Strategy |
|---|---|---|
| Parallax Error | High | View the dial directly from the front. |
| Spring Tension | Moderate | Always wind past 10 minutes before setting. |
| Internal Friction | Low | Keep the device away from grease buildup. |
| Dial Alignment | Moderate | Ensure the knob is not loose on the spindle. |
Users must also account for the visual thickness of the indicator line. On many manual models, the "zero" point is a range rather than a precise coordinate, meaning that the bell may trigger slightly before or after the exact mark depending on the momentum of the internal hammer mechanism.
Consistency Across Multiple Steaming Cycles
Maintaining consistency during back-to-back steaming cycles requires a standardized approach to setting the manual dial. Because mechanical springs exhibit different behaviors depending on their current state of tension, a "short wind" can lead to inconsistent results. To ensure every batch of vegetables or seafood receives the exact same exposure to heat, professional cooks often employ a specific winding technique that resets the internal gears to a high-tension state before every use.
- Rotate the dial clockwise all the way to the 60-minute mark to fully compress the mainspring.
- Slowly rotate the dial counter-clockwise back to the desired duration.
- Listen for the immediate start of the ticking sound to confirm the escapement has engaged.
- Place the timer on a flat, vibration-free surface to prevent gear slipping.
By following this repetitive motion, you compensate for the mechanical "slack" often found in older or budget-friendly timers. Consistency is further improved by acknowledging that the first few seconds of a cycle are the most variable. Therefore, setting the timer once the steam has actually reached full pressure, rather than when the heat is first applied, ensures that the mechanical countdown aligns perfectly with the chemical process of cooking.
Calibration Tips for Precise Results
Even the most robust manual timer may drift over years of use due to spring fatigue or internal dust accumulation. Calibrating your timer against a known standard, such as a smartphone or a digital watch, is essential for tasks requiring high precision, like soft-boiling eggs or delicate steaming. Start by running three test cycles at different intervals: five minutes, fifteen minutes, and thirty minutes. Note if the timer consistently runs fast or slow at these specific points on the dial.
- Visual Marking: Use a fine-tip permanent marker to create "true" marks on the dial if the factory printing is inaccurate.
- Lubrication: If the dial feels gritty, a tiny drop of food-grade mineral oil on the central spindle can reduce resistance.
- Positioning: Always operate the timer in the orientation it was designed for, usually vertical or horizontal, as gravity can affect the balance wheel.
- Spring Reset: Allow the timer to sit at the zero position for several minutes between uses to let the metal spring relax.
If you find that the timer consistently rings thirty seconds early, simply adjust your setting habit to include that offset. Regular calibration ensures that the convenience of a manual interface does not come at the cost of ruined ingredients or inconsistent textures in your kitchen.
Durable Design and Long Term Reliability
The primary advantage of the manual kitchen timer is its inherent durability. Unlike digital timers that rely on thin liquid crystal displays (LCDs) and membrane buttons, manual timers are constructed from molded plastics, stainless steel, and brass. These materials are far more resistant to the harsh environment of a kitchen, where humidity, airborne grease, and high temperatures are common. The absence of integrated circuits means there is no risk of a "fried" motherboard if the device is splashed with boiling water or exposed to heavy steam from a nearby pot.
Furthermore, the long-term reliability of a mechanical device is bolstered by the lack of battery dependency. A manual timer is always ready for use, eliminating the frustration of finding a dead battery in the middle of a complex recipe. The outer casing is typically designed with a sealed or semi-sealed interface, preventing flour and spices from entering the gear mechanism. This "low-tech" approach ensures that the device remains functional for decades, often outlasting several generations of more advanced electronic appliances. As long as the internal spring is not over-wound to the point of snapping, the simple physics of the gear train will continue to provide accurate timing with minimal mechanical degradation over thousands of cycles.
Overcoming Human Error with Manual Knobs
Human error is the most common cause of timing inaccuracies when using manual dials. Because these devices rely on physical positioning, even a slight misalignment in the user's line of sight can lead to a deviation of one or two minutes. This is known as parallax error, where the indicator needle appears to be on a different number depending on the angle from which it is viewed. To overcome this, users should always calibrate the dial at eye level and ensure the timer is positioned directly in front of their workspace.
- Check the "zero" alignment before winding to ensure the knob hasn't shifted on its post.
- Use a consistent "over-winding" technique to engage the spring's maximum tension.
- Avoid setting the timer with wet or greasy hands, which can cause the knob to slip and result in an incorrect setting.
- Double-check the dial position immediately after setting to confirm the pointer hasn't "drifted" back a notch.
Tactile feedback is another benefit of manual knobs; the resistance felt while turning the dial can alert a seasoned cook to potential issues, such as a jammed gear or a weakening spring. By being mindful of these physical interactions, you can significantly reduce the margin of error and achieve professional-grade results without the need for digital precision.
Impact of Load Size on Timing Precision
In the context of kitchen steaming, the relationship between the manual timer and the load size is critical. While the timer itself counts down at a constant rate regardless of what is in the pot, the effective cooking time changes based on the volume of food. A manual timer is a "blind" instrument; it does not know if you are steaming a single stalk of broccoli or a full tray of potatoes. Larger loads possess greater thermal mass, which can absorb the initial steam and delay the internal temperature rise of the cooking chamber.
| Load Volume | Thermal Impact | Timer Adjustment Needed |
|---|---|---|
| Small (1-2 servings) | Minimal | Set to standard recipe time. |
| Medium (Family size) | Moderate | Add 1-2 minutes to compensate for heat loss. |
| Large (Bulk prep) | High | Add 3-5 minutes and check for steam consistency. |
To ensure precision, the manual timer should be activated only when the steamer reaches its target temperature. For larger loads, it is often necessary to pre-heat the water and the vessel before starting the countdown. Understanding that the timer measures the duration of the mechanical gear release-not the internal temperature of the food-allows the cook to make manual adjustments that lead to perfectly steamed results every time.
Maintaining Your Steamer for Peak Performance
The manual timer on a kitchen steamer is a precision instrument that requires basic maintenance to function correctly. Since it is often located near sources of moisture, the primary threat is the ingress of steam or condensation into the internal gear housing. Over time, moisture can cause the brass gears to oxidize or the lubrication to gum up, leading to a "sticky" dial that may stop mid-cycle. To prevent this, always wipe the timer casing with a dry cloth after each use and avoid placing the device directly over an open pot of boiling water.
- Exterior Cleaning: Use a damp cloth with mild detergent; never immerse a manual timer in water.
- Debris Removal: Use a toothpick to gently clear any food particles or flour from the gap between the dial and the body.
- Bell Maintenance: If the alarm sounds muffled, gently shake the unit to ensure the hammer is moving freely.
- Storage: Store the timer in a cool, dry drawer away from the high humidity of the stovetop.
If the timer becomes significantly inaccurate, it may be due to a buildup of kitchen grease. Professional servicing is rarely cost-effective for manual timers, but a simple blast of compressed air around the dial seam can often dislodge dust and restore the smooth movement of the internal escapement mechanism.
Manual versus Digital Timing Precision Comparison
The debate between manual and digital timers often centers on the balance between absolute precision and practical utility. Digital timers utilize quartz oscillators, which are incredibly accurate to within milliseconds. However, in a kitchen environment, this level of precision is often unnecessary. Manual timers offer a level of "functional accuracy" that is perfectly suited for cooking. They provide an immediate, tactile interface that is much faster to set than tapping buttons on a digital screen, which is particularly useful when multi-tasking during a busy dinner service.
| Feature | Manual Timer | Digital Timer |
|---|---|---|
| Power Source | Mechanical Spring | Battery / Plug-in |
| Ease of Use | Single turn setting | Multi-button input |
| Durability | High (Heat resistant) | Moderate (Sensitive to heat) |
| Precision | +/- 30 seconds | +/- 1 second |
| Alarm Style | Mechanical Bell | Electronic Beep |
While a digital timer is superior for laboratory settings or specific baking tasks like tempering chocolate, the manual timer excels in high-heat, high-moisture scenarios such as steaming. The ability to glance at a physical dial and see the remaining time at a distance, combined with the reliability of a device that never runs out of power, makes the manual option a staple for professional and home cooks alike.
Essential Techniques for Consistent Steaming
Achieving consistent results with a manual timer during steaming involves more than just turning a dial; it requires a systematic approach to the entire cooking process. The most important technique is to standardize the environment before the countdown begins. This means ensuring the water level in the steamer is consistent for every batch, as the volume of water dictates how quickly steam is generated. Additionally, the timer should be treated as a tool for "active monitoring" rather than a "set and forget" solution.
- Bring the water to a rolling boil and wait for a steady plume of steam before placing the food inside.
- Set the manual timer by winding it fully to 60 minutes and then back to the specific time required.
- Position the steamer lid securely to prevent steam escape, which can alter the internal pressure.
- Listen for the ticking; if the ticking stops prematurely, manually nudge the dial to ensure the gears haven't caught on a piece of grit.
By combining these techniques with the mechanical reliability of a manual dial, you create a repeatable process. The manual timer becomes a rhythmic guide, allowing you to focus on the quality of the ingredients while the gears handle the temporal precision needed for perfectly tender results.


Comments