Selecting the Right Cheese Texture
The effectiveness of a cheese plane is largely dictated by the density and moisture content of the dairy product being sliced. While this tool is incredibly versatile, it is primarily designed for semi-hard to hard cheeses that possess enough structural integrity to withstand the tension of the blade without collapsing. Ideal candidates include varieties such as Gouda, Edam, Havarti, and young Cheddar. These cheeses offer a supple yet firm body that allows the blade to glide smoothly, producing continuous, ribbon-like slices.
Conversely, very soft cheeses like Brie or Camembert will simply stick to the metal surface, resulting in a messy smear rather than a clean cut. Similarly, extremely aged or crystalline cheeses may shatter under the pressure of a wide blade. To ensure the best results, consider the following compatible textures:
- Semi-Soft: Young Fontina or Monterey Jack (requires a chilled surface).
- Semi-Hard: Swiss, Emmental, or Jarlsberg (the gold standard for planes).
- Hard: Aged Manchego or medium-aged Provolone.
Optimal Temperature for Precision Slicing
Temperature plays a pivotal role in the physics of cheese slicing. When cheese is too warm, the fats begin to soften, creating a "sticky" friction against the plane's surface. This often leads to the slice tearing or the tool getting bogged down in the block. For the most precise, paper-thin results, it is generally recommended to slice cheese immediately after removing it from the refrigerator. Cold temperatures keep the protein structure rigid, allowing the blade to sever the fibers cleanly without dragging.
However, once the slices are created, they should be allowed to reach room temperature before serving to unlock their full flavor profile. Using a chilled cheese plane can also assist in maintaining the integrity of the slices during high-volume preparation. Refer to the table below for suggested preparation temperatures:
| Cheese Type | Slicing Temp | Serving Temp |
|---|---|---|
| Semi-Hard (Gouda) | 35-40°F | 65-70°F |
| Hard (Cheddar) | 38-42°F | 68-72°F |
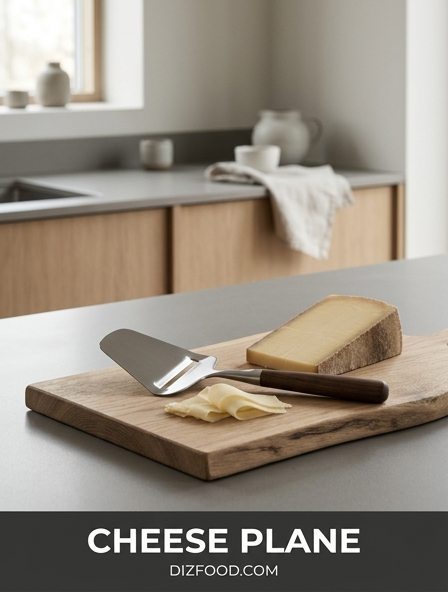
Anatomy of a Traditional Cheese Plane
A traditional cheese plane, or "ostehøvel," is a marvel of Norwegian engineering designed for simplicity and efficiency. Understanding its components helps the user manipulate the tool with greater control. The device consists of three primary parts: the handle, the neck, and the spade-like head. The handle provides the leverage, while the neck connects the handle to the blade at a specific offset to allow for hand clearance during the slicing motion. The most critical part is the spade, which contains the horizontal cutting slot.
The width of this slot determines the maximum thickness of the slice, while the sharpness of the leading edge dictates how easily the tool enters the cheese. High-quality planes often feature a slightly flexible head to accommodate different block shapes. Key features to look for include:
- The Blade Slot: A precision-ground opening that regulates thickness.
- The Beveled Edge: The sharpened underside that initiates the cut.
- The Surface Finish: Often polished or textured to reduce "suction" and sticking.
Mastering the Correct Blade Angle
The angle at which you hold the cheese plane significantly influences the thickness and ease of the cut. To begin a slice, the plane should be held at approximately a 30 to 45-degree angle relative to the surface of the cheese block. As the blade engages with the edge of the cheese, the user should gradually flatten the angle to maintain a consistent depth throughout the length of the stroke. If the angle is too steep, the blade will dig too deep, potentially stalling or creating a ragged, uneven slice.
Conversely, holding the plane too flat will cause it to skim across the surface without engaging the blade, resulting in thin, fragmented shavings. Mastering this fluid transition-from a steep entry to a flat pull-requires practice. By adjusting the pitch of the handle mid-stroke, you can effectively "steer" the blade. This control allows for customization, enabling the user to create either translucent slivers for melting or thicker ribbons for sandwiches, depending on the subtle tilt of the wrist.
Consistent Pressure for Uniform Thickness
Achieving a professional-looking cheese slice requires more than just a sharp blade; it requires a steady, calibrated application of force. One common mistake is applying too much downward pressure at the start of the stroke and tapering off toward the end. This results in "wedge-shaped" slices that are thick at one end and thin at the other. Instead, the goal is to apply even, moderate pressure through the entire duration of the pull. The force should be directed downward into the cheese and backward toward the body simultaneously.
To maintain uniformity, ensure the block of cheese is securely placed on a non-slip surface, such as a wooden cutting board. If the cheese moves, the pressure distribution will fluctuate, leading to ripples or "chatter marks" on the slice. Consider these factors for maintaining consistency:
- Start with a leveled cheese surface to ensure the blade has a flat path.
- Use a slow, deliberate pace rather than a quick jerking motion.
- Follow through completely until the blade has cleared the far edge of the block.
Steady Hand Positioning and Grip
The way a user grips the cheese plane determines the stability of the cut and reduces the risk of accidental slips. Most professional chefs recommend a "modified hammer grip." This involves wrapping the fingers firmly around the handle while extending the thumb along the top of the neck or the base of the spade. This thumb placement provides a secondary point of control, allowing for micro-adjustments in pressure and angle that the fingers alone cannot manage. It acts as a guide, stabilizing the head of the plane against the resistance of the cheese.
The non-cutting hand is equally important. It should hold the cheese block from the side or the back, well away from the path of the blade. For larger blocks, using a "claw" position ensures the cheese remains stationary without the fingers getting in the way. Proper ergonomics prevent hand fatigue during long preparation sessions and ensure that the leverage generated by the arm is transferred efficiently to the cutting edge, making the process feel effortless and controlled.
Slicing Techniques for Hard Cheeses
Harder cheeses, such as aged Parmesan, Pecorino Romano, or extra-sharp Cheddar, present a unique challenge for the cheese plane. Because these varieties are less elastic, they tend to resist long, continuous slices and may flake instead. When working with these textures, the technique must shift from long pulls to shorter, more deliberate strokes. Often, the goal with very hard cheese is not a sandwich-sized slice, but rather thin, decorative curls or shards that can be used to garnish salads or pasta dishes.
To prevent the blade from skipping, it is helpful to "score" a small starting line at the edge of the block. If the cheese is exceptionally hard, you may need to apply a slight sawing motion to help the blade penetrate the surface before pulling. Because these cheeses are prone to cracking, keep the slices relatively short. Using a plane with a narrower slot can also help by limiting the amount of cheese the blade attempts to lift, reducing the internal stress on the slice and preventing it from shattering into crumbs.
Maintaining Blade Sharpness and Clarity
A dull cheese plane is not only inefficient but also dangerous, as it requires excessive force that can lead to slips. Unlike a chef's knife, a cheese plane cannot be easily sharpened with a whetstone due to its unique geometry. However, specialized small files or ceramic honing rods can be used to touch up the leading edge of the slot. Keeping the metal surface "clear" is equally vital. Over time, cheese fats and proteins can build up a microscopic film that increases friction and causes the plane to drag.
To maintain peak performance, the tool should be hand-washed in warm, soapy water immediately after use. Avoid the dishwasher, as high heat and harsh detergents can dull the edge and degrade the handle material. For optimal maintenance, follow these steps:
- Clean: Use a soft brush to remove residue from the slot.
- Dry: Wipe immediately to prevent water spots or oxidation.
- Polish: Occasionally rub a drop of food-grade mineral oil on the metal to ensure a low-friction glide.
Avoiding Common Crumbly Cheese Mistakes
Attempting to use a cheese plane on crumbly varieties like Feta, Blue cheese, or very dry Wensleydale is a frequent culinary error. The mechanics of a plane rely on the cheese having a certain degree of tensile strength; crumbly cheeses lack the moisture and fat "glue" needed to hold a slice together as it passes through the slot and over the spade. Using a plane on these types will usually result in the block disintegrating into irregular chunks, clogging the tool and wasting product.
For these textures, a wire slicer or a specialized "cheese harp" is a much better alternative. If you must use a plane on a semi-crumbly cheese, try to keep the block slightly warmer than you would for a hard cheese, as the slight increase in temperature can sometimes help the fats bind the particles together temporarily. However, recognizing the limits of the tool is key to avoiding frustration. If the first attempt results in a mess, switch to a crumbling technique or a different cutting implement better suited for friable textures.
Elegant Presentation and Plating Tips
The aesthetic appeal of cheese often lies in its texture and shape. A cheese plane allows for the creation of elegant, uniform ribbons that can be styled in various ways to elevate a charcuterie board. Instead of laying slices flat, try folding them into "fans" or rolling them into tight cylinders. These shapes add vertical interest and volume to a platter, making it look more abundant. The thinness provided by the plane also allows the cheese to melt quickly on the tongue, enhancing the sensory experience for the guest.
For a sophisticated touch, consider the following plating arrangements:
- The Shingle: Overlap slices in a curved line to create a sense of movement.
- The Ribbon Pile: Gather long, thin shavings into an airy nest in the center of the board.
- The Contrast: Pair smooth, planed ribbons of Gouda alongside rustic, hand-broken chunks of Parmesan to showcase different textures.
By focusing on the visual rhythm of the slices, you transform a simple snack into a curated culinary display.


Comments