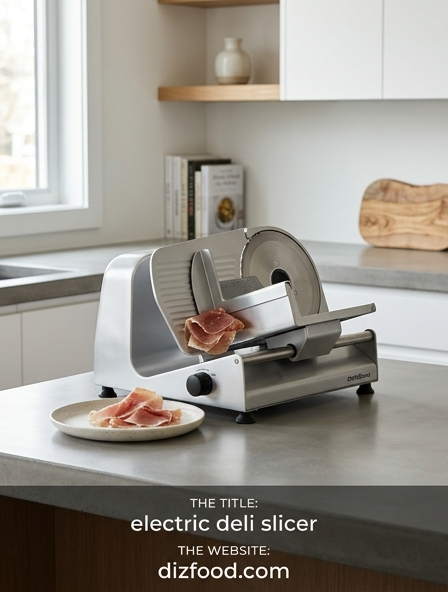
Selecting the Right Commercial Electric Slicer
Choosing the appropriate electric deli slicer for a commercial kitchen requires a detailed assessment of expected volume and the specific types of proteins to be processed. Higher-volume establishments generally require heavy-duty models equipped with a gear-driven motor, which provides the torque necessary for continuous operation and dense products like aged cheeses. Conversely, belt-driven models are often suitable for light to medium duty, offering quieter operation and easier maintenance for smaller delis or cafes.
- Blade Size: 12 to 14-inch blades are standard for versatile commercial use.
- Motor Horsepower: Aim for 1/2 HP for heavy-duty tasks to prevent motor burnout.
- Gravity Feed vs. Automatic: Automatic slicers reduce labor costs in high-volume settings.
- Safety Features: Look for no-volt release switches and permanent blade guards.
Furthermore, the construction material should be anodized aluminum or stainless steel to ensure long-term durability and resistance to corrosion. Evaluating the duty cycle of the machine is paramount; a slicer rated for four hours of continuous use will fail in a facility requiring eight hours of production. Investing in a unit that exceeds your current needs allows for future growth and reduces the frequency of mechanical repairs.
Essential Safety Protocols for High Volume Slicing
Operating a high-speed deli slicer presents significant risks if proper safety protocols are not strictly enforced. The primary line of defense is a comprehensive training program that every operator must complete before touching the equipment. Maintaining a clean workspace and ensuring that the floor is dry and free of debris prevents slips that could lead to accidental contact with the blade. When the machine is not in active use, the thickness gauge must always be set to zero to shield the blade edge.
- Always wear cut-resistant stainless steel mesh gloves on both hands.
- Utilize the food pusher or weighted press at all times; never feed product by hand.
- Unplug the unit completely before beginning any disassembly or cleaning procedure.
- Establish a "no-distraction zone" around the slicing station during operation.
Regular inspection of the machine's safety interlocks and sensors ensures that the motor cannot start while the blade guard is removed. In high-volume environments, fatigue can lead to complacency, making scheduled breaks for operators a vital safety measure. By fostering a culture where safety is prioritized over speed, kitchens can prevent life-altering injuries and maintain a steady, professional production flow.
Preparing Meat for Optimal Slicing Results
The quality of the final slice is often determined long before the meat touches the blade. Temperature management is the most critical factor in achieving clean, consistent results without shredding or "tailing." Most professional chefs recommend chilling the product to a temperature between 30°F and 34°F. This slight firming of the fats and muscle fibers allows the blade to pass through the product with minimal resistance, ensuring that even the thinnest shavings maintain their structural integrity.
- Trimming: Remove excess silver skin and heavy gristle to prevent blade deflection.
- Squaring: Trim the ends of the roast to create a flat surface for the pusher to grip.
- Tempering: Allow frozen products to thaw slightly until they reach the "hard-chill" stage.
- Moisture Control: Pat the surface of the meat dry to prevent slipping on the carriage.
Properly shaped products also ensure that the yield is maximized. For irregular cuts like brisket or corned beef, binding the meat with butcher's twine can help maintain a uniform shape, which results in more consistent slice diameters. Taking these preparatory steps reduces mechanical strain on the slicer and produces a visually superior product for sandwich builds or charcuterie displays.
Mastering Precision Thickness for Professional Consistency
Achieving professional consistency requires an intimate understanding of the slicer's adjustment dial and how different textures respond to blade pressure. Each meat variety demands a specific thickness setting to highlight its flavor and mouthfeel. For example, a delicate prosciutto should be translucent, while a hearty roast beef for a French dip might require a slightly thicker, more substantial cut. Consistency across a batch is maintained by locking the thickness plate and using steady, rhythmic strokes.
| Product Type | Recommended Setting | Visual Indicator |
|---|---|---|
| Prosciutto/Salami | 0.5 mm - 1.0 mm | Translucent/Paper-thin |
| Turkey/Ham | 1.5 mm - 2.0 mm | Standard deli fold |
| Corned Beef | 2.0 mm - 3.0 mm | Substantial bite |
Operators should perform a "test slice" every time a new product is loaded or after the blade has been sharpened. This ensures that the mechanical calibration of the dial matches the physical output. When slicing large batches, periodically check the thickness, as friction and heat can slightly expand the product or the blade, leading to minute variations in the final portion size.
Workflow Strategies for Maximum Slicing Efficiency
Efficiency in a high-volume kitchen is achieved through organized staging and logical sequencing. To minimize downtime, operators should group products by texture and cleaning requirements. For instance, slicing all lean meats before moving to high-fat cheeses or spicy cured meats reduces the frequency of mid-shift sanitization. A well-organized workspace ensures that the operator never has to leave the station to fetch trays, parchment paper, or storage containers.
- Pre-stage all products on a refrigerated cart next to the slicing station.
- Use a digital scale at the exit point to verify portion weights in real-time.
- Implement a "shingle and stack" technique to prepare portions for rapid assembly.
- Coordinate with the prep team to ensure a continuous supply of tempered product.
Utilizing the automatic carriage feature on high-end slicers allows the operator to perform other tasks, such as weighing and labeling, while the machine handles the repetitive motion. However, even with automation, the operator must remain attentive to the machine's rhythm. By refining the physical layout of the slicing station and the order of operations, a kitchen can significantly increase its hourly output without compromising on quality or safety standards.
The Importance of Blade Maintenance and Sharpening
A dull blade is the primary cause of product waste, poor presentation, and mechanical failure. As a blade loses its edge, it begins to "tear" rather than "cut," creating ragged edges and uneven slices. Regular sharpening is essential, but it must be done correctly to avoid damaging the blade's temper or creating a dangerous burr. Most commercial slicers come with an integrated sharpening stone system, which should be used daily or weekly depending on the volume of use.
- Daily Inspection: Check for nicks, chips, or flat spots on the blade edge.
- Cleaning Before Sharpening: Never sharpen a greasy blade; fats will clog the stones.
- Honing: Use the honing stone briefly to remove the burr created by the sharpening stone.
- Blade Replacement: Replace the blade once it has been ground down past its safe diameter.
Proper maintenance also involves lubricating the carriage slide rod with food-grade oil. A smooth-sliding carriage reduces operator fatigue and ensures a consistent feed rate. When the blade is sharp and the carriage moves effortlessly, the motor runs cooler and the machine lasts significantly longer. Neglecting these basic maintenance tasks leads to increased friction, which can eventually burn out the motor or snap drive belts.
Standardized Cleaning Procedures for Food Safety
Electric slicers are notorious for harboring bacteria in hard-to-reach crevices, making standardized cleaning procedures a cornerstone of food safety. Because the machine handles protein-rich foods, the risk of cross-contamination and foodborne illness is high. A full "breakdown" cleaning must occur at least every four hours during continuous use, or whenever switching between different types of allergens. The process requires focus and the use of approved sanitizing chemicals at the correct concentrations.
- Turn the thickness dial to zero and unplug the machine.
- Remove the product tray, blade cover, and slice deflector.
- Wash all removable parts in a three-compartment sink with hot, soapy water.
- Clean the stationary blade and housing using a long-handled brush and sanitizer.
Special attention must be paid to the area behind the blade and the center hub, where meat juices often accumulate. After cleaning, all surfaces should be air-dried or dried with single-use paper towels to prevent rust. Reassembly should only happen once the machine is completely dry. Consistent adherence to these steps not only ensures compliance with health department regulations but also protects the reputation of the establishment and the health of the customers.
Reducing Product Waste During Large Batch Slicing
In a professional kitchen, every gram of wasted product impacts the bottom line. Large batch slicing often results in "heels" or "ends" that are difficult to slice safely or consistently. To minimize this, operators should use high-quality meat grips that allow the product to be sliced almost to the very end. Additionally, ensuring the blade is razor-sharp prevents "shaving," where the blade creates meat dust instead of clean slices, which can account for a 2-3% loss in total yield.
- End-Piece Utilization: Save heels for dicing into salads, soups, or omelet fillings.
- Uniform Pressure: Apply steady, even pressure to prevent thicker "wedge" slices.
- Proper Loading: Secure the product firmly to prevent it from shifting during the stroke.
- Chilling: Firm product yields less "mush" and fewer unusable scraps.
By monitoring the weight of the usable product against the weight of the raw roast, managers can identify which operators need more training in waste reduction. Implementing a waste log for "slicing loss" encourages staff to be more mindful of their technique. When the slicing process is optimized, the yield per unit increases, directly improving the kitchen's food cost percentage and overall profitability.
Advanced Techniques for Versatile Meat Textures
Professional slicing involves more than just pushing meat back and forth; it requires adjusting techniques for various textures. Soft, fatty meats like mortadella require a slower carriage speed to prevent the friction from melting the fat, while fibrous meats like corned beef benefit from being sliced against the grain to improve tenderness. Mastering the "shave" is also essential for certain sandwich styles, where the meat is cut so thin it ruffles, creating a light and airy texture that enhances the eating experience.
| Texture Type | Technique Adjustment | Expected Result |
|---|---|---|
| Fibrous/Tough | Cross-grain alignment | Increased tenderness |
| High Fat/Soft | Slow speed, cold temp | Clean edges, no melting |
| Cured/Hard | Thin setting, high speed | Consistent, wafer-like chips |
For high-end charcuterie, "bias cutting" can be used to increase the surface area of small-diameter sausages, making them appear larger and more visually appealing on a board. This technique requires the operator to angle the product manually within the carriage. Experimenting with these advanced methods allows a kitchen to differentiate its offerings and provide a premium experience that goes beyond standard deli service.
Optimizing Output for Professional Kitchen Demands
To meet the high demands of a professional kitchen, the deli slicer must be treated as a high-performance engine. Optimization begins with a preventive maintenance schedule that includes checking belt tension and replacing sharpening stones before they become glazed. Staff should be trained to operate the machine at the "sweet spot"-a speed that is fast enough to meet production goals but slow enough to maintain perfect slice geometry. Overworking the machine beyond its rated capacity leads to frequent breakdowns and inconsistent product.
- Batch Processing: Dedicate specific times of day for large-scale slicing to avoid mid-service rushes.
- Ergonomics: Set the slicer at the correct height to reduce strain on the operator's back and arms.
- Digital Integration: Use smart scales that talk to the POS to track inventory in real-time.
- Redundancy: In high-volume shops, always have a secondary slicer available as a backup.
Ultimately, optimizing output is a balance between human skill and mechanical reliability. When operators are proficient in the machine's nuances and the equipment is meticulously maintained, the slicing station becomes a hub of high-speed, high-quality production. This efficiency allows the kitchen to handle peak periods with ease, ensuring that every customer receives a product that meets the highest professional standards of the culinary industry.


Comments