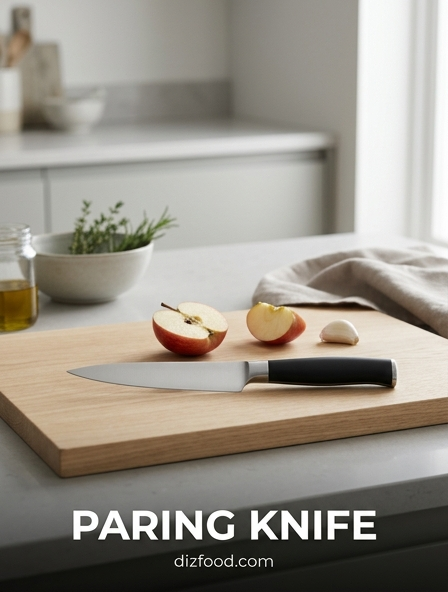
Anatomy of the Paring Knife
The paring knife is a compact yet indispensable tool in the culinary world, designed specifically for intricate tasks that require maximum control. Unlike its larger counterpart, the chef's knife, the paring knife typically features a blade length between 2.5 and 4 inches. The anatomy of this tool is engineered for precision, starting with the tip, which is used for fine detail work and piercing. The cutting edge is slightly curved or straight, depending on the specific style, and leads back to the bolster, providing balance and finger protection.
- The Tip: Used for delicate work like removing potato eyes or deveining shrimp.
- The Blade: Usually made from high-carbon stainless steel for edge retention and rust resistance.
- The Tang: Ideally full-tang, extending through the handle for superior strength and durability.
- The Handle: Ergonomically shaped to fit comfortably in the palm for various grip styles.
Understanding these components allows a cook to leverage the knife's lightweight nature. A well-constructed paring knife feels like an extension of the hand, facilitating effortless movement through soft fruits and tough vegetable skins alike.
Selecting the Ideal Blade Shape
Choosing the right paring knife involves understanding the specific geometry of the blade and how it interacts with different ingredients. While many home cooks rely on a single utility knife, professional chefs often keep various shapes on hand to optimize their workflow for specialized tasks. The curvature of the edge determines the type of motion required, whether it be a rocking cut on a board or a drawing cut in the air.
| Blade Type | Key Features | Best Use Case |
|---|---|---|
| Spear Point | Classic curved edge | General peeling and slicing |
| Bird's Beak | Concave, hooked blade | Tourné cuts and round fruits |
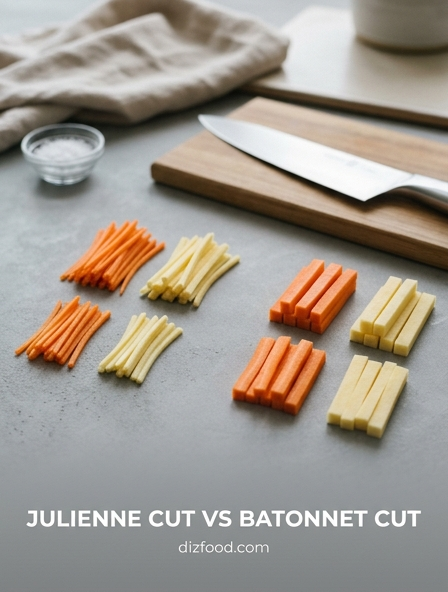
| Sheep's Foot | Straight edge, flat tip | Precision julienne and board work |
The spear point is the most versatile, making it a standard choice for most kitchens. However, the bird's beak is unrivaled for peeling curved items, as the concave edge hugs the surface of the ingredient. Conversely, the sheep's foot offers maximum contact with a cutting board, providing clean slices for small aromatics like garlic or shallots.
Mastering the Precision Pinch Grip
To achieve the highest level of control with a paring knife, one must master the pinch grip. This technique shifts the control from the wrist to the fingers, allowing for microscopic adjustments during delicate tasks. Unlike a hammer grip used for heavy chopping, the precision grip involves "choking up" on the blade to minimize the distance between the hand and the cutting point. This proximity reduces leverage issues and increases tactile feedback from the ingredient.
- Place your thumb on one side of the blade, just past the bolster.
- Position your index finger on the opposite side of the blade, creating a "pinch."
- Wrap your remaining three fingers securely around the handle for stability.
- Ensure the palm of your hand rests lightly against the back of the handle.
This grip is essential when performing "in-hand" work, such as peeling an apple or hulling a strawberry. By stabilizing the blade between the thumb and forefinger, you can navigate tight corners and follow the natural contours of produce without the risk of the knife slipping or veering off course.
Essential Peeling and Trimming Skills
Peeling and trimming are the primary functions of the paring knife, serving as the foundation for food preparation. Efficiency in these tasks reduces food waste and ensures uniform cooking times. When peeling, the goal is to remove only the outermost skin while preserving the nutrient-dense flesh beneath. This is often performed by holding the item in the non-dominant hand and drawing the knife toward the thumb, which acts as a guide and a pivot point.
- Rotational Peeling: Rotating the fruit against the blade for a continuous ribbon.
- Blemish Removal: Using the tip to scoop out bruises or "eyes" in potatoes.
- Silverskin Trimming: Sliding the blade under connective tissue on small proteins.
- Stemming: Removing the woody ends of green beans or woody herb stems.
Consistency is key; a sharp paring knife should glide through the skin with minimal pressure. If you find yourself sawing at the produce, it is likely that your blade is dull or your angle is too steep. Practice on round objects like citrus or apples to develop a smooth, rhythmic motion that follows the item's natural shape.
Intricate Garnishing and Decorative Cutting
The paring knife is the artist's brush of the kitchen. Its small size allows for decorative flourishes that transform a standard dish into a visual masterpiece. Garnishing requires a combination of a sharp tip and steady hand-eye coordination. Whether you are creating classic French garnishes or modern fruit displays, the paring knife provides the agility needed for tight curves and micro-incisions that a larger knife simply cannot achieve.
- Citrus Twists: Carve long, thin strips of zest, avoiding the bitter white pith.
- Radish Roses: Make petal-like incisions around the circumference of a radish.
- Strawberry Fans: Slice thin layers through the berry, leaving the green top intact.
- Scallion Curls: Shred the green ends into fine ribbons and shock in ice water.
Precision is more important than speed when garnishing. Focus on maintaining a uniform depth for every cut to ensure the decorative elements hold their shape. Using a bird's beak paring knife can be particularly helpful here, as its curved blade is naturally suited for the rounded surfaces of fruits and vegetables used in decorative work.
Efficient Coring and Deseeding Methods
Removing seeds and cores is a repetitive task that can be significantly optimized with the right paring knife technique. Because the knife is short, it can be easily inserted into the center of produce to extract unwanted parts without damaging the exterior. This is particularly useful for peppers, stone fruits, and pome fruits where the interior structure must be removed before further slicing or stuffing.
- Jalapeños: Cut off the stem and use the tip to scrape out the ribs and seeds.
- Apples: Insert the knife at an angle to cut a cone shape around the core.
- Tomatoes: Use a circular motion to remove the tough stem attachment point.
- Stone Fruit: Run the blade around the pit to split the fruit cleanly in half.
When coring, always be mindful of where your fingers are positioned on the opposite side of the fruit. The short blade of a paring knife gives you excellent spatial awareness, but it still requires a controlled, steady motion. For smaller items like cherries or grapes, the paring knife allows for surgical precision, ensuring the fruit remains intact for presentation while removing any internal debris.
Slicing Small Aromatics and Fruits
While a chef's knife is often preferred for high-volume chopping, the paring knife excels at slicing small, delicate aromatics that require a light touch. For ingredients like garlic cloves or shallots, the paring knife allows for incredibly thin, translucent slices that melt into sauces. Its maneuverability also makes it the ideal choice for slicing small fruits like grapes or berries for salads and desserts, where a larger blade might crush the delicate flesh.
| Ingredient | Technique | Desired Outcome |
|---|---|---|
| Garlic | Thin vertical slices | Uniform browning/infusion |
| Shallots | Cross-wise rings | Crispy texture when fried |
| Ginger | Matchstick julienne | Fine aromatic distribution |
| Grapes | Half or quarter cuts | Bite-sized salad components |
When working on a cutting board with a paring knife, use a "draw cut" by pulling the blade toward you. This provides better control over the thinness of the slice. For aromatics, keeping the tip of the knife in contact with the board can help maintain stability, although many chefs prefer to perform these small slices entirely in-hand for maximum speed and efficiency.
Safety Protocols for Handheld Cutting
Because paring knives are frequently used for "in-hand" cutting, they present unique safety challenges compared to board-based cutting. The most critical rule is to always maintain awareness of the thumb's position. When drawing the blade toward your hand, the thumb of the hand holding the produce acts as a stopper. You must ensure the blade edge is angled so that it stops against the fleshy part of the thumb or the side of the ingredient, rather than the nail or joint.
- Always keep the blade sharp; a dull knife requires more force and is more likely to slip.
- Cut away from your body whenever the task allows for it.
- Maintain a dry grip on both the handle and the ingredient to prevent sliding.
- Focus entirely on the task; handheld cutting requires constant visual monitoring.
If you are a beginner, it is safer to perform most tasks on a cutting board until you develop the necessary muscle memory. Even experienced chefs must remain vigilant, as the small size of the paring knife can lead to a false sense of security. Always treat the blade with the same respect as a larger knife, ensuring your workspace is clear and stable.
Maintaining a Razor Sharp Edge
A paring knife is only as effective as its edge. Because it is used for fine, detailed work, even a slight loss of sharpness can make tasks like peeling skin or slicing tomatoes frustrating and dangerous. Regular maintenance involves two main processes: honing and sharpening. Honing realigns the microscopic "teeth" of the blade, while sharpening removes metal to create a new edge. Due to their small size, paring knives can be tricky to sharpen on large whetstones, requiring a consistent angle and steady hand.
- Honing: Use a ceramic honing rod frequently to maintain the edge between heavy uses.
- Sharpening: Use a fine-grit whetstone (1000/6000) once every few months.
- Storage: Store in a knife block or use a blade guard to prevent the edge from chipping.
- Cleaning: Hand wash and dry immediately; never put a paring knife in the dishwasher.
To test the sharpness, a paring knife should be able to slice through a piece of paper or the skin of a ripe tomato with zero downward pressure. If the blade "walks" or slides off the skin, it is time for a sharpening session. Proper maintenance ensures the knife remains a precision instrument rather than a blunt utility tool.
Developing Advanced Dexterity Drills
To truly master the paring knife, one must develop high levels of manual dexterity and fine motor control. Professional culinary students often practice specific drills to build the muscle memory required for rapid, precise movements. These drills focus on the coordination between the hand holding the knife and the hand holding the ingredient. Speed will naturally follow as your accuracy improves, so the initial focus should always be on the cleanliness and uniformity of the cuts.
- The Apple Spiral: Try to peel an entire apple in one continuous, unbroken ribbon.
- Potato Tourné: Practice carving a potato into a seven-sided football shape.
- Grape Segments: Practice removing the skin from grapes without bruising the flesh.
- Blind Positioning: Practice the pinch grip and finger shifts without looking at the knife.
Engaging in these exercises for just a few minutes a day can significantly enhance your comfort level. Advanced dexterity allows you to switch between different grips-such as moving from an in-hand peel to a board-based slice-seamlessly. Over time, the paring knife will feel like a natural extension of your fingers, enabling you to tackle the most complex kitchen prep with confidence and ease.


Comments