
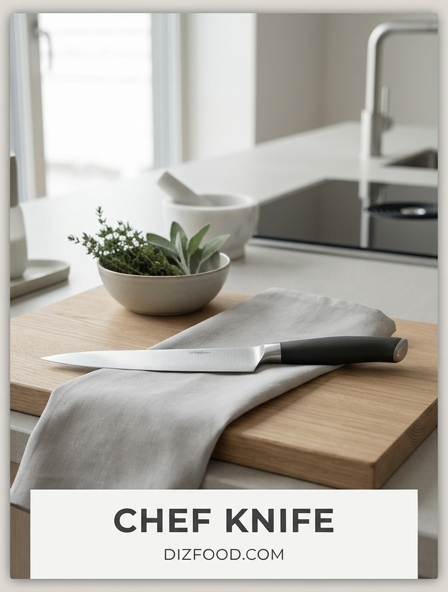
Foundational Pinch Grip for Total Control
The pinch grip is the professional standard for holding a chef knife, offering a level of control and precision that a simple handle grip cannot provide. By choking up on the knife, you shift the center of gravity closer to your hand, effectively making the tool an extension of your arm. This technique involves placing your thumb and the side of your index finger directly onto the bolster or the base of the blade. The remaining three fingers wrap loosely around the handle to provide stability without tension. This grip minimizes the risk of the knife slipping or rolling during heavy-duty tasks like splitting a butternut squash.
- Increases leverage for tougher cuts.
- Enhances tactile feedback from the blade edge.
- Reduces wrist fatigue during extended prep sessions.
- Improves accuracy for fine, delicate work.
Transitioning to the pinch grip may feel unnatural initially for home cooks accustomed to holding only the handle. However, once the muscles in the hand adapt, the increase in stability becomes evident. It allows for a more fluid movement and ensures that the blade remains vertical, preventing the slanted cuts that often occur when the knife is held too far back. Mastering this foundation is the first step toward professional-grade culinary skills.
Safe Guidance with the Claw Technique
While the dominant hand manages the knife, the non-dominant hand is responsible for safety and stability through the claw technique. This method involves curling the fingertips inward toward the palm, creating a "claw" shape. The knuckles are then pressed against the side of the blade to act as a guide. By keeping the fingertips tucked away, you eliminate the risk of accidental nicks or deep cuts. The thumb should also be tucked behind the other fingers, acting as a brace to push the ingredient toward the blade as you slice.
- Curl your fingers so the tips are pointed down at the board.
- Rest the flat side of the knife against your middle knuckles.
- Use your thumb and pinky to stabilize the ingredient from the sides.
- Slide your hand back slowly as the knife moves across the product.
This technique provides a consistent reference point for the thickness of each slice. Because the knife is always in contact with the knuckles, you can maintain high speeds without looking directly at your fingers. It transforms the non-dominant hand into a precision measuring tool while ensuring maximum safety in a fast-paced kitchen environment.
Rhythmic Rocking Motion for Efficiency
The rocking motion is the hallmark of efficient vegetable prep, taking full advantage of the curved belly found on most Western chef knives. To execute this move, the tip of the knife remains in constant contact with the cutting board. The back of the blade is lifted and lowered in a rhythmic, circular motion, "rocking" over the ingredients. This technique is particularly effective for dicing onions, chopping celery, or mincing garlic. Because the tip never leaves the board, the knife remains stable, reducing the likelihood of erratic movements that could lead to injury or uneven cuts.
As you master the rhythm, the speed of the rocking motion increases, allowing you to process large volumes of produce in a fraction of the time. It is essential to maintain the pinch grip throughout this process to ensure the blade does not wobble at the top of the arc. This motion should feel fluid and effortless, utilizing the weight of the knife to do the work rather than sheer physical force. When done correctly, the sound of the knife against the board should be a consistent, percussive beat, signaling a steady and controlled pace.
Precision Slicing and Smooth Push Cuts
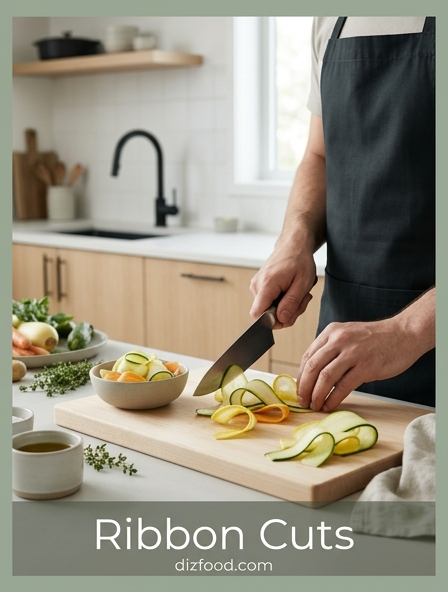
The push cut is a fundamental movement used when a rocking motion is not suitable, such as when slicing through large root vegetables or delicate proteins. Unlike the rocking motion, the entire blade moves forward and downward simultaneously. You start with the heel of the knife near the ingredient and push the blade away from your body as you bring it down to the board. This forward momentum allows the sharp edge to shear through fibers cleanly rather than crushing them. It is the preferred method for achieving perfectly uniform slices of cucumber, zucchini, or potatoes.
- Maintain a vertical blade angle to ensure straight slices.
- Use a single, fluid motion rather than a sawing action.
- Apply consistent pressure throughout the duration of the cut.
- Reset the knife completely after every slice for uniformity.
Push cutting requires a sharp edge to be truly effective. If the knife is dull, the blade may slide off the skin of the vegetable, which is both dangerous and frustrating. By focusing on a smooth forward glide, you preserve the internal structure of the food, which helps maintain texture and flavor during the cooking process. This precision is vital for professional presentations.
Mastering the Fine Mince and Brunoise
Mincing and the brunoise cut represent the pinnacle of precision in the kitchen. A brunoise is a tiny cube, typically measuring 1/8 inch on all sides, whereas a mince is even finer and less structured. These cuts are used for aromatics like shallots, garlic, and ginger, where the goal is to release maximum flavor or ensure the ingredient melts into a sauce. Achieving this level of detail requires a very sharp knife and a steady hand, as the margin for error is incredibly small. The process usually begins with julienned strips that are then gathered and cut crosswise.
| Cut Name | Dimensions | Common Uses |
|---|---|---|
| Brunoise | 1/8" x 1/8" x 1/8" | Garnishes, Consommé |
| Fine Brunoise | 1/16" x 1/16" x 1/16" | Fine sauces, Vinaigrettes |
| Mince | Irregular / Very Small | Garlic, Herbs, Ginger |
When mincing herbs, a secondary technique involves placing the palm of your non-dominant hand flat on the spine of the knife near the tip. This allows you to rapidly pivot the handle back and forth while the tip stays anchored, creating a fan-like motion that pulverizes the herbs into a fine consistency without bruising the delicate leaves.
Uniform Julienne and Matchstick Precision
The julienne cut, often referred to as the matchstick cut, is essential for stir-fries, salads, and garnishes. The objective is to create long, thin rectangular strips that are approximately 1/8 inch thick and 2 inches long. This technique begins with "squaring off" the vegetable-slicing off the rounded sides to create a stable, rectangular block. This prevents the ingredient from rolling on the cutting board, which is the primary cause of kitchen accidents. Once the block is formed, it is sliced into thin planks, which are then stacked and sliced again into strips.
- Trim the vegetable into a consistent rectangular shape.
- Slice the rectangle into thin, even planks (1/8 inch).
- Stack two or three planks on top of one another.
- Cut through the stack lengthwise to create matchsticks.
Uniformity in julienne cutting is not just about aesthetics; it ensures that every piece of food cooks at the exact same rate. In a high-heat environment like a wok, a strip that is too thick will remain raw while a thinner strip burns. Mastering this cut demonstrates a chef's commitment to both visual excellence and technical consistency.
The Classic Dice for Consistent Results
Dicing is perhaps the most frequent task performed with a chef knife, turning large ingredients into uniform cubes. These cubes are categorized by size: small (1/4 inch), medium (1/2 inch), and large (3/4 inch). The process is a logical progression from the julienne. Once you have created matchstick strips, you simply rotate them 90 degrees and cut crosswise. The key to a perfect dice is ensuring that the initial planks and strips are perfectly measured. If the foundation is uneven, the final cubes will be irregular.
- Large Dice: Best for slow-cooked stews and hearty soups.
- Medium Dice: The standard for mirepoix and general vegetable prep.
- Small Dice: Ideal for quick-cooking dishes and salsas.
Consistent dicing allows for even heat distribution, which is critical for the flavor profile of a dish. For example, in a potato hash, irregularly sized cubes will result in some pieces being mushy while others are still hard. By slowing down and focusing on the geometry of each cut, you elevate the quality of your cooking. Practice on inexpensive vegetables like onions and potatoes to build the muscle memory required for speed and accuracy.
Delicate Slicing with the Draw Cut
The draw cut, or pull cut, is the opposite of the push cut and is specifically used for delicate items that might be crushed by downward pressure. Instead of pushing forward, you place the tip or the middle of the blade against the ingredient and pull the knife back toward your body. This motion uses the length of the blade to slice through the item with minimal force. It is the gold standard for slicing raw proteins, such as fish for sashimi or thin strips of beef, and for chiffonading delicate herbs like basil and mint.
When performing a draw cut on herbs, the leaves are typically stacked, rolled tightly into a cigar shape, and then sliced using a gentle pulling motion. This prevents the edges of the herbs from turning black, a common result of "bruising" caused by blunt force or a dull blade. The draw cut requires a very sharp tip, as this is often the part of the blade that initiates the contact. It is a graceful, quiet technique that emphasizes the sharpness of the steel over the strength of the cook, resulting in clean, elegant lines on the plate.
Ergonomic Fluidity in Knife Movement
Efficiency in the kitchen is not just about how you hold the knife, but how you position your entire body. Ergonomics play a vital role in preventing long-term strain on the wrists, elbows, and shoulders. Your cutting board should be at a height that allows your forearms to be parallel to the floor, and your stance should be stable with your feet shoulder-width apart. Instead of using only your wrist to move the knife, try to engage your forearm and shoulder. This distributes the physical load across larger muscle groups, reducing the risk of repetitive strain injuries.
- Keep the elbow close to the body for better stability.
- Avoid "death-gripping" the handle; keep your hand relaxed.
- Ensure the cutting board is secured with a damp paper towel or non-slip mat.
- Stand slightly to the side of the board to allow for a natural range of motion.
Fluidity comes from a lack of tension. When you are relaxed, your movements become more rhythmic and less robotic. This allows you to work for longer periods without discomfort. Proper ergonomics also improve safety; a fatigued hand is more likely to make a mistake. By treating knife work as a full-body activity rather than just a hand movement, you gain better control over the blade's path.
Maintaining a Sharp Edge for Control
A sharp knife is significantly safer and more efficient than a dull one. When a blade is dull, it requires more downward pressure to cut through an ingredient, increasing the likelihood that the knife will slip and cause an injury. Furthermore, a sharp knife produces cleaner cuts that preserve the cellular structure of food, leading to better texture and longer shelf life for prepped ingredients. Maintenance involves two distinct processes: honing and sharpening. Honing realigns the microscopic "teeth" of the edge, while sharpening removes metal to create a new edge.
| Tool | Function | Frequency |
|---|---|---|
| Honing Steel | Realigns the edge | Before every use |
| Whetstone | Removes metal / Sharpens | Every 3-6 months |
| Strop | Polishes the edge | Post-sharpening |
Regular maintenance ensures that the knife responds predictably to your movements. If you find yourself having to "saw" through a tomato or if the blade slides off an onion skin, it is time for a tune-up. A well-maintained chef knife is the most important tool in any kitchen, and keeping it in peak condition is a fundamental responsibility of any serious cook.

Comments