
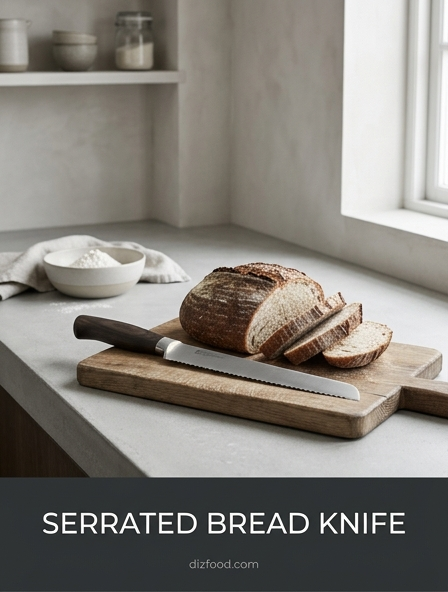
Essential Tools for Every Bread Type
Navigating the world of artisanal baking requires more than just a high-quality oven; the tools used for post-bake preparation are equally critical. A specialized serrated bread knife is the primary instrument for managing various textures, from the glass-like crust of a baguette to the pillowy softness of milk bread. Unlike a smooth chef's knife, which relies on downward pressure that can crush delicate structures, a serrated blade acts like a saw, using its teeth to catch and tear through tough exteriors without compromising the interior crumb.
- Standard Serrated Knife: Ideal for hard-crusted boules and sourdough.
- Offset Bread Knife: Provides better knuckle clearance for slicing deep loaves.
- Electric Carving Knife: Useful for processing large volumes of uniform sandwich bread.
To ensure versatility across all bread types, a blade length of 8 to 10 inches is recommended. This length allows for long, fluid strokes that minimize the number of passes needed to complete a cut. Investing in a high-carbon stainless steel blade ensures the teeth remain sharp over hundreds of loaves, providing the precision necessary for professional-grade presentation at home.
Slicing Sourdough Without Crushing the Crumb
Sourdough presents a unique challenge to the home cook due to its contrasting textures: a thick, caramelized crust and a highly hydrated, airy interior. If you apply too much vertical force, the internal alveoli-the beautiful bubbles created during fermentation-will collapse, resulting in a dense and unappealing texture. The key to preserving this "crumb" is a sharp serrated knife and a patient approach. Let the teeth do the work of piercing the hardened exterior before gently transitioning into the soft center.
Many bakers find success by starting the cut at an angle or using the tip of the knife to score a small entry point in the crust. Once the blade has gained purchase, maintain a horizontal sawing motion. Avoid the temptation to push down; instead, focus on the forward and backward movement. A high-quality blade will glide through the airy pockets of the sourdough without flattening them. This preservation of structure is not just about aesthetics; it ensures the bread retains its signature mouthfeel and ability to hold toppings or spreads without becoming a compressed mass of dough.
Gentle Techniques for Soft Brioche Loaves
Brioche and other enriched breads, such as challah or Japanese milk bread, are exceptionally fragile due to their high butter, egg, and sugar content. These loaves lack the structural rigidity of a sourdough boule, making them prone to tearing or squashing under the slightest pressure. When slicing brioche, the "weight of the knife" rule is paramount. You should exert almost zero downward pressure, allowing only the physical weight of the blade to sink through the layers of enriched dough.
- Place the loaf on a stable, flat wooden cutting board to prevent sliding.
- Position the serrated blade at the far end of the loaf to utilize the full length of the serrations.
- Execute long, slow strokes, moving the knife back and forth like a delicate violin bow.
- Continue the motion until the blade clears the bottom crust completely.
Because brioche is so soft, a knife with smaller, more frequent serrations often performs better than one with large, aggressive teeth. Smaller teeth provide a smoother finish on the delicate surface, preventing the "shredding" effect that can occur with coarser blades. This technique ensures every slice remains airy and intact.
The Importance of Serrated Blade Selection
Not all serrations are created equal, and the geometry of the blade's edge significantly dictates its performance across different culinary tasks. When selecting a bread knife, you must consider the shape and frequency of the teeth. Deep, pointed serrations are aggressive and excellent for breaking through the thick, charred crusts of rustic loaves. In contrast, scalloped or rounded serrations are gentler, making them the preferred choice for soft cakes and tender sandwich breads where a clean, non-jagged edge is desired.
| Feature | Pointed Serrations | Scalloped Serrations |
|---|---|---|
| Best Use | Hard Crusts, Baguettes | Brioche, Sponge Cakes |
| Cutting Action | Aggressive Tearing | Smooth Slicing |
| Maintenance | Difficult to Sharpen | Easier to Honing |
Blade material also plays a role; high-carbon steel offers the best edge retention but requires more care to prevent rust. A slightly flexible blade can be beneficial for maneuvering through irregular shapes, while a rigid blade offers more control for straight, thick slices of dense rye or whole-grain breads.
Why Resting Your Bread Prevents Gumminess
One of the most common mistakes in the kitchen is slicing into a loaf of bread the moment it emerges from the oven. While the aroma is tempting, the internal structure of the bread is still undergoing a crucial process called starch retrogradation. As bread bakes, the starches gelatinize; as it cools, these starches set and firm up. If you cut the loaf while it is still hot, the steam trapped inside escapes too rapidly, and the starches-still in a semi-liquid state-will collapse and stick to the knife blade.
This results in a "gummy" texture that feels undercooked, even if the bread reached the proper internal temperature. For a standard loaf, a cooling period of at least one to two hours is recommended. Larger boules or dense rye breads may require up to four hours or even a full day to properly set. Using a cooling rack is essential during this time to allow air to circulate around the bottom of the loaf, preventing the base from becoming soggy due to condensed moisture. Patience ensures the crumb is fully developed and easy to slice cleanly.
Mastering the Sawing Motion for Clean Cuts
The mechanics of using a serrated knife differ fundamentally from the chopping motion used with a chef's knife. To achieve a clean, professional cut, you must master the horizontal sawing motion. This technique relies on the friction and shearing force of the serrations rather than vertical weight. By utilizing the entire length of the blade, you distribute the cutting action across more teeth, which reduces the effort required and prevents the bread from being squashed downward into the cutting board.
- Start with the heel of the knife near the loaf.
- Push forward smoothly, allowing the teeth to "bite" the crust.
- Pull back with equal length, maintaining a level horizontal plane.
- Repeat the cycle with light pressure until the cut is finalized.
Many people fail by using short, choppy strokes. This creates an uneven surface and leaves "crumbs" everywhere. Long, rhythmic strokes produce a smooth, polished face on the slice. If you find yourself struggling, check the sharpness of your knife; a dull serrated blade requires more pressure, which is exactly what leads to crushed bread and uneven slices.
Tips for Consistent Slice Thickness
Achieving perfectly uniform slices is a hallmark of a skilled home cook and is essential for even toasting. The primary challenge is the "drift" of the blade, where the knife begins to tilt inward or outward as it moves through the loaf. To combat this, ensure your bread is positioned securely on a stable surface. You can use your non-dominant hand as a guide, but always keep your fingers curled safely away from the blade's path. Visualizing the line of the cut before you begin can also help maintain a straight trajectory.
If consistency remains an issue, consider using a bread slicing guide-a wooden or plastic frame that holds the loaf and provides slots for the knife. Alternatively, you can place two cutting boards of equal thickness on either side of the loaf to act as height markers. Another trick is to rotate the loaf 180 degrees halfway through the cut; this allows you to meet the initial incision from the opposite side, often correcting any slant that occurred during the first half of the process. Consistent thickness ensures that every piece of toast or sandwich is identical in texture and quality.
Safety First Proper Hand Placement
Serrated knives are notoriously dangerous because their "teeth" can cause jagged lacerations that are harder to heal than clean cuts from a straight blade. Therefore, proper hand placement is the most critical aspect of bread slicing. The standard "claw grip" is highly recommended: tuck your fingertips inward and use your knuckles to guide the side of the blade. This keeps your fleshy bits away from the sharp edge while providing stability to the loaf as you saw through it.
- Place the loaf on a non-slip surface or a damp towel-anchored board.
- Anchor the loaf with your non-dominant hand, forming a "C" or "claw" shape.
- Ensure your thumb is tucked behind your fingers, not resting on top of the bread.
- Always cut away from your body and keep your eyes on the blade at all times.
Never attempt to slice bread while holding it in your hand or "in the air." The resistance of a hard crust can cause the knife to slip suddenly, leading to injury. Always use a stable cutting board and maintain a firm, controlled grip on the knife handle to ensure safety throughout the process.
Cleaning and Maintaining Your Bread Knife
To preserve the longevity of your serrated bread knife, proper maintenance is essential. Unlike straight blades, serrated edges cannot be easily sharpened with a traditional whetstone. Therefore, preventing dullness is key. You should always hand wash your bread knife with mild soap and warm water. High-heat dishwashers can warp the handle, degrade the steel's temper, and cause the blade to knock against other utensils, dulling the delicate teeth. After washing, dry the blade immediately with a soft cloth to prevent spotting or corrosion.
- Store the knife in a wooden block, on a magnetic strip, or in a protective sheath.
- Avoid cutting on hard surfaces like glass, marble, or ceramic, which dull teeth instantly.
- Use a ceramic honing rod specifically designed for serrations to maintain the edge.
While serrated knives stay sharp longer than chef's knives, they will eventually lose their bite. When this happens, a professional sharpener with specialized tools for individual serrations is usually the best option. Regular care ensures that your knife remains a reliable tool for years, slicing through the toughest crusts with ease and precision.
How Slicing Impacts Bread Storage Life
The way you slice your bread directly affects how long it stays fresh. Once a loaf is cut, the interior crumb is exposed to oxygen, which accelerates the staling process through moisture loss and starch crystallization. To maximize shelf life, you should only slice what you intend to eat immediately. Leaving the loaf whole as long as possible keeps the moisture locked inside the protective barrier of the crust. If you must slice ahead of time, try to keep the slices pressed tightly together to minimize air exposure.
A useful trick for storing a partially sliced loaf is the "cut from the middle" method. Instead of starting at one end, cut the loaf in half and take slices from the center. Afterward, you can push the two remaining halves back together, effectively using the crusts to seal the cut faces. When storing, avoid the refrigerator, as the cold temperature actually speeds up staling. Instead, use a bread box for short-term storage or a paper bag to maintain crust crispness. For long-term storage, pre-slice the bread, wrap it tightly in plastic, and freeze it; this allows you to toast individual slices directly from the freezer without compromising quality.

Comments