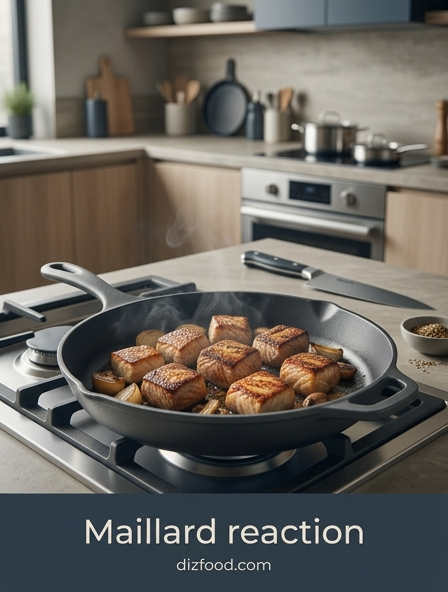
Science Behind the Sear
The Maillard reaction is a complex chemical process that occurs when amino acids and reducing sugars are exposed to heat. This non-enzymatic browning is responsible for the deep, savory flavors and distinct aromas found in seared steaks, toasted bread, and roasted coffee. Unlike simple caramelization, which involves only the oxidation of sugar, the Maillard reaction produces hundreds of different flavor compounds known as melanoidins. These compounds create the characteristic brown color and the "umami" profile that human palates find instinctively appealing.
- Amino Acids: The building blocks of proteins that react with sugars.
- Reducing Sugars: Specifically glucose, fructose, and lactose that initiate the bond.
- Melanoidins: Large polymeric molecules responsible for the brown pigment.
- Aromatics: Volatile molecules like pyrazines and furans that provide the scent.
The reaction begins slowly at room temperature but accelerates significantly once the food surface exceeds the boiling point of water. This transformation changes the molecular structure of the food, converting bland raw proteins into complex gastronomic delights. Understanding this chemistry is the foundation of professional culinary technique.
Optimal Temperature for Browning
To achieve a perfect sear, precise temperature management is essential. The Maillard reaction effectively begins around 285°F (140°C) and peaks between 300°F and 330°F (150°C to 165°C). Within this range, the chemical restructuring occurs rapidly enough to develop a crust without burning the exterior. If the temperature remains too low, the food will simply cook in its own juices, resulting in a grey, boiled appearance rather than a rich, golden-brown finish.
| Temperature Range | Resulting Action |
|---|---|
| Below 212°F (100°C) | Steaming/Boiling; no Maillard reaction occurs. |
| 285°F - 330°F (140°C - 165°C) | Optimal Maillard reaction; rapid browning. |
| Above 350°F (175°C) | Caramelization begins; risk of acrid charring. |
| Above 400°F (200°C) | Pyrolysis; carbonization and bitter flavors. |
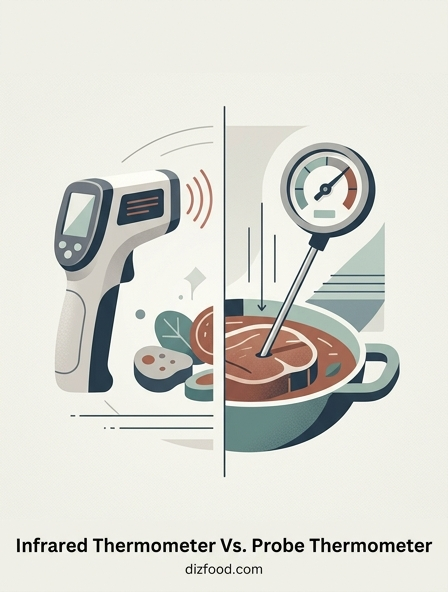
Monitoring the surface temperature of the pan with an infrared thermometer ensures the environment is primed for browning. Once the heat exceeds 350°F, the risk of pyrolysis-or charring-increases, which can lead to bitter flavors and the production of carcinogens. Maintaining the "sweet spot" is the key to balanced flavor.
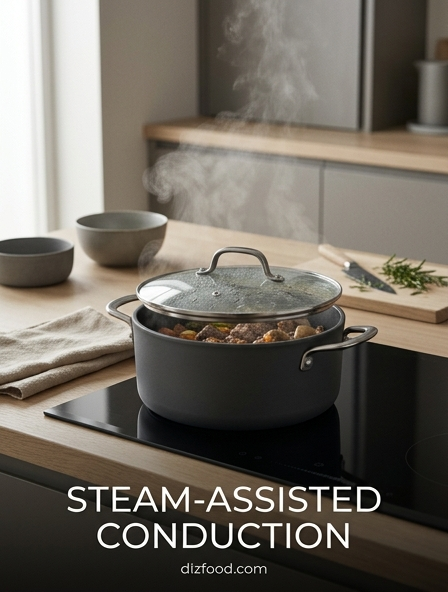
The Importance of Surface Moisture
Moisture is the primary enemy of a high-quality sear. Because water evaporates at 212°F (100°C), any liquid on the surface of the protein must be fully converted to steam before the temperature can rise high enough to trigger the Maillard reaction. This phase change requires a significant amount of latent heat energy, which effectively stalls the browning process. If the meat is wet, the surface temperature will remain trapped at the boiling point, leading to grey, rubbery results rather than a crisp crust.
- Pat Dry: Use paper towels to remove all surface juices before cooking.
- Air-Drying: Refrigerate uncovered proteins to allow surface moisture to evaporate.
- Salt Timing: Salt early (40+ mins) or immediately before to manage osmosis.
- Avoid Overcrowding: Too much food releases excess steam that cannot escape.
Ensuring the protein is bone-dry allows the heat of the pan to transfer directly to the amino acids and sugars. This immediate contact facilitates an instant sear, locking in the internal juices while developing the desirable textures and flavors that define expert-level cooking.
Choosing the Right Cookware
The vessel used for searing dictates how efficiently heat is transferred to the food. For the Maillard reaction to thrive, the pan must possess high thermal mass and excellent heat retention. When cold meat hits a hot pan, the temperature naturally drops; high-quality cookware minimizes this drop, allowing the sear to continue uninterrupted. Thin, lightweight pans often lose heat too quickly, causing the meat to stew in its own juices rather than brown effectively.
| Material | Heat Retention | Pros/Cons |
|---|---|---|
| Cast Iron | Excellent | Heavy, retains heat perfectly, but slow to heat. |
| Stainless Steel | Moderate | Great for fond development, non-reactive. |
| Carbon Steel | High | Lighter than cast iron, very responsive to heat. |
| Non-Stick | Low | Often fails at high temps; prevents fond creation. |
Professional chefs often prefer heavy-bottomed stainless steel or cast iron. These materials facilitate the development of "fond"-the caramelized bits stuck to the pan-which are essential for creating complex pan sauces. Avoiding non-stick coatings for high-heat searing is crucial, as they can degrade and release fumes at the temperatures required for browning.
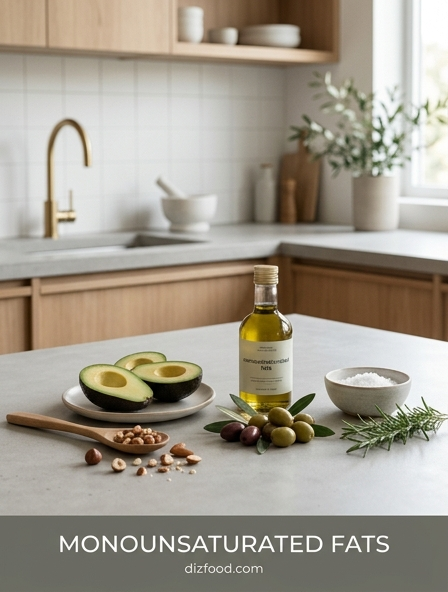
High Smoke Point Fats
Selecting the correct cooking fat is vital for maintaining the integrity of the flavor during high-heat searing. Every oil has a "smoke point," the temperature at which it begins to break down, smoke, and release acrolein, which imparts a bitter, burnt taste to the food. For the Maillard reaction to occur efficiently at 300°F and above, the oil must remain stable. Using a fat with a low smoke point, like extra virgin olive oil or butter, will result in scorched flavors before the meat actually browns.
- Avocado Oil: Extremely high smoke point (~520°F).
- Grapeseed Oil: Neutral flavor and high stability (~420°F).
- Refined Vegetable Oils: Canola or peanut oils are reliable for high-heat work.
Butter is often added at the very end of the searing process, a technique known as "arrosé," to provide flavor and richness without burning. By using a high-smoke-point oil for the initial sear and finishing with butter, you achieve both the chemical benefits of the Maillard reaction and the luxury of dairy fats.
The Role of pH Levels
The speed and intensity of the Maillard reaction are heavily influenced by the alkalinity or acidity of the food's environment. Chemical reactions between sugars and amino acids occur more rapidly in alkaline (high pH) conditions. By slightly increasing the pH on the surface of the food, you can accelerate browning and achieve a deeper color in a shorter amount of time. Conversely, acidic environments-such as those created by citrus juices or vinegar marinades-can actually inhibit the Maillard reaction, slowing down the browning process significantly.
A common kitchen hack involves using a tiny pinch of baking soda in marinades or on the skin of poultry. This creates an alkaline environment that encourages the molecular bonds to form faster. This is also why pretzels are dipped in a lye or baking soda solution before baking; the high pH allows the exterior to turn a deep mahogany brown while the interior remains soft. Understanding pH control gives the cook a "fast-forward" button for flavor development, provided it is used sparingly to avoid metallic off-flavors.
Timing and Heat Control
Achieving a perfect sear is a balancing act between surface browning and internal doneness. If the heat is too high for too long, the exterior will char before the interior reaches the desired temperature. If the heat is too low, you lose the Maillard benefits. Proper heat control involves a preheating phase followed by active management once the protein is added to the pan. Professionals often use a "two-stage" cooking method: searing at high heat and finishing in a lower-temperature oven.
- Preheat the pan until the oil shimmers or just begins to wisps of smoke.
- Place the protein carefully and leave it undisturbed for at least 2 minutes.
- Listen for a vigorous sizzle; a quiet pan indicates a drop in temperature.
- Flip only once a crust has formed and the meat releases naturally from the pan.
- Adjust the flame downward if the browning proceeds too rapidly toward black.
Patience is as important as temperature. Moving the food constantly prevents the surface from reaching the necessary threshold for the Maillard reaction to take hold. Controlled timing ensures a uniform crust.
Prepping Protein for Success
The preparation of the protein before it ever touches the pan is what separates home cooks from professional chefs. Beyond just drying the surface, the state of the muscle fibers and the distribution of surface solutes play a massive role in how the heat interacts with the meat. Tempering the protein-bringing it closer to room temperature-can help in some instances, though for thin steaks, a cold interior can prevent overcooking while the exterior sears. Most importantly, the application of salt influences the moisture levels through osmosis.
- Dry-Brining: Salt the meat at least 40 minutes before cooking to allow moisture to reabsorb.
- Trussing: Tie roasts or poultry to ensure even surface contact with the pan.
- Scoring: Lightly cut into fatty edges (like on a duck breast) to encourage fat rendering.
- Pressing: Use a weight or spatula to ensure the entire surface area touches the heat.
By managing the physical shape and surface chemistry of the protein, you maximize the area available for the Maillard reaction. This preparation ensures that every square millimeter of the meat contributes to the final flavor profile of the dish.
Deglazing and Flavor Extraction
After the searing process is complete, the pan often contains a layer of browned protein bits and concentrated juices known as the "fond." This substance is the Maillard reaction in its most concentrated form. To leave this in the pan is to waste the most flavorful part of the cooking process. Deglazing is the technique of adding a liquid-such as wine, stock, or verjuice-to the hot pan to loosen and dissolve these flavorful solids back into a liquid state, creating the base for a sophisticated sauce.
The solvent (liquid) acts to hydrolyze the caramelized proteins, pulling the pyrazines and other aromatic compounds into the sauce. This not only cleans the pan but also creates a bridge between the seared exterior of the meat and the rest of the meal. Using a wooden spoon to scrape the bottom during this process ensures that every bit of developed flavor is captured. The resulting reduction is rich, complex, and perfectly mirrors the savory notes of the seared protein, providing a cohesive culinary experience that highlights the science of browning.
Common Searing Pitfalls To Avoid
Even with the right equipment, several common mistakes can sabotage the Maillard reaction and result in sub-par flavor. Awareness of these pitfalls is the first step toward mastery. The most frequent error is overcrowding the pan; when too many pieces of meat are added at once, the cumulative moisture release overwhelms the heat capacity of the pan, causing the temperature to plummet. Instead of searing, the meat begins to steam in a grey pool of liquid, ruining the texture and flavor.
- Flipping Too Early: The meat will stick if the crust hasn't formed yet.
- Using Cold Pans: Starting with a cold pan leads to sticking and uneven cooking.
- Ignoring the Smoke: Continuing to cook when oil has broken down creates acrid tastes.
- Using Wet Meat: Failing to pat dry ensures the Maillard reaction will be delayed.
Another mistake is the "set it and forget it" mentality. While the meat needs to sit undisturbed to form a crust, the cook must constantly monitor the heat levels to ensure the reaction doesn't cross over into carbonization. Avoiding these errors ensures a consistent, professional result every time.


Comments