
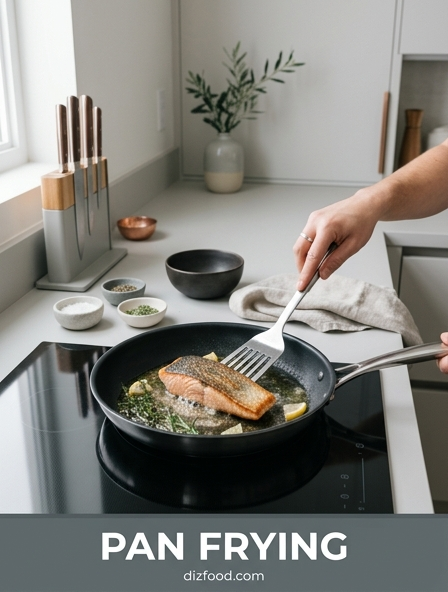
Choosing the Right Pan Material
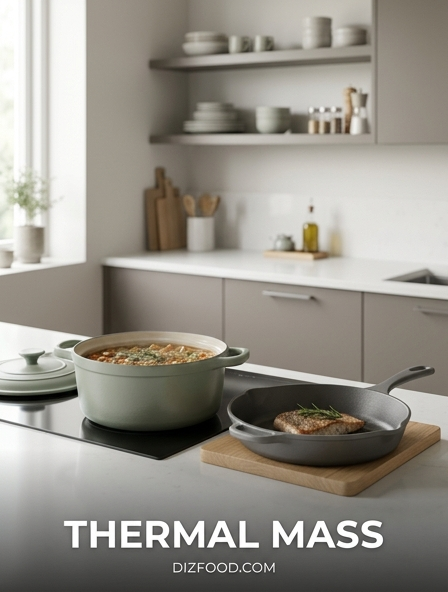
The foundation of a successful pan fry begins with the thermal properties of your cookware. Selecting the right material dictates how heat is transferred to the food and how well the pan maintains its temperature when cold proteins are introduced. Cast iron is a favorite for many chefs due to its incredible heat retention; once it gets hot, it stays hot, making it ideal for thick steaks. However, its low thermal conductivity means it can develop hot spots if not preheated properly.
- Stainless Steel: Excellent for creating fond (browned bits) and is highly responsive to temperature changes.
- Carbon Steel: Offers the heat retention of cast iron with the slick surface of a seasoned non-stick pan.
- Copper: Provides the highest level of precision and conductivity but requires significant maintenance.
For most pan-frying tasks, a heavy-bottomed tri-ply stainless steel or carbon steel pan provides the best balance of durability and performance. These materials allow for the high-heat environments necessary to trigger the chemical transformations that result in a savory, golden-brown crust without the risk of the pan warping or losing its edge during the process.
Selecting Oils with High Smoke Points
In pan frying, the oil acts as the medium of heat transfer, filling the microscopic gaps between the food and the pan surface. Using an oil with a low smoke point, such as extra virgin olive oil or butter, can lead to acrid flavors and the production of harmful free radicals as the fats break down. To achieve a professional sear, you must select fats that can withstand temperatures between 400°F and 450°F without smoking.
| Oil Type | Smoke Point | Best Use |
|---|---|---|
| Avocado Oil | 520°F | High-heat searing |
| Grapeseed Oil | 420°F | Neutral pan frying | Ghee (Clarified Butter) | 450°F | Steaks and poultry |
Neutral oils like canola or vegetable oil are affordable workhorses for everyday frying. However, if you desire a specific flavor profile, refined peanut oil offers a high smoke point with a subtle nuttiness. Always ensure the oil is fresh, as rancid oils have significantly lower smoke points and will ruin the delicate balance of your dish.
Essential Preheating Techniques for Searing
A common mistake in the kitchen is adding ingredients to a lukewarm pan. Proper preheating ensures that the moment the food touches the surface, the outer cells are cauterized, locking in moisture and beginning the browning process. This prevents the food from sticking, as the rapid expansion of steam creates a temporary cushion between the protein and the metal. To master preheating, follow these steps:
- Place the dry pan over medium-high heat for three to five minutes.
- Perform the Leidenfrost test by dropping a bead of water onto the surface; it should dance and roll like a marble rather than evaporating instantly.
- Add the oil only after the pan is hot, waiting for it to shimmer and show faint wisps of smoke.
By waiting for the oil to reach its optimal temperature, you decrease the viscosity of the fat, allowing it to coat the pan evenly. This thermal preparation is the difference between a soggy, grey piece of meat and a vibrant, restaurant-quality sear. Consistent preheating also protects the integrity of your cookware by preventing localized thermal shock.
Removing Surface Moisture for Better Browning
Moisture is the primary enemy of a perfect sear. When a damp piece of meat or vegetable hits a hot pan, the energy of the burner is first consumed by the phase change of turning water into steam. Because steam occurs at 212°F, the surface temperature of the food cannot rise above this point until all the moisture has evaporated. This delay prevents the Maillard reaction from occurring, often resulting in food that is steamed rather than fried.
To prevent this, use heavy-duty paper towels to pat the surface of your protein or vegetables until they are bone dry. For even better results, many professional cooks recommend "air-drying" proteins in the refrigerator uncovered for several hours. This process removes deep-seated moisture from the skin or surface tissues, allowing for a much faster transition to the browning phase. If you are using a marinade, ensure it is thoroughly wiped off or contains enough oil to facilitate frying rather than boiling. Taking sixty seconds to dry your ingredients can improve the final texture of your dish more than almost any other preparation step.
Understanding the Maillard Reaction Mechanics
The Maillard reaction is the chemical cornerstone of savory cooking, responsible for the complex flavors and aromas of browned food. It is not a single reaction but a series of many small reactions between amino acids and reducing sugars. This process generally begins to accelerate between 280°F and 330°F. If the pan temperature is too low, the reaction never starts; if it is too high (above 400°F), the food may skip the flavorful browning stage and go straight to carbonization, or burning.
As the heat breaks down the molecular structures on the surface of the food, it creates hundreds of different flavor compounds. These compounds provide the depth and "umami" characteristic of a well-seared steak or a golden-brown onion. Controlling this reaction requires a delicate balance of heat and time. Because the reaction is pH-sensitive, some chefs add a tiny pinch of baking soda to certain vegetables to accelerate the browning. Understanding that you are managing a chemical transformation, rather than just "heating food," changes how you approach the intensity of your flame and the duration of the cook time.
Managing Pan Crowding and Steam Prevention
Crowding the pan is a guaranteed way to lower the quality of your stir-fry or sear. Every ingredient added to the pan acts as a heat sink, drawing energy away from the cooking surface. If you add too much food at once, the temperature of the pan will plummet below the threshold required for frying. Furthermore, each piece of food releases a small amount of internal moisture; in a crowded pan, this moisture becomes trapped between the pieces, creating a humid environment that steams the food.
- Rule of Thirds: Aim to cover no more than two-thirds of the pan's surface area at any time.
- Batch Cooking: Fry in smaller increments, removing finished pieces to a warm oven while you finish the rest.
- Airflow: Ensure there is at least a half-inch of space between individual protein cuts.
By respecting the space in the pan, you allow the moisture to escape as steam into the air rather than condensing back onto the food. This maintains the high-heat environment necessary for a crisp exterior and ensures that the oil remains hot enough to prevent the food from becoming greasy and waterlogged.
Consistent Temperature Control Strategies
Mastering the heat source is an active process that requires constant observation. Many home cooks make the mistake of setting the burner to a single position and leaving it there for the duration of the cook. However, as the moisture evaporates and the food renders its own fats, the thermal dynamics change. You must learn to listen to the "acoustic signature" of the pan; a sharp, vigorous sizzle indicates a healthy sear, while a quiet hiss suggests the temperature is too low.
- Start with high heat to establish the initial sear and compensate for the cold food.
- Moderate the flame to medium-high once the initial moisture has evaporated to prevent burning.
- Move the pan off the heat entirely for a few seconds if the oil begins to smoke excessively.
If you notice the fond on the bottom of the pan turning dark black rather than deep brown, your temperature is too high. Conversely, if juices are pooling around the meat, you need more heat. By treating the stove dial as a dynamic tool rather than a static setting, you maintain the "sweet spot" where browning occurs without the risk of charring or drying out the interior.
Optimal Timing for the First Flip
Patience is the most difficult skill to master in pan frying. There is a natural tendency to move the food around or flip it prematurely to "check" on the progress. However, food will naturally release from the pan when it has developed a sufficient crust. This is known as "release," and it occurs because the proteins have coagulated and dried out enough to stop bonding with the metal surface. If you try to flip a piece of meat and it feels stuck, it is likely not ready.
Forcefully scraping the food off the pan will tear the fibers and leave the best part of the flavor-the crust-stuck to the bottom. For most proteins, you should only flip once. This allows for a deep, even color on both sides and helps you track the internal temperature more accurately. Watch the sides of the ingredient; when you see the cooked color creeping up the sides by about one-third, it is usually the optimal time to turn it over. By minimizing the number of flips, you preserve the structural integrity of the food and maximize the contact time with the heat.
Proper Seasoning for Enhanced Crust Development
Seasoning is not just about flavor; it is a functional part of the pan-frying process. Salt plays a crucial role in moisture management through the process of osmosis. When salt is applied to a protein, it initially draws moisture to the surface. If you fry immediately, that moisture will interfere with the sear. However, if you season at least forty minutes in advance, the salt dissolves into a brine and is reabsorbed, breaking down muscle proteins and creating a tackier surface that browns more efficiently.
- Salt Type: Use Kosher salt for better tactile control and even coverage.
- Timing: Season either immediately before hitting the pan or more than 40 minutes prior.
- Spices: Add delicate spices toward the end of cooking to prevent them from burning in high-heat oil.
A well-seasoned surface creates more "friction" for the Maillard reaction, resulting in a thicker and crunchier crust. Furthermore, the chemical interaction between the salt and the heat helps to denature the surface proteins faster, locking in the natural juices of the meat while providing the essential seasoning that carries the flavor of the dish.
Resting Techniques for Moisture Retention
The final step of pan frying occurs after the heat is turned off. During the intense heat of frying, the muscle fibers in meat contract and push juices toward the center. If you cut into the food immediately after removing it from the pan, those pressurized juices will spill out onto the cutting board, leaving the meat dry and chewy. Resting allows the fibers to relax and the internal temperature to equalize, which reabsorbs the moisture into the structure of the food.
| Protein Type | Resting Time | Technique |
|---|---|---|
| Steak / Chops | 5-10 Minutes | Tent loosely with foil |
| Chicken Breast | 5 Minutes | Rest on a warm plate |
| Whole Roasts | 15-20 Minutes | Uncovered for air flow |
It is important not to wrap the food too tightly in foil, as this can trap steam and soften the crisp crust you worked so hard to create. Instead, use a warm resting spot and allow carryover cooking to bring the item to its final target temperature. This patience ensures that every bite is as juicy and flavorful as possible, honoring the technical precision of the frying process.

Comments