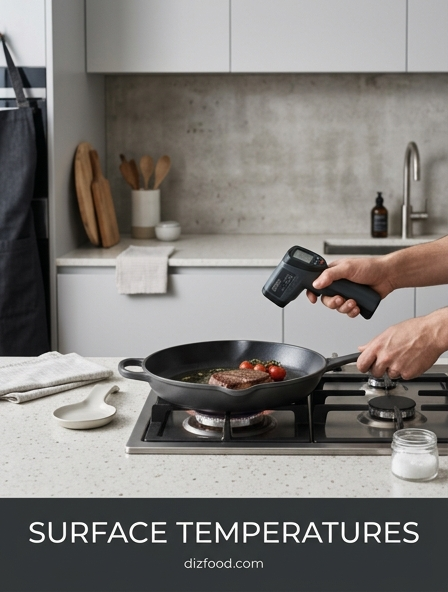
Choosing Between Infrared and Probe Thermometers
In a high-pressure kitchen environment, selecting the appropriate diagnostic tool for temperature management is critical for both safety and culinary precision. Infrared (IR) thermometers offer a non-contact solution, allowing chefs to measure the surface temperature of pans, pizza stones, or griddles from a distance. This is ideal for preventing cross-contamination and assessing readiness without interrupting the cooking process. However, IR technology only measures the outermost layer of a substance, which can be misleading when dealing with thick proteins or deep liquids.
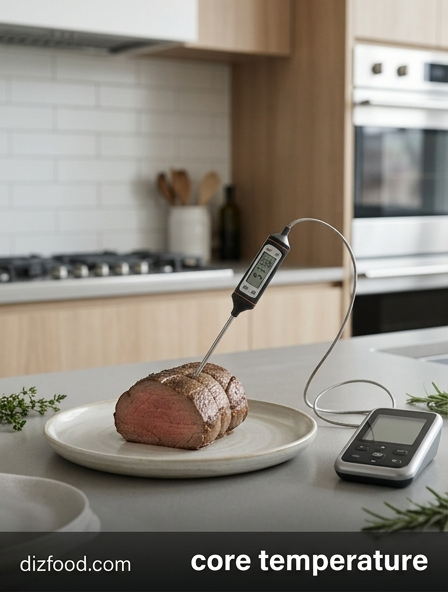
Conversely, probe thermometers provide an accurate reading of the internal temperature, which is essential for ensuring foodborne pathogens are destroyed. While they require physical contact and subsequent cleaning, their reliability in measuring the "core" of an item remains unmatched. For a comprehensive thermal management strategy, professionals should utilize both tools according to the specific requirement:
- Infrared: Best for searing surfaces, oil surface checks, and verifying refrigerator wall temperatures.
- Thermocouple Probe: Best for roasts, delicate poaching liquids, and internal bread temperatures.
- Leave-in Probe: Best for long-term monitoring of oven roasts or smoked meats.
Understanding Emissivity Settings for Pan Surfaces
Emissivity is a measure of a material's ability to emit infrared energy. In the kitchen, ignoring this setting on an infrared thermometer can lead to dangerous inaccuracies. Most consumer-grade IR thermometers are pre-set to an emissivity of 0.95, which is accurate for organic materials and matte surfaces but fails when encountering shiny metals. When measuring a highly reflective stainless steel pan, the sensor may pick up ambient heat reflections rather than the actual temperature of the metal itself.
To achieve accuracy, professional-grade sensors allow users to adjust the emissivity coefficient ($\epsilon$). Understanding the specific values for common kitchen materials ensures that the recorded data reflects reality. Using an incorrect setting can result in a reading that is off by over 50 degrees Celsius, potentially ruining a delicate sear or failing to reach the required temperature for Maillard browning.
| Material | Emissivity Value ($\epsilon$) |
|---|---|
| Cast Iron (Seasoned) | 0.95 |
| Anodized Aluminum | 0.77 |
| Polished Stainless Steel | 0.07 - 0.15 |
| Ceramic/Glass | 0.85 - 0.92 |
Optimizing Distance to Spot Measurement Ratios
The Distance to Spot (D:S) ratio is a fundamental specification of infrared thermometers that determines the size of the area being measured relative to the distance from the target. For example, a thermometer with a 12:1 ratio will measure a circle with a 1-inch diameter when held 12 inches away. In a kitchen setting, failing to account for this ratio often leads to "averaging" errors, where the sensor picks up the temperature of the surrounding burner or oven wall instead of the specific pan surface intended.
To optimize measurements, the chef must maintain a distance that ensures the target surface completely fills the sensor's field of view. This is particularly important when measuring small items like individual scallops or small saucepans. Follow these steps for the most accurate spot readings:
- Identify the D:S ratio printed on the side of the device.
- Calculate the maximum distance allowed to keep the "spot" within the boundaries of the cookware.
- Move closer if the target is small to ensure no background heat interference.
- Hold the device perpendicular to the surface to prevent elliptical distortion of the measurement area.
Calibrating Digital Sensors for Frying Accuracy
Precision in deep-frying is the difference between a crisp, golden exterior and a grease-laden, soggy product. Digital sensors, while highly accurate, can drift over time due to thermal shock, moisture exposure, or battery depletion. Regular calibration is mandatory in professional environments to maintain consistency. The two most common methods are the ice point method and the boiling point method. The ice point is generally preferred as it is less affected by altitude and atmospheric pressure changes.
For frying specifically, a sensor that is off by even five degrees can cause oil to drop below the recovery temperature when food is added, or worse, reach the flash point. Calibration should be documented in a kitchen log to ensure compliance with health and safety standards. Consider these primary calibration checkpoints:
- Ice Point: Submerge the probe in a 50/50 slush of crushed ice and water; it should read 32°F (0°C).
- Boiling Point: Submerge in boiling water; adjust for altitude (212°F or 100°C at sea level).
- Electronic Offset: Use the "Cal" button on digital units to lock in the corrected temperature.
Comparing Cast Iron and Stainless Heat Profiles
The thermal behavior of cookware materials significantly impacts surface temperature management. Cast iron is prized for its high volumetric heat capacity, meaning it retains a massive amount of energy. However, it is a poor thermal conductor, often resulting in significant "hot spots" directly above the heat source. In contrast, stainless steel-especially when layered with aluminum or copper cores-distributes heat much more evenly across the surface but loses that heat rapidly when cold food is introduced.
Understanding these profiles allows a chef to predict how the surface temperature will fluctuate during the cooking cycle. Measuring these surfaces requires different approaches; the seasoned, dark surface of cast iron is ideal for infrared measurement, whereas the reflective nature of stainless steel often requires a probe or the "oil spot" method for an accurate reading. The following table highlights the thermal differences:
| Feature | Cast Iron | Stainless Steel (Tri-ply) |
|---|---|---|
| Thermal Conductivity | Low | High |
| Heat Retention | Excellent | Moderate |
| Preheat Time | Long | Short |
| Surface Uniformity | Poor | Excellent |
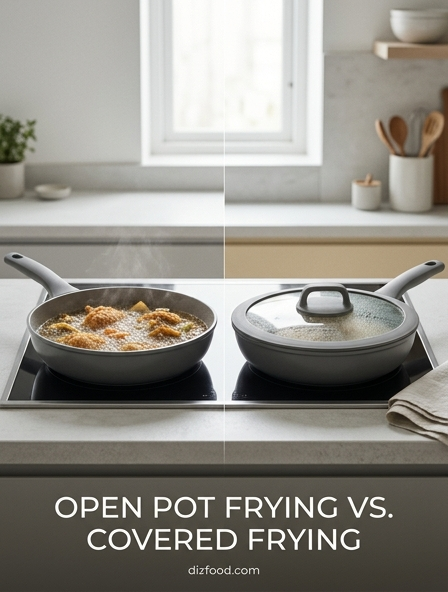
Measuring Oil Surface vs Internal Temperatures
When heating oil for frying or sautéing, a significant temperature gradient often exists between the surface and the base of the vessel. Convection currents cause hotter, less dense oil to rise, but evaporative cooling at the surface can lead to a deceptive infrared reading. If a chef relies solely on a surface reading, they may find the internal oil temperature is significantly higher, leading to premature scorching or the reaching of the smoke point once the oil is agitated.
To manage this, it is essential to employ a dual-measurement technique. An infrared thermometer provides a quick safety check, but a physical probe must be used to stir the oil and measure the bulk temperature. This ensures the entire volume of fat is at the target temperature. To accurately assess oil readiness, follow these protocols:
- Agitate the oil with a metal whisk or spoon to break up thermal layers.
- Insert a probe thermometer into the center of the liquid, avoiding contact with the metal bottom.
- Verify the surface temperature with an IR gun for comparison.
- Wait for the temperature to stabilize after adding food items.
Managing Industrial Heat Mapping Techniques
In industrial kitchen settings, managing a single point of heat is insufficient; instead, chefs and engineers must utilize heat mapping to understand the thermal landscape of entire cooklines. Heat mapping involves using thermal imaging cameras or multi-point sensor arrays to visualize how heat migrates across grills, through ovens, and into holding zones. This data allows for the identification of "dead zones" where food might fall into the danger zone (40°F - 140°F) or hot spots that cause uneven cooking.
By analyzing a thermal map, kitchen managers can optimize the placement of equipment and the workflow of staff. For instance, placing a cold prep station directly adjacent to a high-heat charbroiler can drastically affect the surface temperatures of ingredients. Industrial heat mapping strategies include:
- Infrared Thermography: Capturing visual heat signatures of the entire line during peak hours.
- Data Logging: Using Bluetooth sensors to track temperature fluctuations over a 24-hour cycle.
- Spatial Averaging: Calculating the mean temperature across large flat-top griddles to ensure consistency.
Adjusting for Reflectivity on Polished Metals
The primary obstacle to accurate infrared temperature measurement in modern kitchens is reflectivity. Polished metals, such as new stainless steel sauté pans or chrome-plated griddles, act like mirrors for infrared radiation. When you point an IR thermometer at a shiny pan, the sensor is often measuring the reflection of the ceiling lights or the chef's own body heat rather than the pan's thermal energy. This results in dangerously low readings that could lead to undercooking or equipment damage.
To circumvent this physical limitation, chefs must modify the surface to create a "blackbody" or high-emissivity target. This allows the IR thermometer to capture the true kinetic energy of the metal. Effective methods for adjusting reflectivity include:
- Adding a small amount of cooking oil to the pan; the oil has a high emissivity and provides a stable reading.
- Placing a small piece of matte electrical tape or specialized high-temp "emissivity tape" on the surface.
- Focusing the measurement on a seasoned area or a duller portion of the metal.
- Using a contact probe to verify the IR reading until a baseline offset is established.
Essential Maintenance for Thermal Measurement Tools
Thermal measurement tools are precision instruments that require rigorous maintenance to ensure they remain within specified tolerances. In a kitchen, these devices are routinely exposed to airborne grease, steam, and extreme temperature swings, all of which can degrade sensor accuracy. The lens of an infrared thermometer is particularly vulnerable; a thin film of grease can scatter infrared waves, resulting in inconsistent data. Similarly, probe sensors can develop "pitting" or carbon buildup that slows response times.
A structured maintenance schedule prevents equipment failure during critical service periods. Keeping tools clean and calibrated is not just about culinary quality; it is a fundamental aspect of HACCP (Hazard Analysis and Critical Control Points) compliance. Key maintenance tasks include:
- Lens Cleaning: Wiping IR sensors with a soft cloth and medical-grade alcohol to remove grease.
- Probe Sanitization: Using alcohol wipes after every insertion to prevent cross-contamination.
- Battery Management: Replacing batteries at 20% power to prevent low-voltage sensor drift.
- Housing Inspection: Checking for cracks in the casing that could allow moisture to enter the circuitry.
Best Practices for High Temperature Industrial Frying
Industrial frying operations require a sophisticated understanding of oil chemistry and thermal dynamics. At high temperatures, oil undergoes rapid oxidation, polymerization, and hydrolysis. Maintaining a consistent surface and internal temperature is vital to extending the life of the frying medium and ensuring product consistency. Fluctuations in temperature can cause the oil to break down into polar compounds, which negatively affect flavor and safety. Monitoring the "smoke point" is the priority, as exceeding it can lead to spontaneous combustion.
To manage high-volume frying, operators should utilize integrated thermal management systems. These systems combine automated heaters with submerged sensors to maintain a narrow temperature band. The following table provides a guideline for optimal frying ranges for various high-volume products:
| Product Type | Optimal Temp Range | Critical Smoke Point |
|---|---|---|
| Standard Potato Fries | 345°F - 375°F | 450°F (Peanut Oil) |
| Breaded Chicken | 325°F - 350°F | 400°F (Canola Oil) |
| Tempura/Light Batter | 350°F - 380°F | 410°F (Corn Oil) |
| Doughnuts/Pastries | 360°F - 375°F | 440°F (Sunflower Oil) |

Comments