
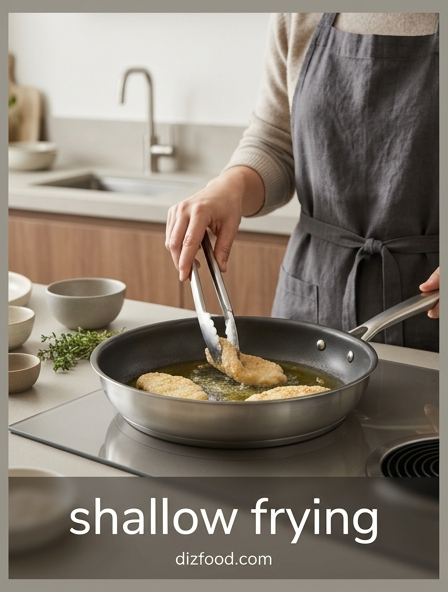
Choosing the Best Skillet for Shallow Frying
The success of shallow frying begins with the vessel itself. Unlike deep frying, which requires volume, shallow frying relies on consistent contact between the food and a thin layer of hot fat. Therefore, a heavy-bottomed skillet is non-negotiable for even heat distribution. Cast iron is often considered the gold standard for this technique because its high thermal mass prevents the oil temperature from plummeting when cold ingredients are added. Carbon steel is another excellent alternative, offering similar heat retention properties with a slightly lighter weight.
If you prefer stainless steel, ensure it features a multi-clad construction with an aluminum or copper core to avoid hot spots that can scorch your breading. While non-stick pans are convenient for delicate items like fish, they often struggle to achieve the intense, crusty sear desired in shallow frying. Consider the following attributes when making your choice:
- High flared sides to contain oil splatter while allowing steam to escape.
- A wide, flat cooking surface to maximize the number of items fried per batch.
- A sturdy, heat-resistant handle for safe maneuvering on the stovetop.
- Compatibility with your specific heat source, such as induction or gas.
Selecting Oils with High Smoke Points
In shallow frying, the oil is subjected to sustained high temperatures, often ranging between 350°F and 375°F. Using an oil with a low smoke point, such as extra virgin olive oil or unrefined coconut oil, will result in the fat breaking down prematurely. This degradation produces acrid flavors, unpleasant odors, and potentially harmful compounds. Instead, chefs prioritize neutral-flavored oils that can withstand the heat without overshadowing the natural taste of the ingredients. The table below highlights common choices for this cooking method:
| Oil Type | Smoke Point | Best Use |
|---|---|---|
| Avocado Oil | 520°F | High-heat searing and frying |
| Peanut Oil | 450°F | Crispy poultry and stir-fry |
| Canola Oil | 400°F | General breaded cutlets |
| Grapeseed Oil | 420°F | Delicate fish and vegetables |
Always ensure the oil is fresh; reused oil has a significantly lower smoke point and may impart "off" flavors from previous cooking sessions. For most shallow frying applications, aim for a depth of approximately half the thickness of the food being cooked.
Achieving the Perfect Oil Temperature
Temperature control is the most critical variable in achieving a crisp, non-greasy exterior. If the oil is too cold, the food will absorb the fat before the crust can set, leading to a soggy texture. Conversely, if the oil is too hot, the exterior will burn before the interior is safely cooked. Professional cooks often use an infrared thermometer for precision, but there are several manual ways to gauge readiness. To ensure your oil is ready for frying, follow these steps:
- Preheat the dry skillet over medium-high heat before adding the oil.
- Add the oil and wait for it to shimmer and move fluidly across the pan.
- Test the heat by dipping the end of a wooden spoon into the oil; steady, small bubbles should form immediately around the wood.
- Alternatively, drop a single breadcrumb or a small piece of bread into the fat; it should sizzle and turn golden brown within 30 to 60 seconds.
- Adjust the burner throughout the process to compensate for the cooling effect of adding food.
Essential Food Preparation and Breading Tips
Moisture is the enemy of a perfect fry. Before any seasoning or breading is applied, use paper towels to pat the food thoroughly dry. Any surface moisture will turn to steam during frying, which can cause the breading to slough off or prevent the Maillard reaction from occurring. For breaded items like schnitzel or eggplant parmesan, the standard three-step dredging process ensures maximum adhesion and crunch. This process involves coating the item in flour to absorb surface moisture, dipping it in an egg wash to act as an adhesive, and finally pressing it into breadcrumbs or panko.
Consistency in the size and thickness of your ingredients is equally important. Thinly pounded cutlets cook rapidly and evenly, whereas irregular chunks may result in some sections being overcooked while others remain raw. Consider these preparation strategies:
- Season the protein directly before breading to ensure flavors are locked in.
- Allow breaded items to rest on a parchment-lined tray for 10 minutes before frying to help the coating set.
- Use a cooling rack to hold prepared items if frying in multiple large batches.
- Avoid seasoning the flour too heavily with dried herbs that may burn in the hot oil.
Managing Pan Capacity to Avoid Crowding
One of the most common mistakes in shallow frying is trying to cook too many items at once. Crowding the pan leads to a drastic drop in oil temperature. When the temperature falls, the frying process transitions into steaming. Instead of a rapid sear that locks out moisture, the food begins to release its internal juices, which further lowers the temperature and results in a pale, greasy, and limp crust. Maintaining space between items allows the oil to circulate freely, ensuring that the sides of the food are also exposed to direct heat.
Ideally, there should be at least a half-inch of space between each piece of food. If you are cooking for a large group, it is far better to fry in batches. Keep the oven on a low setting (around 200°F) and place finished items on a wire rack inside the oven to maintain their temperature and crispness while you finish the remaining portions. Always allow the oil a minute or two to return to the target temperature between batches, as the previous set of food will have siphoned off a significant amount of heat energy.
Mastering the Art of the Flip
Flipping the food is a pivotal moment in shallow frying that requires both timing and safety. The goal is to turn the item only once to minimize oil absorption and preserve the integrity of the crust. Flipping too early can cause the breading to stick to the pan or tear away from the protein. You will know it is time to flip when the edges of the food visible above the oil line begin to turn a deep golden color and the item moves freely when the pan is gently shaken. To execute a safe and effective flip, use the following procedure:
- Use a wide, slotted spatula or sturdy kitchen tongs that provide a secure grip.
- Gently lift the edge to check the color of the underside before committing to the turn.
- Always flip the food away from your body to prevent hot oil from splashing toward you.
- Lay the item back into the oil slowly rather than dropping it.
- Monitor the second side closely, as it typically cooks faster than the first since the food is already partially heated.
Recognizing the Signs of Golden Brown Doneness
Visual cues are your primary indicator of success, often referred to in the culinary world as "G.B.D." (Golden Brown and Delicious). However, color alone can sometimes be deceptive, especially if the oil was too hot and the exterior browned prematurely. You must also listen to the sound of the fry. A vigorous, loud sizzle indicates that moisture is still escaping from the food, meaning the interior is likely still cooking. As the food nears doneness, the sizzle becomes quieter and the bubbles become smaller and less frequent, signaling that the internal moisture has stabilized.
For thicker items like chicken breasts or pork chops, the only way to be certain of doneness is by using an instant-read thermometer. Relying on "poke tests" or cutting into the meat can release essential juices, making the final product dry. Aim for the safe internal temperature recommended for the specific protein, keeping in mind that carry-over cooking will continue to raise the temperature by a few degrees after the item is removed from the skillet. A perfect crust should feel firm and brittle when tapped lightly with a utensil, yielding a hollow sound that confirms a lack of sogginess.
Effective Draining and Resting Techniques
Once the food reaches the desired level of doneness, the way it is handled in the first sixty seconds is vital for maintaining its texture. Many home cooks make the mistake of placing fried items directly onto a flat plate or piling them on top of one another. This creates a steam pocket underneath the food, which quickly turns the bottom crust soft and mushy. The priority should be removing excess surface oil while allowing air to circulate around the entire surface area. Follow these best practices for post-fry handling:
- Transfer the food immediately to a wire cooling rack set over a baking sheet.
- If using paper towels, blot the top of the food gently, but do not let it sit on the saturated paper for more than a few seconds.
- Season the food with a pinch of fine salt immediately after removing it from the oil; the residual heat helps the salt adhere.
- Allow the food to rest for 2 to 4 minutes before serving to let the internal juices redistribute, ensuring a moist interior.
- Never cover fried food with a lid or foil, as this traps steam and destroys the crispness you worked hard to achieve.
Troubleshooting Common Shallow Frying Mistakes
Even experienced cooks encounter issues when shallow frying. The key to improvement is identifying the specific cause of a failure. Most problems stem from an imbalance between heat, time, and preparation. For instance, if the breading falls off in the pan, it usually indicates that the food was too wet before coating or that it was moved too much before the crust had a chance to set. Oily, heavy food is almost always the result of low oil temperature or overcrowding the skillet. The following table identifies common symptoms and their solutions:
| Symptom | Probable Cause | Solution |
|---|---|---|
| Burnt crust, raw inside | Oil temperature too high | Lower heat; use a thermometer |
| Soggy, greasy crust | Oil temperature too low | Preheat oil longer; fry in batches |
| Breading falling off | Moisture under coating | Pat dry; allow breading to set |
| Acrid, bitter taste | Oil has broken down | Use oil with higher smoke point |
By adjusting your technique based on these observations, you can consistently produce restaurant-quality results at home.
Maintaining Your Cookware for Consistent Results
The condition of your skillet directly impacts the quality of your shallow frying. Over time, high-heat frying can lead to the buildup of carbonized oil, known as polymerizing, which creates a sticky residue. For stainless steel, this usually requires a thorough scrubbing with a specialized cleanser to restore the smooth surface. For cast iron and carbon steel, maintenance involves preserving the "seasoning"-a layer of baked-on fat that provides natural non-stick properties. After frying, avoid using harsh soaps that can strip this layer; instead, rinse with hot water and use a stiff brush.
Always dry your pans immediately to prevent rust. For seasoned pans, apply a very thin coat of neutral oil and heat the pan until it lightly smokes before storing. Additionally, check your pans for warping; a pan that does not sit flat on the burner will have uneven oil depth and inconsistent heat zones. Proper care ensures that your cookware remains a reliable tool for years, providing the stable environment necessary for the delicate balance of heat and fat that defines the art of shallow frying.

Comments