Preparing Your Kitchen Sink for Installation
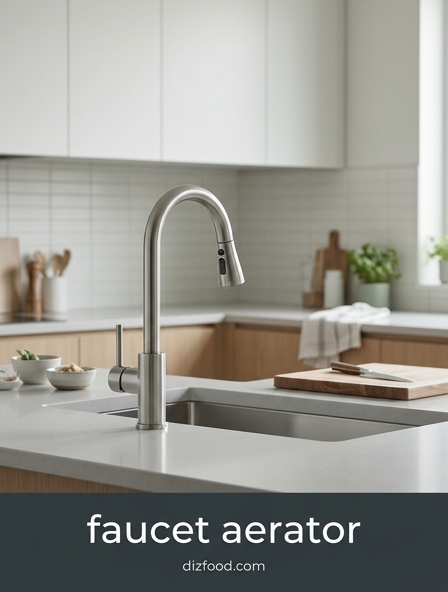
Before beginning the installation of a portable dishwasher adapter, it is essential to prepare the kitchen sink area to ensure a smooth and safe process. Start by clearing the sink basin of any dishes, debris, or standing water. A clean workspace allows for better visibility and prevents small components, such as washers or gaskets, from being lost down the drain. It is highly recommended to plug the drain with a stopper or place a small towel over the opening to catch any falling parts during the disassembly of the faucet aerator.
In addition to cleaning the sink, gather the necessary tools and materials. While most adapters are designed for hand-tightening, you may need a pair of pliers or a small wrench to remove an old, mineral-encrusted aerator. Ensure the surrounding countertop is dry to prevent slipping during the procedure. Proper preparation involves the following steps:
- Clear the workspace of all kitchenware and clutter.
- Seal the drain to prevent loss of small mechanical parts.
- Identify the hot and cold water valves under the sink for emergency shut-off.
- Wipe down the faucet neck to remove grease or soap residue.
Checking Faucet Compatibility for Aerator Adapters
Not every kitchen faucet is designed to accept a portable dishwasher adapter. Most standard faucets feature a removable aerator that exposes either internal (female) or external (male) threads. However, modern designs such as pull-out sprayers, gooseneck faucets with integrated LEDs, or faucets with non-circular spouts often lack the threading required for a secure connection. Before purchasing an adapter, you must determine if your faucet head is compatible with standard plumbing sizes.
Standardization in the United States typically follows specific thread measurements. If your faucet has a spray wand that detaches from the main body, it generally cannot support the weight or the backpressure of a dishwasher hose. Refer to the following table to identify common thread configurations:
| Thread Type | Visual Identification | Compatibility |
|---|---|---|
| Male Threads | Threads are on the outside of the faucet tip. | Highly Compatible |
| Female Threads | Threads are located inside the faucet spout. | Highly Compatible |
| Pull-Out Spray | Flexible hose attached to the spray head. | Not Compatible |
Removing the Existing Faucet Aerator
To install a dishwasher adapter, the original aerator must first be removed from the end of the faucet spout. Over time, calcium and lime deposits can build up within the threads, making the aerator difficult to unscrew by hand. If the aerator is stubborn, avoid using excessive force that could bend the faucet neck. Instead, wrap a cloth around the aerator to protect the finish and use a wrench to gently break the seal of the mineral deposits. Once loosened, the assembly should unscrew easily in a counter-clockwise direction.
After removal, take a moment to inspect the condition of the faucet threads. It is common to find grit or old rubber fragments lodged inside. Cleaning these threads ensures a watertight seal with the new adapter. Follow these steps for successful removal:
- Grip the aerator firmly and turn counter-clockwise.
- Use a cushioned wrench if hand-turning is insufficient.
- Remove any old rubber washers that may be stuck inside the spout.
- Scrub the internal and external threads with a small brush and white vinegar.
- Dry the area thoroughly before proceeding to the adapter selection.
Selecting the Right Size Faucet Adapter
Choosing the correct adapter size is the most critical step in preventing leaks and ensuring the unicouple stays attached during a wash cycle. Kitchen faucet aerators typically come in three sizes: regular, junior, and tom thumb. To determine the size without a professional gauge, you can use common household coins. A regular-sized aerator is approximately the diameter of a nickel, while a junior-sized aerator is closer to the diameter of a dime. If the threads do not match perfectly, the high water pressure required for the dishwasher will cause the adapter to blow off the faucet.
In addition to the diameter, consider the thread pitch. Most portable dishwasher adapters are dual-threaded, meaning they have male threads on the top and female threads further down the barrel to accommodate various faucets. Ensure your selection includes:
- Correct diameter matching (15/16" or 55/64" are common).
- Appropriate thread depth for the faucet spout.
- High-quality brass construction to withstand heat and pressure.
- Compatibility with the specific locking mechanism of your dishwasher's unicouple.
Installing the Portable Dishwasher Adapter
Once you have identified the correct size, the installation of the adapter serves as the bridge between your plumbing and the appliance. Begin by placing the rubber washer inside the adapter. This gasket is vital; without it, water will spray from the connection points regardless of how tight the adapter is screwed on. Align the adapter with the faucet threads, ensuring it is level to avoid cross-threading, which can permanently damage the faucet. Screw the adapter onto the faucet by hand, turning clockwise until it is snug.
While it may be tempting to use a tool to tighten the adapter significantly, hand-tightening is usually sufficient for a leak-proof seal. Over-tightening can crush the rubber washer or make it nearly impossible to remove the adapter in the future if you need to switch back to a standard aerator. Once installed, the adapter remains on the faucet permanently, allowing the dishwasher to be connected and disconnected in seconds. Verify that the adapter sits flush against the spout and that there are no visible gaps where the gasket should be compressed.
Connecting the Unicouple to the Faucet
The unicouple is the large connector at the end of the dishwasher hoses that handles both the water intake and the drainage. To connect it, pull down on the outer locking collar of the unicouple while pushing the connector upward onto the faucet adapter. Once the unicouple is seated fully against the adapter, release the collar. You should hear a distinct "click" or feel the collar snap back into the locked position. To ensure a secure fit, give the unicouple a gentle tug downward; it should remain firmly attached to the faucet.
It is important to manage the hoses during this step to prevent them from pulling the faucet at an awkward angle. Follow this sequence for a safe connection:
- Inspect the unicouple for any debris in the intake filter.
- Depress the locking collar with your thumb and forefinger.
- Push the unit straight up onto the adapter until it bottoms out.
- Release the collar to engage the locking ball bearings.
- Check that the hoses are not twisted or under extreme tension.
Attaching and Securing Water Hoses
With the unicouple securely attached to the faucet, you must focus on the management of the intake and drain hoses. These hoses are often bundled together in a protective sleeve. Ensure that there are no sharp kinks or loops in the lines, as kinks can restrict water flow into the dishwasher or prevent the dirty water from draining correctly, leading to a flooded kitchen. The drain hose portion of the unicouple usually features a small exit port that directs wastewater into the sink basin. Position the hoses so that this port is pointed directly down into the drain area.
To maintain a safe environment, observe the following hose guidelines:
- Keep hoses away from hot stove surfaces or sharp cabinet edges.
- Ensure the drain port is clear of any obstructions in the sink.
- Check that the dishwasher is positioned close enough to the sink to avoid stretching the hoses.
- Verify that the weight of the hoses is not putting excessive lateral pressure on the faucet spout.
Testing for Leaks and Water Pressure
Before starting a full wash cycle, you must test the integrity of the connection. Slowly turn on the hot water faucet. Gradual pressure increase is better than a sudden blast, which can shock the gaskets. Watch the area where the adapter meets the faucet and where the unicouple meets the adapter. If you see a fine mist or dripping, the connection is likely loose or a washer is misaligned. Portable dishwashers also feature a red pressure-relief button on the unicouple; pressing this momentarily can help stabilize the pressure and confirm water is flowing into the assembly.
Use the following table to troubleshoot common leak symptoms observed during the initial pressure test:
| Symptom | Likely Cause | Correction |
|---|---|---|
| Leaking above adapter | Loose fit or missing washer | Tighten adapter or add gasket |
| Spray from unicouple collar | Unicouple not fully seated | Re-seat until collar clicks |
| Steady drip from hose sleeve | Internal hose crack | Replace hose assembly |
Operating the Dishwasher Safely
Operating a portable dishwasher requires attention to the unique connection at the kitchen sink. Always ensure the water temperature has reached its peak by running the kitchen faucet until the water is hot before snapping on the unicouple. This ensures the dishwasher starts with hot water, improving cleaning efficiency. Once the cycle begins, do not attempt to disconnect the hoses or move the dishwasher. The internal water valves will open and close throughout the cycle, creating pressure fluctuations that the adapter is designed to handle only when fully locked.
Safety considerations include:
- Never leave the house while the portable dishwasher is running.
- Ensure the power cord is plugged into a grounded (GFCI) outlet.
- Keep the sink area clear so the drain water can flow freely without splashing.
- Avoid using the sink for other tasks while the dishwasher is draining, as the water is near boiling and may contain harsh detergents.
Disconnecting and Maintaining the Faucet Connection
When the dishwasher cycle is complete, the system remains under pressure. You must release this pressure before attempting to remove the unicouple. Turn off the water faucets first. Then, press the red pressure-relief button on the side of the unicouple until the water flow stops. Once the pressure is neutralized, pull down on the locking collar and slide the unicouple off the adapter. It is common for a small amount of residual water to drain from the hoses, so keep them over the sink during this process.
To maintain the longevity of your faucet connection and dishwasher, follow these maintenance steps:
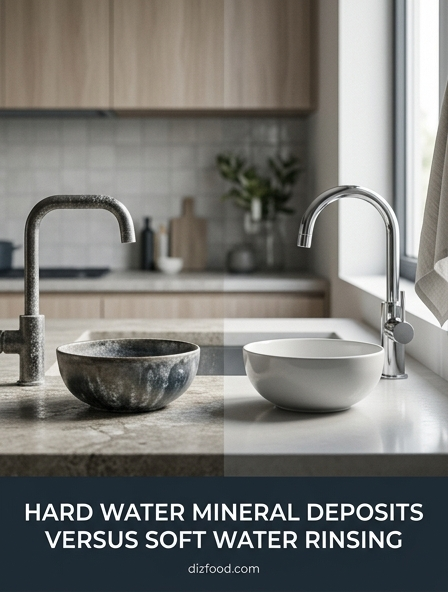
- Wipe the adapter threads occasionally to remove mineral buildup.
- Inspect the rubber gaskets in the unicouple for cracks or flattening.
- Store the hoses inside the dishwasher's designated compartment to prevent tripping.
- Periodically clean the small screen filter inside the unicouple to maintain high water pressure and prevent clogs.


Comments