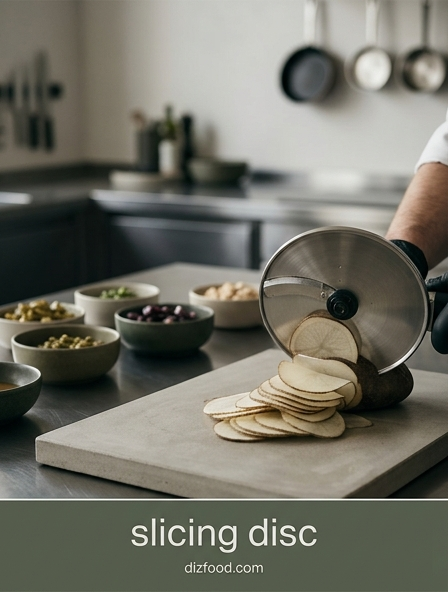
Understanding Slicing Disc Thickness Settings
The versatility of a food processor often hinges on the adjustable nature of its slicing disc. Most modern kitchen appliances feature discs that can be calibrated to specific millimeter measurements, allowing for precision that manual knife work rarely achieves. These settings typically range from paper-thin slices at 1mm to substantial chunks at 6mm or more. Selecting the correct thickness is the first step toward professional-grade food preparation, as the thickness dictates the texture and appearance of the final dish.
| Thickness | Common Uses | Typical Setting |
|---|---|---|
| Thin (1mm - 2mm) | Potato chips, radishes, shaved onions | Fine |
| Medium (3mm - 4mm) | Cucumber salads, au gratin potatoes | Standard |
| Thick (5mm - 7mm) | Zucchini rounds, bell pepper rings | Coarse |
When using an adjustable disc, always ensure the locking mechanism is engaged before starting the motor. For machines with fixed-width discs, you may need to swap the entire attachment to change the depth. Understanding these increments ensures your ingredients are perfectly tailored for their specific culinary application, whether you are aiming for a delicate garnish or a hearty vegetable component.
Preparing Vegetables for Perfect Feed Tube Fit
To maximize the efficiency of your slicing disc, the physical preparation of the produce is just as critical as the machine settings. Most food processors come with a vertical feed tube that dictates the maximum size of the ingredients. If a vegetable is too large, it can jam the motor or result in uneven, jagged cuts. Proper preparation involves trimming the ends and squaring off round vegetables to provide a stable base during the slicing process.
- Trimming: Remove stems and root ends to prevent tough fibers from tangling in the blade.
- Sizing: Cut large items like eggplants or cabbages into halves or quarters that slide easily through the chute.
- Orienting: Place the flat side of the vegetable against the disc to ensure the first slice is clean.
- Peeling: For vegetables with waxy or thick skins, such as certain cucumbers or squashes, peeling helps the blade bite into the flesh immediately.
By taking a few extra moments to prep your vegetables, you reduce the strain on your food processor's motor and significantly improve the aesthetic quality of your slices. This preparation ensures that every piece of produce is processed safely and effectively, preventing common mishaps like lopsided rounds or incomplete cuts.
Essential Safety Tips for Food Processor Slicing
Operating a food processor with a slicing disc requires strict adherence to safety protocols to prevent injury. The blades on these discs are exceptionally sharp and rotate at high speeds, making them capable of causing serious harm if handled incorrectly. The primary rule of safety is to never use your fingers to push food down the feed tube. Instead, always utilize the plastic pusher provided by the manufacturer to guide ingredients toward the spinning disc.
- Always unplug the appliance before changing discs or reaching into the work bowl.
- Wait for the blade to come to a complete stop before opening the lid.
- Store discs in protective sleeves or dedicated storage cases to avoid accidental cuts when reaching into cabinets.
- Check that the disc is securely seated on the drive shaft before turning the power on.
Furthermore, be mindful of the "pulse" versus "continuous" settings. Using the pulse function for softer vegetables can give you more control and prevent over-processing. By maintaining a clear workspace and following these fundamental safety guidelines, you can enjoy the time-saving benefits of your kitchen equipment without unnecessary risk. Proper handling ensures that the slicing disc remains a helpful tool rather than a hazard.
Achieving Consistent Vegetable Rounds Every Time
Consistency is the hallmark of a skilled cook, and the slicing disc is the ultimate tool for achieving uniformity. To get identical rounds of carrots, cucumbers, or potatoes, the secret lies in the amount of pressure applied to the food pusher. If you apply inconsistent pressure, the blade will bite into the vegetable at different depths, resulting in slices that vary in thickness. Maintaining a steady, firm downward force ensures that each rotation of the blade removes an equal amount of material.
The speed at which you feed the produce also plays a role. Feeding the ingredients too slowly can cause the blade to scrape rather than cut, while feeding too quickly might stall the motor or lead to torn edges. For the best results, pack the feed tube tightly so the vegetables cannot tilt or wobble during the process. This is particularly important for long, thin items like celery or asparagus. When the tube is full, the vegetables support each other, keeping them vertical and ensuring perfectly circular rounds. Mastering this balance of pressure and packing will result in professional-quality prep work that enhances the visual appeal of any salad, tray, or side dish you prepare.
Creating Elegant Vegetable Ribbons with Ease
Vegetable ribbons add a touch of sophistication to salads and pasta alternatives, and they are surprisingly easy to create using a slicing disc. Rather than feeding vegetables vertically through the chute, ribbons are achieved by positioning the produce horizontally. This allows the blade to shave long, wide strips from the length of the vegetable. This technique works best with firm, elongated produce such as zucchini, carrots, parsnips, and large radishes.
- Horizontal Placement: If your food processor has a wide-mouth feed tube, lay the vegetable flat against the disc.
- Selection: Choose straight vegetables with a consistent diameter for the most uniform ribbons.
- Thin Settings: Use the thinnest setting available (1mm or 2mm) to ensure the ribbons are flexible and delicate.
Once sliced, these ribbons can be blanched briefly for a "pasta" dish or marinated in citrus and oil for a vibrant cold salad. The slicing disc handles this task in seconds, a fraction of the time it would take with a handheld mandoline or peeler. The resulting ribbons are not only beautiful but also have a uniform surface area that absorbs dressings and sauces more effectively, leading to a better flavor profile in every bite.
Why Uniform Slices Ensure Even Cooking
The primary culinary benefit of using a slicing disc is the guarantee of even cooking. When vegetable slices vary in thickness, the thinner pieces often overcook and become mushy or burnt before the thicker pieces are even tender. This is particularly problematic in dishes like scalloped potatoes, ratatouille, or homemade vegetable chips, where heat distribution must be identical across all components to achieve a harmonious texture. Uniformity ensures that the internal temperature of every slice rises at the same rate.
Furthermore, uniform slices provide a consistent surface area for browning and caramelization. In a sauté pan or on a roasting sheet, slices of the same thickness will develop a golden-brown crust simultaneously. This predictability allows the cook to follow precise timing in recipes, reducing the need for constant monitoring and manual testing. Beyond the functional benefits, there is an undeniable aesthetic advantage; a dish where every ingredient is perfectly sized looks more appetizing and professional. Ultimately, the slicing disc is not just a time-saver; it is a critical tool for heat management and texture control in the kitchen, ensuring that your final result is cooked to perfection throughout.
Maximizing Kitchen Efficiency with Slicing Discs
Efficiency in the kitchen is often measured by how quickly one can move from prep to the actual cooking process. Manual slicing with a chef's knife is a foundational skill, but it cannot compete with the raw speed of a food processor's slicing disc. For high-volume tasks-such as prepping five pounds of onions for French onion soup or slicing a dozen potatoes for a large gratin-the disc can complete the work in under a minute. This massive reduction in prep time allows home cooks and professional chefs alike to focus on seasoning and technique.
To truly maximize efficiency, it is helpful to organize your workflow. Process all your sliced ingredients in one go before switching to other attachments like the shredding disc or the multipurpose blade. Because the slicing disc produces very little mess compared to a cutting board, cleanup is often faster as well. Most modern discs are dishwasher safe, meaning the time saved extends beyond the cooking itself. For meal prepping, the slicing disc is indispensable; it allows you to process an entire week's worth of vegetables for stir-frys or salads in a single session, ensuring that healthy meals are always within reach regardless of your daily schedule.
Best Vegetables for Food Processor Slicing
While a slicing disc can handle a wide variety of produce, it performs exceptionally well with firm, dense vegetables. These items offer enough resistance to the blade to ensure clean cuts without bruising or tearing. Root vegetables and cruciferous plants are the primary candidates for this tool. On the other hand, extremely soft or overripe produce, like very soft tomatoes, may get crushed rather than sliced. Choosing the right ingredients is key to maintaining the integrity of the vegetable's structure.
- Potatoes: Whether for chips or gratins, all varieties slice cleanly and hold their shape.
- Brussel Sprouts: Using a thin setting creates a shaved texture perfect for slaw.
- Cabbage: The disc acts as a high-speed mandoline for shredding cabbage into fine ribbons for sauerkraut.
- Firm Cucumbers: Ideal for pickling or refreshing salads when sliced at medium thickness.
- Carrots: Provides perfect rounds or long planks depending on orientation.
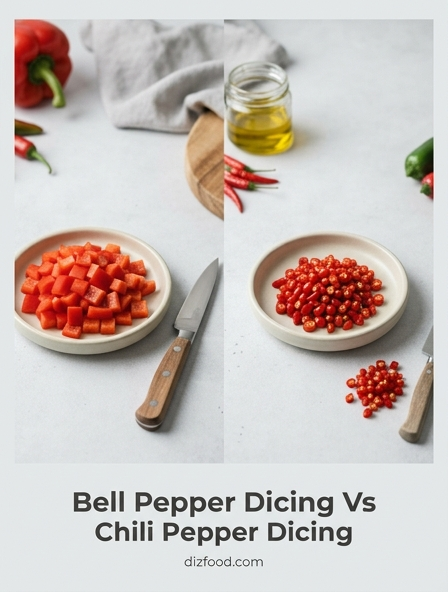
Bell peppers and onions also work well, provided they are fresh and crisp. For best results with softer items, chilling them in the refrigerator for an hour before slicing can help firm up the fibers, allowing the blade to pass through more cleanly. By selecting the appropriate vegetables, you ensure that the slicing disc operates at peak performance, yielding beautiful results every time.
Troubleshooting Common Slicing Disc Challenges
Even with high-quality equipment, users may occasionally encounter issues when using a slicing disc. Most problems stem from either ingredient preparation or the mechanical setup of the processor. One common issue is "wedging," where the vegetable tips over during slicing, resulting in uneven, diagonal pieces. This is usually caused by not packing the feed tube tightly enough. Another frequent challenge is the buildup of food between the disc and the lid, which can happen if the produce is too soft or if the motor is not running at the correct speed.
| Issue | Possible Cause | Solution |
|---|---|---|
| Uneven Slices | Inconsistent pressure | Apply steady, firm force with the pusher. |
| Tearing/Mashing | Dull blade or soft produce | Chill produce or sharpen/replace the disc. |
| Clogging | Feeding too fast | Slow down the feed rate and clear the lid. |
If you notice the motor straining, immediately stop the machine and check for large pieces of food jammed under the blade. Regularly clearing the work bowl is also important; if the bowl becomes too full, the sliced food will back up into the disc, preventing it from rotating freely. Addressing these small issues promptly will prevent mechanical wear and ensure a smooth slicing experience.
Maintaining Your Slicing Disc for Longevity
A slicing disc is a precision instrument that requires proper care to maintain its sharpness and structural integrity. Over time, exposure to moisture and acidic food residues can dull the blade or cause spotting on the stainless steel surface. To prevent this, it is recommended to wash the disc immediately after use. While many are labeled as dishwasher safe, hand washing with a soft brush and mild detergent is the best way to preserve the fine edge of the blade, as the high heat and harsh chemicals in dishwashers can lead to premature dulling.
- Drying: Always dry the disc thoroughly with a clean towel immediately after washing to prevent rust spots.
- Storage: Avoid tossing the disc into a cluttered drawer where it can strike other metal utensils. Use a storage hub or the original packaging.
- Inspection: Periodically check the center plastic hub for cracks or signs of wear, as this part handles the torque of the motor.
- Sharpening: While difficult to do at home, some professional services can sharpen slicing discs if they become noticeably dull.
By treating the slicing disc as a high-quality knife rather than a simple plastic accessory, you extend its lifespan significantly. Proper maintenance ensures that the disc continues to provide effortless, clean cuts for years, making it a reliable staple in your kitchen arsenal.


Comments