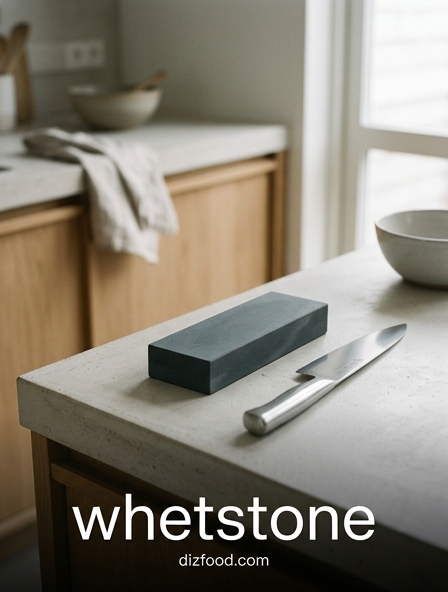
Understanding Whetstone Grit Levels
Selecting the appropriate grit level is the foundational step in effective knife sharpening. Grit refers to the density of the abrasive particles on the stone's surface, which determines how much steel is removed during each pass. Using the wrong grit can either lead to an inefficient sharpening process or cause unnecessary wear on your kitchen cutlery. Most home cooks benefit from a multi-stone setup or a combination stone that offers two different surfaces.
| Grit Category | Grit Range | Primary Function |
|---|---|---|
| Coarse | 200 - 400 | Repairing chips and reprofiling dull edges. |
| Medium | 800 - 2,000 | Standard sharpening and refining the edge. |
| Fine / Finishing | 3,000 - 8,000 | Polishing and achieving a razor-like finish. |
Lower numbers indicate a coarser texture, which is aggressive and removes material quickly. Conversely, higher numbers represent finer particles that smooth out the scratches left by coarser stones. For routine maintenance, a medium grit stone is often sufficient to restore a functional edge to a chef's knife. Understanding these distinctions ensures that you apply the correct amount of friction for the specific condition of your blade.
Preparing Your Stone for Optimal Results
Before any metal touches the stone, proper preparation is essential to prevent damage and ensure a smooth glide. Whetstones generally fall into two categories: soak stones and splash-and-go stones. Failing to hydrate a soak stone can lead to the pores becoming clogged with metal filings, effectively ruining the abrasive surface. Additionally, stability is paramount to safety; a stone that slides during use can cause serious injury or an uneven bevel.
- Submerge "soak stones" in water for 10 to 20 minutes until air bubbles stop rising.
- Place the stone on a non-slip base, such as a rubber holder or a damp kitchen towel.
- Keep a spray bottle or a small bowl of water nearby to lubricate the surface during use.
- Ensure the stone is level and clean of any dried slurry from previous sessions.
A well-hydrated stone creates a slurry-a mixture of water and released abrasive particles-which acts as a cutting paste. This slurry is vital for the sharpening process as it helps the stone cut more effectively. Always monitor the moisture level; if the stone looks dry or the blade begins to drag, add more water immediately. Proper setup transitions the task from a chore into a controlled, professional craft.
Finding the Correct Sharpening Angle
The angle at which the blade meets the stone determines the sharpness and durability of the edge. For most Western kitchen knives, an angle of 20 degrees per side is standard, providing a balance between a keen edge and structural integrity. Japanese knives, often made from harder steel, are typically sharpened at a shallower 15-degree angle. Maintaining this angle consistently throughout the entire stroke is the most challenging aspect for beginners to master.
- Use a stack of two pennies to gauge a 15-degree angle under the spine of the knife.
- Visualize the halfway point of a 90-degree angle (45) and then half of that again (22.5).
- Utilize plastic angle guides if you struggle to maintain a steady hand.
- Lock your wrist and move your entire arm to ensure the angle does not fluctuate.
Consistency is more important than achieving a perfect mathematical degree. Even a slight variation in the angle during a stroke can round over the edge, negating the work done. By focusing on muscle memory and periodic checks, you can ensure the bevel remains flat and uniform from the heel of the blade to the tip. This precision results in a professional-grade edge that glides through ingredients with minimal resistance.
Step by Step Sharpening Technique
The physical act of sharpening requires a rhythmic and controlled motion. It is not about speed, but rather the uniform application of pressure and coverage. You must treat the entire length of the blade equally to avoid creating "recurs" or uneven spots in the steel. Generally, you should work in sections, starting from the heel and moving toward the tip, ensuring that every millimeter of the edge receives the same number of strokes.
- Grip the handle with your dominant hand and place three fingers of your other hand on the blade's face near the edge.
- Apply moderate pressure on the forward stroke and release pressure as you pull back.
- Sweep the blade across the stone in an arc to ensure the curved tip is sharpened.
- Count your strokes to maintain symmetry on both sides of the knife.
- Check the edge frequently for the development of a burr.
As you progress, the sound of the steel against the stone will change, becoming smoother as the edge refines. It is crucial to use the full length of the whetstone to prevent hollowing out the center of the stone over time. By following a structured approach, you ensure that the geometry of the knife remains intact while removing just enough material to restore its peak performance.
Identifying and Removing the Burr
A burr, also known as a wire edge, is a microscopic flap of metal that forms on the opposite side of the edge you are currently sharpening. Its presence is the primary indicator that you have removed enough steel to reach the very apex of the blade. If you do not create a burr, the knife will never truly be sharp; if you do not remove it, the edge will feel "toothy" and dull quickly after its first use.
- Feel for the burr by gently sliding your thumb from the spine toward the edge on the opposite side.
- It should feel like a slight, rough snag or a microscopic lip along the entire length.
- Once felt, flip the knife and repeat the sharpening process on the other side until the burr flips back.
- Remove the final burr using very light, alternating strokes on a high-grit stone.
The removal process, often called de-burring, requires a delicate touch. Using too much pressure at this stage can simply fold the burr back and forth rather than breaking it off cleanly. A clean de-burring process leaves the edge perfectly centered and incredibly sharp. This stage marks the transition from heavy metal removal to the refinement of the cutting surface, preparing the blade for final polishing.
Refining the Edge with Polishing
Polishing is the final abrasive stage in the sharpening process, utilized to smooth out the microscopic scratches left by coarser stones. This step is typically performed on stones with a grit of 3,000 or higher. A polished edge reduces friction, allowing the knife to pass through delicate proteins and vegetables without tearing the fibers. For many chefs, this is where a functional kitchen tool becomes a high-performance instrument capable of effortless precision.
- Clean the knife thoroughly to ensure no coarse grit is carried over to the finishing stone.
- Use very light pressure, letting the weight of the knife do the work.
- Perform trailing strokes, pulling the edge away from the stone to minimize burr formation.
- Maintain a consistent angle, as even a small mistake here can dull the refined edge.
A high polish not only enhances the aesthetic appeal of the blade, giving it a mirror-like finish, but also increases the edge's resistance to corrosion. Since the surface area is smoother, there are fewer microscopic "valleys" where moisture and acids can settle. While not every utility knife requires a 6,000-grit finish, it is a rewarding practice for sushi knives, slicers, and high-carbon steel blades.
Testing Blade Sharpness and Performance
After completing the sharpening and polishing process, it is vital to verify the results before returning the knife to the kitchen block. Testing allows you to identify any remaining dull spots or sections where the burr was not fully removed. A truly sharp knife should feel effortless and bite into a surface immediately rather than sliding off. There are several standard tests used by enthusiasts and professionals to gauge the quality of the edge.
- The Paper Test: A sharp blade should slice through a piece of held printer paper with no snagging or tearing.
- The Tomato Test: The knife should be able to cut through the skin of a ripe tomato using only its own weight.
- The Shaving Test: Carefully check if the blade can cleanly shave a small patch of arm hair (for advanced edges).
- Visual Inspection: Look at the edge under a bright light; a dull edge will reflect light, while a sharp one will not.
If the knife fails any of these tests, it usually indicates that the angle was inconsistent or the burr was not completely removed. In such cases, a few more passes on a finishing stone or a leather strop are often enough to correct the issue. Consistent testing builds a feedback loop that helps you improve your technique over time, ensuring your tools are always ready for service.
Extending Knife Life Through Proper Care
Sharpening on a whetstone is an abrasive process that removes steel, so the best way to extend the life of a knife is to maintain the edge between sharpening sessions. Proper kitchen habits prevent the edge from rolling or chipping, reducing the frequency of heavy grinding. A knife that is well-cared-for can last for decades, whereas a neglected one will quickly diminish in size and quality due to repeated corrective sharpening.
- Never put high-quality knives in the dishwasher; the heat and chemicals can damage the steel and handle.
- Always use a wooden or plastic cutting board; avoid glass, granite, or tile surfaces.
- Use a ceramic honing rod weekly to realign the edge without removing significant metal.
- Store knives in a block, on a magnetic strip, or in individual sheaths to prevent edge contact.
By treating the blade with respect, you preserve the geometry and the "temper" of the steel. Cleaning the knife immediately after cutting acidic foods like lemons or onions is also critical for carbon steel blades to prevent patina from turning into harmful rust. Care is a holistic practice that encompasses how you cut, how you clean, and how you store your equipment.
Whetstone Maintenance and Surface Leveling
Whetstones are wear items themselves and require maintenance to remain effective. Over time, the center of the stone will wear down faster than the edges, creating a "dish" or a concave surface. Sharpening on a dished stone makes it impossible to maintain a consistent angle, especially on longer blades. Therefore, leveling the stone-a process called flattening-is a mandatory maintenance task for anyone serious about sharpening.
- Draw a grid of pencil lines across the entire surface of the dry whetstone.
- Rub the whetstone against a dedicated flattening plate or a coarse diamond stone under running water.
- Continue rubbing until all the pencil marks have been erased, indicating a perfectly flat surface.
- Rinse the stone to remove any debris and allow it to air dry completely before long-term storage.
Proper storage is also crucial. Never store a wet stone in its original cardboard box, as this can trap moisture and lead to mold growth or structural cracking. Instead, allow the stone to dry naturally in a well-ventilated area. A flat, clean stone is the only way to ensure that your knives receive a uniform bevel and a professional-grade edge every time you sharpen.
Achieving a Professional Razor Finish
The pinnacle of whetstone sharpening is the "razor finish," a state where the edge is so refined it offers zero resistance during use. This level of sharpness is achieved through a combination of high-grit graduation and a final "stropping" phase. While the stones do the heavy lifting, the final touch often happens on a piece of leather or a very fine synthetic material, which removes the last microscopic remnants of the wire edge.
- Graduate through grits systematically (e.g., 1,000 to 3,000 to 8,000).
- Use a leather strop loaded with a fine polishing compound for the final mirror finish.
- Keep the pressure extremely light-almost non-existent-during the final few strokes.
- Focus on slow, deliberate movements to ensure the angle remains perfectly true.
Achieving this result is as much about patience as it is about equipment. A professional finish transforms the kitchen experience, making tasks like julienning herbs or slicing raw fish a tactile pleasure. It represents the mastery of the craft, signifying that the cook understands their tools at a fundamental level. With practice, the whetstone becomes an extension of the hand, capable of producing edges that surpass the factory sharpness of any new knife.


Comments