
Elevate your home cooking by learning to master the immersion blender, the ultimate secret to achieving velvety soups and sauces with minimal effort. This versatile tool allows you to blend directly in your cooking pot, eliminating the messy transfer of hot liquids and significantly cutting down on kitchen cleanup. From silky bisques to zesty pestos, its handheld convenience provides superior control over texture and consistency. It's a must-have for anyone looking to streamline their meal prep without sacrificing professional results. To find out which device best suits your needs, discover the pros and cons of an immersion blender vs countertop blender.
Essential Tools for Creamy Homemade Soups
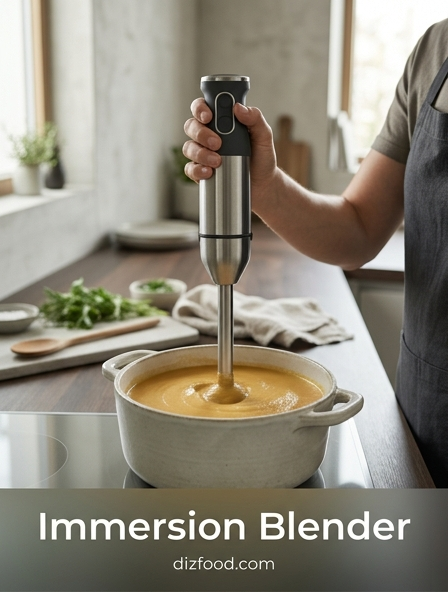
Creating a velvety, restaurant-quality soup at home requires more than just high-quality ingredients; it demands the right equipment to achieve the perfect consistency. While a traditional countertop blender is a common fixture in many kitchens, the immersion blender has revolutionized the process of pureeing hot liquids. This handheld tool allows you to blend directly in the cooking pot, eliminating the dangerous and messy task of transferring boiling soup in batches. The convenience of this tool cannot be overstated, as it saves time and significantly reduces the number of dishes to wash.
To complement your immersion blender, you should also have several other essential items on hand. A heavy-bottomed Dutch oven or a deep stockpot provides the necessary space for the wand to move without splashing. A sturdy ladle is useful for checking the consistency of your puree as you work. Additionally, having a fine-mesh strainer nearby can help if you desire an ultra-refined texture, though a powerful stick blender usually makes this step unnecessary. By centering your setup around a reliable immersion blender, you ensure that every bisque or chowder you prepare reaches its smoothest potential with minimal effort.
How to Use Stick Blenders Safely
Operating a stick blender is generally straightforward, but because of its exposed, high-speed blades, safety must be your primary concern. Always ensure the device is unplugged before attaching or detaching the blending wand or any other accessories. When you are ready to blend, place the blade guard completely at the bottom of the vessel before turning the power on. This prevents the liquid from spraying and keeps the blades from catching air, which could cause the machine to jerk suddenly in your hand.
- Always keep the blades submerged while the motor is running to avoid scalding splatters.
- Never reach into the blade area with your fingers, even if the unit appears to be off.
- Avoid using the blender in shallow pans where the blade guard is not fully covered.
- Ensure your hands are dry when handling the motorized handle to maintain a firm grip.
- Keep the electrical cord away from hot burners and out of the path of the blending wand.
By following these fundamental safety protocols, you can enjoy the efficiency of your immersion blender without the risk of injury or kitchen accidents. Consistency in these habits ensures a long-lasting and safe relationship with your appliance.
Techniques for Achieving Ultra Smooth Textures
The secret to achieving an ultra-smooth texture with an immersion blender lies in the movement and the angle of the tool. Rather than simply holding the blender stationary, you should use a gentle "up and down" motion. This helps draw the larger chunks of food down into the blade's vortex, ensuring every piece is processed evenly. If your blender has variable speed settings, start on the lowest speed to break down the bulk of the ingredients before increasing to high speed for the final, refining pass.
Another professional tip is to slightly tilt the blending wand while it is submerged. This creates a stronger whirlpool effect, pulling more liquid through the blades and preventing "dead zones" where unblended bits might hide. Watch for the change in the sound of the motor; a consistent, humming whir usually indicates that the mixture is becoming uniform. If you notice large air bubbles forming, tap the head of the blender against the bottom of the pot to release trapped air before continuing. These small adjustments in technique can transform a chunky vegetable broth into a sophisticated, silky emulsion that rivals the output of high-end stationary blenders.
Best Pots for Blending Directly on Heat
When using an immersion blender directly on the stovetop, the type of cookware you use is critical for both safety and the longevity of your tools. Choosing the right material prevents damage to the pot's surface and ensures a stable blending environment. Deep pots are always preferable to shallow ones to contain the movement of the liquid.
| Pot Material | Suitability | Reason |
|---|---|---|
| Stainless Steel | Excellent | Durable, resists scratching from metal blade guards, and handles high heat well. |
| Enamel-Coated Cast Iron | Good | Very stable, but requires caution to avoid chipping the enamel with the wand. |
| Non-Stick Aluminum | Poor | The metal guard of the blender can easily scratch and ruin the non-stick coating. |
| Copper | Fair | Conducts heat well, but can be prone to denting if the blender is used aggressively. |
In addition to material, consider the height of the pot walls. A pot should be at least double the height of the liquid volume to provide a "splash zone" that keeps your kitchen counters clean during the blending process.
Avoiding Splatters and Kitchen Messes
One of the most common complaints when first using an immersion blender is the potential for splattering hot liquids across the kitchen. This mess is almost always preventable with proper technique and preparation. The most important rule is to never lift the blender head out of the liquid while the blades are still spinning. This creates a centrifugal spray that can travel several feet. Instead, wait for the blades to come to a complete stop before lifting the wand even an inch.
To further minimize mess, use a container that is narrow and tall rather than wide and shallow. The narrow diameter helps the blender create a more controlled vortex, which keeps the liquid directed downward toward the blades. If you are blending in a pot on the stove, you can use a clean kitchen towel or a specialized "splatter guard" lid with a hole in the middle to cover the top of the pot while you work. Starting at the lowest possible speed and gradually increasing it also prevents the sudden displacement of liquid that occurs when a high-speed motor is engaged instantly. These simple steps keep your workspace tidy and your skin safe from burns.
Cleaning Your Immersion Blender in Seconds
The beauty of the immersion blender lies in its simplicity, and this extends to the cleaning process. Unlike a traditional blender with multiple gaskets, jars, and lids, the immersion blender can often be cleaned in under a minute. The "soapy water trick" is the most effective method: fill a tall glass or jar with warm water and a single drop of dish soap. Submerge the blending wand into the water and run it on high for ten seconds. This action dislodges food particles from under the blades and inside the guard where sponges cannot easily reach.
After the soapy run, rinse the wand under clean running water. It is vital to dry the unit immediately to prevent any rusting of the blades or water spots. For many modern models, the blending attachment is dishwasher safe; however, hand washing is often recommended to preserve the sharpness of the blades over time. Always remember to wipe down the motorized handle with a damp cloth to remove any food splashes, but never submerge the motorized part in water. This quick routine ensures your tool is hygienic and ready for its next use without the dread of a difficult cleanup.
Creating Emulsions and Silky Sauces
Mastering emulsions is a hallmark of a skilled cook, and the immersion blender is the ultimate tool for this task. An emulsion is the forced mixture of two liquids that typically do not stay together, such as oil and vinegar or butter and lemon juice. Because the immersion blender spins at such high revolutions, it breaks the oil into microscopic droplets that become suspended in the base liquid, creating a stable, creamy texture that is impossible to achieve by hand whisking.
When making mayonnaise or hollandaise, use the tall, narrow beaker that often comes with the blender. Place your heavy ingredients like egg yolks and mustard at the bottom, then pour the oil on top. Place the blender head firmly at the very bottom of the beaker and turn it on. As the white emulsion begins to form at the bottom, slowly tilt and lift the wand to incorporate the remaining oil from the top. This technique ensures a perfect, thick sauce every time. Beyond mayo, use this tool to emulsify vinaigrettes that won't separate on your salad or to whisk cold butter into a pan sauce for a glossy, professional finish.
Maintenance Tips for Sharp Blender Blades
To keep your immersion blender performing like new, you must maintain the integrity of the blades. Over time, blades can become dull or nicked, especially if they frequently encounter hard ingredients like ice, frozen fruit, or whole spices. While these blenders are powerful, they are not always designed for heavy-duty grinding. To preserve the edge, try to thaw frozen ingredients slightly or chop very hard vegetables into smaller pieces before blending. This reduces the initial impact on the metal edges.
Regular inspection is also key. Every few months, check the blades for any signs of pitting or bending. If your model allows for blade replacement, keep a spare on hand; otherwise, you may need to replace the wand attachment if the performance drops significantly. Avoid using abrasive scouring pads when cleaning the blades, as these can create micro-scratches that trap food bacteria and dull the cutting surface. Instead, stick to the "soapy water run" method and a soft brush for stubborn bits. Finally, ensure the wand is completely dry before storing it to prevent oxidation, which can weaken the metal and lead to premature failure of the tool.
Storage Solutions for Small Kitchen Appliances
Finding a home for an immersion blender can be tricky due to its long, awkward shape and the various attachments that often come with it. Efficient storage not only keeps your kitchen organized but also protects the delicate blades and the motorized components. One popular solution is a dedicated wall mount. Many manufacturers include a mounting bracket that allows you to hang the blender on the inside of a pantry door or on a kitchen wall, keeping it within arm's reach while freeing up drawer space.
If you prefer to keep your counters clear, consider using a deep drawer with adjustable dividers. Store the motorized handle and the blending wand separately to prevent the cord from tangling around the blades. For those with multiple attachments like whisks and choppers, a small plastic bin or a cloth drawstring bag can keep all the components together so you aren't hunting for pieces mid-recipe. If your kitchen is particularly tight on space, the sleek profile of the immersion blender allows it to be tucked horizontally behind larger appliances or stood upright in a tall ceramic crock alongside wooden spoons and spatulas, making it both accessible and tidy.
Versatile Uses for Your Immersion Blender
While often associated with autumn soups, the immersion blender is a year-round workhorse with a surprising variety of applications. Its ability to process small quantities makes it much more practical for daily tasks than a full-sized blender. Whether you are preparing a single serving of a healthy drink or prepping ingredients for a weekend bake, the stick blender offers speed and precision that other tools lack.
- Frothing milk for lattes and cappuccinos without an espresso machine.
- Whipping heavy cream into stiff peaks in under a minute.
- Pureeing homemade baby food to the exact consistency your child needs.
- Mixing pancake or waffle batter to remove all lumps instantly.
- Blending frozen fruit and yogurt directly in a cup for a quick morning smoothie.
- Breaking down canned whole tomatoes into a chunky or smooth marinara sauce.
Beyond these, it is excellent for "fixing" lumpy gravies or stirring natural peanut oil back into the nut butter. The more you use it, the more you will realize that this compact tool can handle nearly any task that requires mixing, chopping, or aerating, making it one of the most versatile investments in your culinary arsenal.

Comments