
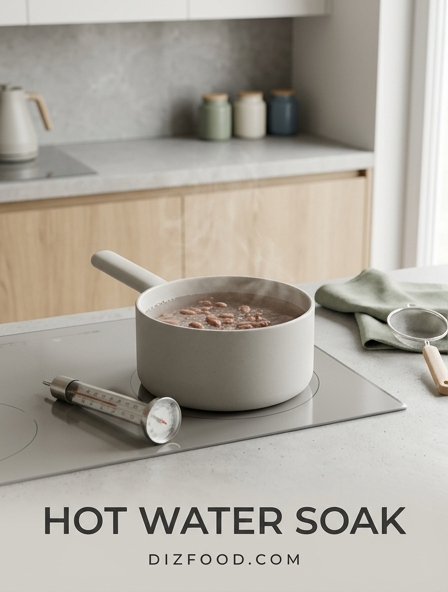
Keeping your kitchen hood filters clean is essential for maintaining optimal air quality and fire safety in your home. One of the easiest and most cost-effective ways to tackle stubborn grease buildup is with a simple hot water soak. By submerging your metal mesh filters in a basin of boiling water mixed with a generous amount of dish soap and baking soda, you can effectively loosen grime without the need for intense scrubbing. This routine maintenance ensures your ventilation system runs efficiently while preventing unpleasant cooking odors from lingering. For those dealing with heavy accumulation, it is helpful to understand the pros and cons of a Range Hood Filter Degreaser vs Hot Water Soak.
Importance of Range Hood Filter Maintenance
Range hood filters are the unsung heroes of kitchen ventilation, acting as the primary barrier against airborne grease, smoke, and steam. Over time, these metallic meshes become saturated with sticky lipids that can significantly hinder the performance of your exhaust fan. Regular maintenance is not merely an aesthetic choice but a critical safety measure. A clogged filter restricts airflow, forcing the fan motor to work harder, which leads to premature mechanical failure and increased energy consumption. Furthermore, accumulated grease is highly flammable; a flare-up on the stovetop can easily ignite the residues trapped in the filter, causing a dangerous kitchen fire.
By prioritizing a routine hot water soak, you ensure that the ventilation system operates at peak efficiency, effectively removing odors and particulate matter from your cooking environment. Maintaining these components extends the lifespan of your appliance and protects your home from potential hazards. Neglecting this task often results in a film of grease settling on cabinetry and walls, making overall kitchen cleanliness much harder to achieve over time.
Essential Supplies for a Deep Hot Water Soak
To achieve a professional-grade clean for your range hood filters, you must gather a few specific household items. The primary agent is boiling water, which serves as the heat source to liquefy hardened fats. In addition to heat, you will need a heavy-duty degreasing dish soap, which acts as a surfactant to break the bond between the grease and the metal. Baking soda is another essential component, providing a gentle abrasive quality and an alkaline boost to the cleaning solution.
- A large heat-proof basin or a plugged kitchen sink
- Boiling or very hot water from a kettle
- Non-abrasive scrubbing brush or a soft sponge
- Degreasing dish soap (citrus-based works well)
- Half a cup of baking soda
- Clean, lint-free towels for drying
Having these supplies ready ensures the process remains organized and efficient, allowing the chemical reactions to take place without interruption. Ensuring you have a non-abrasive tool is particularly important to avoid scratching the delicate metal mesh during the final cleaning stages.
Step by Step Guide to Removing Grease Buildup
Transitioning from a greasy mess to a pristine filter requires a methodical approach. The process begins with the safe removal of the filter from the hood housing, usually involving a small latch or sliding mechanism. Once removed, you can begin the deep cleaning process using the following steps:
- Fill your sink or a large bucket with boiling water.
- Squirt a generous amount of degreasing soap into the water.
- Slowly add the baking soda, being mindful of the fizzing reaction.
- Submerge the filters completely in the hot solution.
- Let the filters soak for a minimum of 15 to 20 minutes.
- Scrub the remaining residue gently with a non-abrasive brush.
By following this sequence, the hot water and chemical agents work in tandem to dissolve even the most stubborn layers of oil, making the physical scrubbing stage significantly easier and more effective for the user. Always ensure the water remains hot throughout the duration of the soak for the best results.
Why Boiling Water is the Ultimate Degreaser
Boiling water is frequently cited as the ultimate degreaser in kitchen maintenance because of its ability to manipulate the physical state of lipids. Most cooking oils and animal fats exist as solids or high-viscosity liquids at room temperature, making them difficult to wipe away. When exposed to the intense thermal energy of boiling water, these fats reach their melting point almost instantly. This transition into a fluid state allows the grease to detach from the intricate mesh of a range hood filter and rise to the surface of the water.
Beyond its melting capabilities, boiling water provides a level of sanitation that lukewarm water cannot match, helping to kill bacteria that may thrive in old food residues. The heat also accelerates the chemical reactions of soaps and baking soda, creating a more dynamic environment for breaking down molecular bonds. Using water at its highest possible temperature ensures that the cleaning process is faster, more hygienic, and requires less manual labor than traditional cold scrubbing techniques.
Optimizing Your Soak with Baking Soda and Soap
While hot water does the heavy lifting, the combination of baking soda and dish soap optimizes the soak for maximum efficiency. Dish soap is formulated with surfactants that possess both hydrophilic and lipophilic ends. These molecules attach to the grease and pull it into the water. Adding baking soda to this mixture introduces an alkaline element that neutralizes acidic food odors and provides a mild effervescent action. As the baking soda reacts with the water and soap, it helps to lift the grease particles away from the metal surface, preventing them from redepositing on the filter during the soak.
This synergistic relationship between the three components creates a potent cleaning bath that penetrates the tiny crevices of the mesh. This method is particularly effective because it avoids the use of harsh, caustic chemicals that could damage the finish of the filter or release toxic fumes into the kitchen. The result is a deep clean that restores the filter to its original state while remaining environmentally friendly and safe for home use.
Scrubbing Techniques for Stubborn Kitchen Grime
Even after a thorough soak, some stubborn spots may remain, particularly in the corners of the filter frame. Proper scrubbing techniques are essential to ensure the mesh is not damaged while removing these residues. It is important to use a brush with firm but non-metal bristles, as steel wool or harsh wire brushes can scratch the aluminum or stainless steel, leading to potential corrosion over time.
- Use circular motions to dislodge grease from the mesh intersections.
- Apply consistent, moderate pressure rather than forceful agitation.
- Pay close attention to the edges where grease tends to pool and harden.
- Rinse the brush frequently in clean water to avoid spreading lifted grime.
By employing these techniques, you can ensure that every square inch of the filter is addressed. The goal is to clear the air passages completely, allowing the hood to breathe freely once again without compromising the structural integrity of the delicate metal mesh or the aesthetic quality of the filter frame.
Proper Rinsing and Drying for Longevity
The final stages of filter maintenance are often overlooked but are vital for ensuring the longevity of the component. Once the scrubbing is complete, the filters must be rinsed thoroughly with clean, hot water. This step removes any remaining soapy residue or loosened grease particles that could otherwise dry and form a sticky film. After rinsing, shaking the filters gently will help dislodge water trapped within the layers of the mesh.
Drying is equally important; placing the filters on a clean towel or a drying rack in a well-ventilated area is recommended. You should never reinstall a damp filter into the range hood, as moisture can be drawn into the motor housing, potentially causing electrical issues or promoting the growth of mold and mildew within the ductwork. Ensuring the filter is bone-dry before reassembly prevents rust in stainless steel variants and maintains the overall hygiene of the ventilation system, keeping it ready for your next culinary project. Proper drying also ensures that the filter fits correctly without any slipping due to moisture.
How Often Should You Clean Your Kitchen Filters
Determining the frequency of your cleaning schedule depends largely on your cooking habits and the types of food you prepare. A household that frequently engages in deep frying or searing meats will accumulate grease much faster than one that primarily steams or boils food. Generally, a professional deep soak should be performed every one to three months to maintain optimal performance and air quality.
| Cooking Style | Cleaning Frequency |
|---|---|
| Light (Boiling, Steaming) | Every 4-6 Months |
| Moderate (Sautéing, Baking) | Every 2-3 Months |
| Heavy (Frying, Grilling) | Monthly |
Establishing a regular routine prevents the grease from hardening into a carbonized layer, which is significantly more difficult to remove. Monitoring the visual state of the mesh is the best way to adjust this schedule to your specific needs. If you start to notice smells lingering after cooking, it is likely time for a soak.
Signs Your Filter Needs Replacement vs Cleaning
There comes a point in the life of every kitchen filter where cleaning is no longer the most viable option. While a hot water soak can work wonders, structural damage is a clear sign that a replacement is necessary. If you notice that the metal mesh is beginning to fray, tear, or pull away from the frame, the filter can no longer effectively trap grease particles. This structural failure allows oils to enter the ductwork, increasing fire risks.
Additionally, if the filter remains sticky or discolored even after multiple deep soaks with boiling water and degreasers, the grease may have become baked onto the metal at a molecular level. Permanent warping of the frame, which prevents the filter from sitting flush against the hood, is another indicator for replacement. Investing in a new filter when these signs appear is essential for protecting your appliance's motor and ensuring that your kitchen ventilation system remains a functional safety feature in your home. Regular inspections during the cleaning process will help you identify these issues early.
Maintaining Better Indoor Air Quality Through Cleanliness
Maintaining clean range hood filters is directly linked to the quality of the air you breathe while cooking. A clean filter allows the exhaust fan to effectively capture and remove combustion products, such as carbon monoxide and nitrogen dioxide, which are often produced by gas stoves. It also captures fine particulate matter and volatile organic compounds released when oils are heated to high temperatures. Without an efficient filtration path, these pollutants linger in the air, contributing to respiratory irritation.
Beyond health, a clean system eliminates lingering food odors that can permeate upholstery and curtains throughout the home. By ensuring a clear passage for air to flow, you reduce the humidity levels in the kitchen, preventing the damp environment that favors mold growth. Cleanliness in the kitchen is therefore more than just a chore; it is a fundamental aspect of creating a healthy, comfortable, and inviting indoor environment for you and your family. High air quality also ensures that your kitchen remains a pleasant space for social gatherings and daily activities.


Comments