
The Benefits of Ditching Single Use Paper Towels
Transitioning away from single-use paper towels is a significant step toward a more sustainable and efficient kitchen cleaning routine. While paper towels offer convenience, they often leave behind annoying lint and fibers that ruin a streak-free finish on glass and polished surfaces. By switching to reusable alternatives, homeowners can achieve a much higher level of clarity on their appliances and countertops. Furthermore, the environmental impact of paper waste is substantial; reducing this footprint contributes to a greener household. Economically, the cost of constantly replenishing paper towel rolls adds up over time, whereas high-quality reusable cloths can last for years with proper maintenance.
- Reduction in household waste and landfill contributions.
- Elimination of tiny paper fibers and lint on reflective surfaces.
- Significant long-term financial savings compared to disposables.
- Higher durability when scrubbing stubborn, dried-on food particles.
- Greater absorption capacity for handling large liquid spills.
By investing in durable textiles, you ensure that your cleaning tools are always available, eliminating the need for emergency trips to the store. This shift not only benefits the planet but also elevates the aesthetic quality of your kitchen surfaces by providing a truly polished, debris-free look that paper simply cannot replicate.
Microfiber Cloths for Superior Surface Polishing
Microfiber technology has revolutionized kitchen maintenance by providing a lint-free, highly absorbent medium for polishing. Unlike cotton, microfiber consists of millions of tiny synthetic fibers that trap dirt, grease, and moisture rather than just pushing them around. This unique structure allows for effective cleaning with minimal chemical use. To achieve a superior shine, it is best to use a two-step process involving a damp cloth for cleaning and a bone-dry cloth for the final buffing. This method ensures that no moisture remains on the surface to form streaks or water spots.
- Wipe the surface with a damp, high-density microfiber cloth to lift grime.
- Immediately follow with a clean, dry suede-weave microfiber cloth.
- Apply firm, circular motions to buff the area to a high gloss.
- Inspect the surface from an angle to identify and remove any remaining haze.
The electrostatic properties of microfiber also help in attracting dust, making it an ideal choice for maintaining the tops of refrigerators and decorative kitchen shelving. When used correctly, these cloths provide a professional-grade finish that makes granite, marble, and glass appear brand new. Their versatility across various textures makes them the most essential tool in any modern kitchen cleaning kit.
Homemade Vinegar Solutions for Clearer Countertops
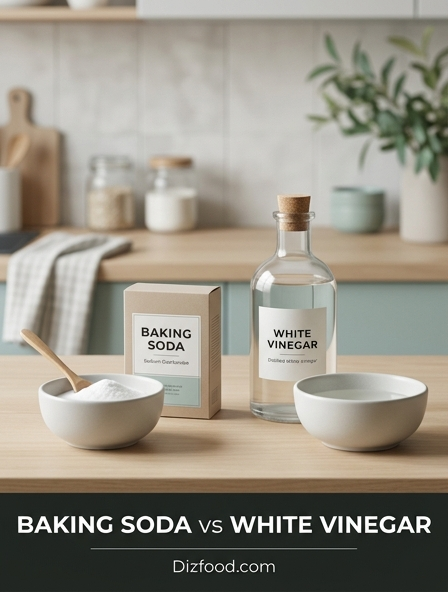
White distilled vinegar is a powerhouse in the kitchen due to its acetic acid content, which naturally breaks down mineral deposits and cuts through light grease. When diluted correctly, it serves as an excellent, non-toxic alternative to harsh commercial cleaners. It is particularly effective on non-porous surfaces like laminate and tile. However, caution must be exercised with natural stones like marble or granite, as the acidity can etch the surface over time. For these materials, a pH-neutral solution is preferred, but for most other kitchen areas, vinegar provides a crystal-clear, streak-free result.
| Surface Type | Vinegar to Water Ratio | Primary Benefit |
|---|---|---|
| Glass & Windows | 1:1 Ratio | Evaporates quickly without streaks |
| Laminate Counters | 1:2 Ratio | Cuts through daily kitchen film |
| Ceramic Backsplashes | 1:1 Ratio | Removes dried water splashes and haze |
To enhance the scent and cleaning power, many users infuse their vinegar solutions with citrus peels or essential oils like lemon or tea tree. This not only masks the sharp vinegar odor but also adds antimicrobial properties to the spray. Always ensure you use a clean spray bottle and filtered water to maintain the purity of the solution for the best possible results.
Techniques for a Smudge Free Stainless Steel Finish
Stainless steel is a staple of modern kitchen design, yet it is notoriously difficult to keep free of fingerprints and smudges. The secret to a perfect finish lies in understanding the "grain" of the metal. Just like wood, stainless steel has subtle directional lines. Cleaning and polishing in the direction of these lines prevents cleaners from getting trapped in the microscopic grooves, which is a primary cause of streaking. Using a dedicated stainless steel cleaner or even a small drop of olive oil on a cloth can provide a protective barrier that repels future marks.
- Identify the vertical or horizontal grain of the appliance surface.
- Apply a mild degreaser to remove oily fingerprints first.
- Use a clean microfiber cloth to dry the surface completely.
- Apply a tiny amount of food-grade mineral oil for a deep, protective luster.
- Buff away any excess oil until the surface feels dry to the touch.
Consistency is key when maintaining stainless steel. Regular light wiping is far more effective than occasional deep scrubbing. By following the grain and avoiding abrasive pads that can scratch the finish, you maintain the factory-fresh glow of your stove, dishwasher, and refrigerator for years to come.
The Role of Distilled Water in Preventing Streaks
Many homeowners struggle with streaks despite using high-quality cleaners, often unaware that the culprit is their tap water. Hard water contains minerals like calcium and magnesium that remain on the surface after the liquid evaporates, leaving behind a cloudy residue or white spots. Distilled water, which has been stripped of these impurities, is the ultimate solution for achieving a professional shine. By using distilled water in your homemade cleaning solutions or for your final rinse, you eliminate the possibility of mineral buildup, ensuring that surfaces remain perfectly transparent and reflective.
- Fill your spray bottles with steam-distilled water instead of tap.
- Mix with a small amount of isopropyl alcohol to speed up evaporation.
- Mist the surface lightly to avoid over-saturation.
- Wipe with a clean cloth, observing the rapid, clean drying process.
This approach is especially beneficial for high-gloss black appliances and glass cooktops where every imperfection is visible. While it requires an extra step to procure distilled water, the results are immediate and labor-saving, as you no longer need to spend time buffing out stubborn mineral hazes. It is a simple scientific adjustment that yields significant aesthetic rewards in the kitchen.
Buffing Strategies for High Gloss Kitchen Cabinets
High-gloss cabinets provide a sleek, contemporary look but are highly susceptible to visible dust and oily residues. The buffing process for these surfaces must be gentle to avoid micro-scratches that can dull the shine over time. It is essential to use extremely soft cloths, such as those made from high-gsm microfiber or chamois. The strategy involves a very light touch; applying too much pressure can trap grit against the glossy finish. Using a specialized gloss-enhancer or a simple solution of highly diluted dish soap can help lift oils without leaving a soapy film.
- Always dust the cabinets with a dry wand or air duster before wiping.
- Use a damp cloth with a pH-neutral cleaner for the initial pass.
- Switch to a fresh, dry cloth for the buffing stage.
- Work in small sections to prevent the cleaner from drying prematurely.
- Use long, sweeping strokes rather than tight circular movements.
Monitoring the reflection in the cabinets as you work will help you spot areas where the cleaner has not been fully buffed away. By maintaining a strict "no-abrasive" policy, you preserve the depth of the color and the mirror-like quality of the gloss, keeping the kitchen looking vibrant and expertly maintained.
Eco Friendly Alternatives to Traditional Cleaning Supplies
Modern kitchens are increasingly moving toward eco-friendly cleaning agents that are safe for food preparation areas and the environment. Traditional cleaners often contain volatile organic compounds (VOCs) that can affect indoor air quality. Alternatives such as baking soda, lemon juice, and castile soap offer effective cleaning power without the chemical load. Baking soda acts as a mild abrasive for tough stains, while lemon juice provides natural bleaching and degreasing properties. These ingredients are not only biodegradable but are often already present in the pantry, making them a convenient choice.
| Ingredient | Application | Environmental Benefit |
|---|---|---|
| Lemon Juice | Removing stains from cutting boards | Biodegradable and non-toxic |
| Baking Soda | Scouring sinks and ovens | No harsh fumes or VOCs |
| Castile Soap | All-purpose surface cleaning | Plant-based and phosphate-free |
Using these natural alternatives reduces the plastic waste associated with commercial bottles and prevents harmful chemicals from entering the water system. Furthermore, they are generally safer for households with pets and small children, providing peace of mind alongside a sparkling clean kitchen environment. Adopting these staples ensures a healthy, streak-free home.
Removing Grease Without Leaving Behind Residue
Grease is perhaps the most difficult substance to remove from kitchen surfaces without leaving a tacky or streaky residue. The key to successful degreasing is emulsification-breaking down the oil so it can be easily wiped away. Concentrated dish soap is highly effective for this, but if used in excess, it creates a new problem: a soapy film that attracts more dust. For heavy-duty grease on range hoods or backsplashes, a warm solution is more effective than a cold one, as heat helps to liquify solidified oils. Following up with a secondary "rinse" wipe is crucial.
- Apply a warm, soapy solution to the greasy area and let it sit for two minutes.
- Wipe the area with a damp cloth to lift the emulsified grease.
- Rinse the cloth and wipe again with clean water to remove soap remnants.
- Finish by buffing the surface with a dry microfiber cloth to restore shine.
For particularly stubborn areas, a paste of baking soda and water can be used as a gentle scrub. The goal is always to remove the organic matter entirely before attempting to polish. This multi-step approach guarantees that the surface is truly clean at a molecular level, preventing the "rainbow" effect often seen when grease is simply smeared around.
Proper Care and Washing of Reusable Polishing Rags
To maintain the effectiveness of reusable polishing rags, a specific laundering routine is required. Microfiber and high-quality cotton cloths can easily become "clogged" with fabric softeners or dryer sheets, which coat the fibers in a waxy layer. This layer significantly reduces absorbency and causes the cloths to leave streaks rather than remove them. To ensure your rags stay in peak condition, they should be washed separately from lint-producing items like bath towels and dried on low heat to prevent the synthetic fibers from melting or becoming brittle.
- Wash microfiber cloths in warm water with a fragrance-free detergent.
- Never use liquid fabric softeners or dryer sheets.
- Avoid washing polishing rags with cotton towels to prevent lint transfer.
- Air dry or use the lowest heat setting on your dryer.
- Shake out the cloths after drying to "fluff" the microfibers.
By following these care instructions, you extend the life of your cleaning tools and ensure they continue to provide a streak-free finish. A well-maintained cloth is the difference between a frustrating cleaning experience and an effortless, high-gloss result. Periodically boiling microfiber in water with a dash of vinegar can also help deep-clean the fibers and restore their original performance.
Eliminating Limescale and Hard Water Spots Permanently
Limescale and hard water spots are common around kitchen sinks and faucets, creating a dull, crusty appearance that is difficult to remove with standard wiping. These deposits are alkaline, meaning they require an acidic treatment to dissolve. While vinegar is a popular choice, lemon juice or citric acid powder can provide a more concentrated punch for heavy buildup. For permanent elimination, the strategy must include both removal and prevention. Keeping the area dry after use is the most effective way to stop new spots from forming once the original scale has been cleared.
| Treatment Method | Contact Time | Best For |
|---|---|---|
| Vinegar Soak | 30 Minutes | Faucet aerators and showerheads |
| Citric Acid Paste | 15 Minutes | Stubborn spots on granite or tile |
| Lemon Half | 5 Minutes | Chrome fixtures and stainless basins |
After treating the area, it is vital to rinse thoroughly and buff the metal or stone to a dry finish. Applying a thin layer of wax or a specialized water-repellent spray to fixtures can help water bead off, significantly reducing the frequency of deep cleaning. Managing hard water is a continuous process, but with the right acidic tools, you can maintain a brilliant, spot-free kitchen indefinitely.

Comments