
The Science of Egg Protein Coagulation
The transformation of a raw egg into a solid structure is a complex biochemical process driven by heat. Egg whites and yolks are composed of diverse proteins that exist in folded, globular shapes held together by weak bonds. As the water temperature rises during boiling, kinetic energy increases, causing these protein molecules to vibrate and eventually unfold, a process known as denaturation. Once unfolded, the proteins expose reactive sites that allow them to bond with neighboring molecules, creating a three-dimensional network that traps water.
- Ovotransferrin: The first major white protein to coagulate at approximately 60°C.
- Lysozyme: Contributes to the structural integrity shortly after ovotransferrin sets.
- Ovalbumin: The most abundant protein, requiring temperatures above 80°C to fully set.
- Lipovitellins: Key yolk proteins that coagulate at slightly higher temperatures than the whites.
The transition from a translucent liquid to an opaque solid occurs gradually. Because different proteins denature at different thermal thresholds, the texture of the egg changes significantly with every degree of temperature increase, making precise timing essential for achieving specific culinary results.
Timing Your Way to the Perfect Soft Yolk
Achieving a soft-boiled egg with a liquid gold center requires a delicate balance between heat penetration and duration. The goal is to apply enough heat to fully set the outer albumen while leaving the vitelline membrane of the yolk intact and its contents fluid. This typically occurs within a narrow window of four to five minutes when using the boiling-start method. If the egg is removed too early, the whites will remain snotty and unappealing; too late, and the yolk begins to thicken into a custard-like state.
- Lower cold eggs gently into already boiling water to start the clock instantly.
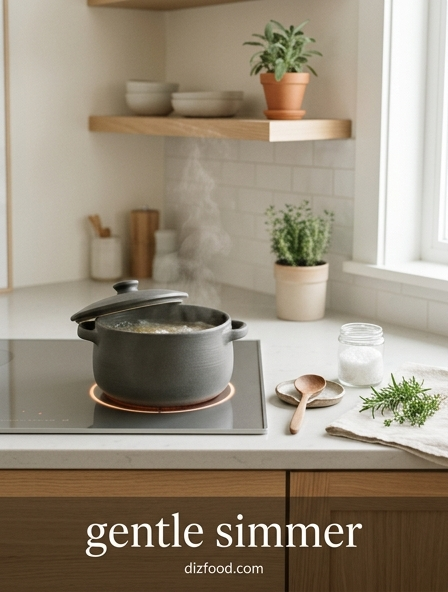
- Maintain a gentle simmer to prevent the eggs from knocking against the pot walls.
- Remove the eggs at exactly four and a half minutes for a runny yolk.
- Transfer immediately to cold water to halt the internal cooking process.
The thermal conductivity of the egg means that the heat travels from the outside in. By the four-minute mark, the temperature at the center of the yolk usually sits around 55°C, which is warm enough for food safety in fresh eggs but below the coagulation point of the yolk's primary fats and proteins.
How Boiling Duration Affects White Texture
The texture of the egg white, or albumen, is the most visible indicator of boiling duration. Initially, the white is tender and delicate, but as boiling time extends, the protein network becomes increasingly dense and tightly cross-linked. This expulsion of water molecules leads to a firmer, and eventually rubbery, consistency. The following table illustrates the progression of white texture based on standard boiling times for large eggs.
| Time (Minutes) | Texture Description | Structural State |
|---|---|---|
| 3 Minutes | Soft and fragile | Partially set, jelly-like |
| 6 Minutes | Firm but tender | Fully opaque and resilient |
| 9 Minutes | Solid and bouncy | Highly cross-linked proteins |
| 12+ Minutes | Tough and rubbery | Dehydrated protein matrix |
Professional chefs often prefer the six-to-seven-minute range because it provides enough structural integrity for the egg to be peeled and handled while retaining a silky mouthfeel. Beyond ten minutes, the whites lose their moisture, resulting in a significantly tougher bite that can detract from the overall dish.
Mastering the Six Minute Jammy Egg
The "jammy egg" has become a staple of modern gastronomy, particularly in ramen and grain bowls. This specific state occurs when the white is fully opaque and set, but the yolk has reached a viscous, marmalade-like consistency. Achieving this requires precise timing of exactly six to six and a half minutes. Unlike a soft-boiled egg, the jammy egg must be firm enough to slice in half without the yolk immediately running across the plate.
- Bring a pot of water to a rolling boil, then reduce to a simmer.
- Gently lower the eggs and set a digital timer for six minutes.
- Maintain a steady temperature to ensure even heat distribution.
- Prepare an ice bath while the eggs simmer to ensure a rapid stop.
The success of this method relies on the "hot start" approach, which allows for a consistent baseline. When eggs are started in cold water, the variables of pot material and stove power make it nearly impossible to hit the six-minute jammy window consistently. By controlling the starting temperature, the cook ensures that the protein coagulation proceeds at a predictable rate every time.
The Chemical Reactions of Overcooked Yolks
One of the most common kitchen errors is over-boiling, which leads to a distinct and unappealing chemical reaction. When an egg is subjected to high heat for too long, typically exceeding eleven or twelve minutes, a greenish-gray ring forms around the yolk. This is not a sign of spoilage, but rather a result of a specific chemical reaction between the sulfur in the egg whites and the iron in the egg yolks.
- Hydrogen sulfide gas is released from the proteins in the white as they denature.
- The gas migrates inward toward the cooler center of the egg.
- Upon reaching the yolk, the gas reacts with iron found in the yolk's yolk-sac.
- Ferrous sulfide is formed, creating the characteristic dark discoloration.
This reaction is accompanied by a strong, sulfurous odor often associated with "rotten eggs," even though the egg is perfectly safe to eat. Additionally, the texture of the yolk becomes chalky and dry as the fats are squeezed out by the tightening protein mesh. Preventing this reaction requires strict adherence to timing and immediate cooling after the desired cook time is reached.
Temperature Control for Consistent Results
Consistency in egg boiling is often undermined by fluctuations in water temperature and the initial state of the egg. Many home cooks make the mistake of using a "rolling boil" throughout the entire process. However, a violent boil can cause the eggs to crack and leads to uneven cooking due to the excessive turbulence and steam pockets. A gentle simmer, characterized by small, steady bubbles, provides a more stable thermal environment for the eggs.
- Initial Temperature: Using eggs straight from the refrigerator requires roughly 30 seconds more than room-temperature eggs.
- Water Volume: A larger pot of water maintains its temperature better when cold eggs are added.
- Altitude: At higher elevations, water boils at lower temperatures, requiring significantly longer cooking times.
- Simmering: Keeping the water at approximately 90-95°C prevents the exterior from overcooking before the interior is done.
By standardizing these environmental factors, the cook can rely on a fixed timer rather than guesswork. Using a thermometer to verify that the water stays within the simmering range ensures that the rate of heat transfer remains constant, leading to identical results across multiple batches.
Standardizing Times for Different Egg Sizes
The mass of an egg significantly impacts how long it takes for heat to reach the center. Most recipes assume the use of "Large" eggs, which weigh approximately 50 to 55 grams. If a cook uses "Medium" or "Jumbo" eggs without adjusting the timing, the results will be either overcooked or undercooked. The surface-area-to-volume ratio dictates that smaller eggs cook much faster than their larger counterparts. The table below provides a guide for adjusting times based on size for a medium-set yolk.
| Egg Size | Average Weight | Recommended Time (Med-Set) |
|---|---|---|
| Small | 42g | 6 Minutes |
| Medium | 49g | 7 Minutes |
| Large | 56g | 8 Minutes |
| Jumbo | 70g | 9.5 Minutes |
When dealing with Jumbo eggs, the extra mass requires nearly two additional minutes of boiling to achieve the same internal temperature as a Large egg. Conversely, quail eggs, which are significantly smaller, may require as little as two minutes to reach a hard-boiled state. Understanding these mass-based variations is crucial for precision in the kitchen.
The Role of Rapid Cooling in Texture
The cooking process does not stop the moment an egg is lifted out of the boiling water. Because the shell and the interior of the egg hold significant residual heat, "carry-over cooking" will continue to tighten the proteins for several minutes. To achieve the specific texture intended, this process must be halted abruptly. This is achieved through the use of an ice bath-a bowl filled with equal parts cold water and ice cubes.
- Prepare the ice bath before the timer for the boiling eggs goes off.
- Use a slotted spoon to transfer eggs immediately from the pot to the ice.
- Leave the eggs submerged for at least five minutes to ensure the core temperature drops.
- Peel the eggs while they are still slightly submerged or under running water.
Rapid cooling also causes the egg to shrink slightly within the shell. This physical contraction helps pull the membrane away from the shell, making the peeling process much smoother. Without an ice bath, a soft-boiled egg can easily transition into a medium-boiled egg just by sitting on the counter for a few minutes, ruining the desired liquid yolk effect.
Achieving the Ideal Hard Boiled Center
A perfect hard-boiled egg should have a fully set, opaque white and a yolk that is solid but still creamy and bright yellow. The ideal window for this result is between nine and eleven minutes. Achieving this without the aforementioned green ring or a chalky texture is the hallmark of a disciplined cook. At this stage, the yolk proteins have fully coagulated, but the lipids (fats) have not yet been completely squeezed out of the protein matrix, allowing for a rich mouthfeel.
- 9 Minutes: The yolk is solid on the edges but slightly moist in the very center.
- 10 Minutes: The yolk is fully set and features a uniform, pale yellow color.
- 11 Minutes: The yolk is firm and starts to become more crumbly.
Hard-boiled eggs are often used for deviled eggs or salads, where structural integrity is paramount. By keeping the boil time under twelve minutes and using an ice bath, you ensure that the yolk remains vibrant and the whites stay tender enough to be palatable. This precision prevents the common "rubbery" complaint associated with overcooked institutional eggs.
Precision Boiling for Easier Shell Removal
The difficulty of peeling an egg is often attributed to the age of the egg, but boiling technique plays an even larger role. Fresh eggs have a lower pH, which causes the membrane to adhere more tightly to the shell. To counteract this, the "hot start" method is scientifically proven to be superior. Placing an egg into boiling water causes a thermal shock that allows the membrane to pull away from the shell almost instantly, regardless of the egg's age.
- Start with boiling water rather than cold water to shock the membrane.
- Add a teaspoon of vinegar or baking soda to the water (optional, as pH adjustment).
- Boil for the desired duration according to your preferred yolk doneness.
- Shock the eggs in an ice bath for ten minutes to facilitate contraction.
- Crack the shell gently all over and peel from the wider end where the air pocket is located.
The combination of thermal shock and rapid cooling creates a physical gap between the albumen and the shell's inner lining. This allows the shell to slip off in large pieces rather than tiny shards, preserving the smooth, aesthetic surface of the cooked egg white. Precision in timing thus serves a dual purpose: perfect internal texture and effortless external presentation.

Comments