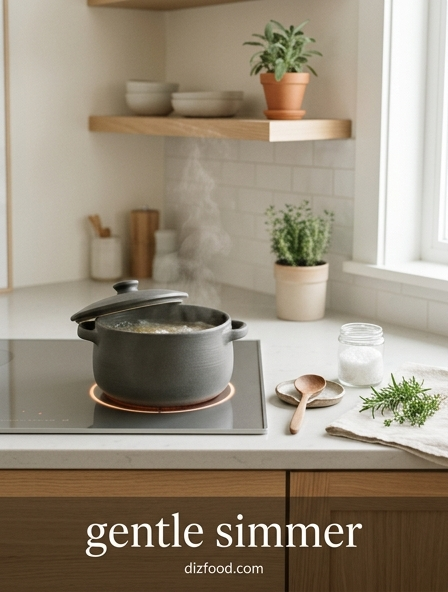
To elevate your home cooking, mastering the art of the gentle simmer is essential for achieving melt-in-your-mouth proteins and deeply aromatic stews. This low-and-slow technique allows tough connective tissues in meat to break down gradually without drying out the muscle fibers, ensuring every bite remains succulent. By maintaining a steady temperature just below the boiling point, you extract maximum flavor from herbs and spices while preserving the structural integrity of your ingredients. It is the culinary secret behind restaurant-quality braises and comforting Sunday roasts that satisfy the soul. Understanding subtle nuances in heat control will transform your kitchen results, especially once you learn the key differences between a gentle simmer vs vigorous boil.
Defining Simmering versus Boiling
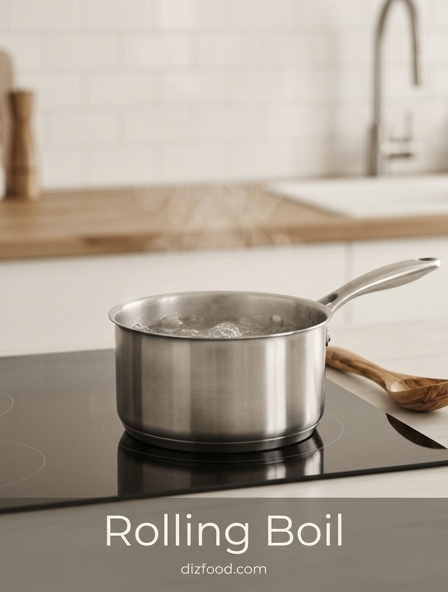
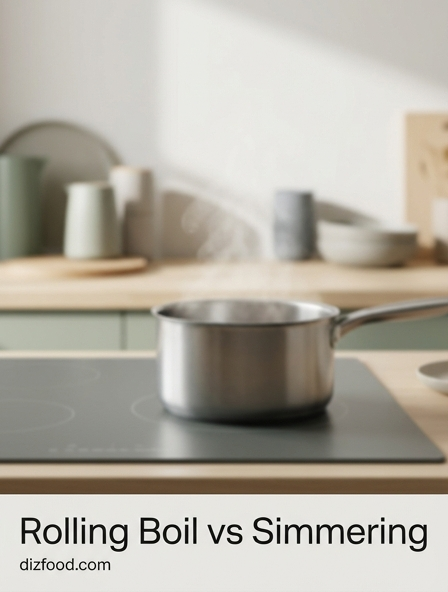
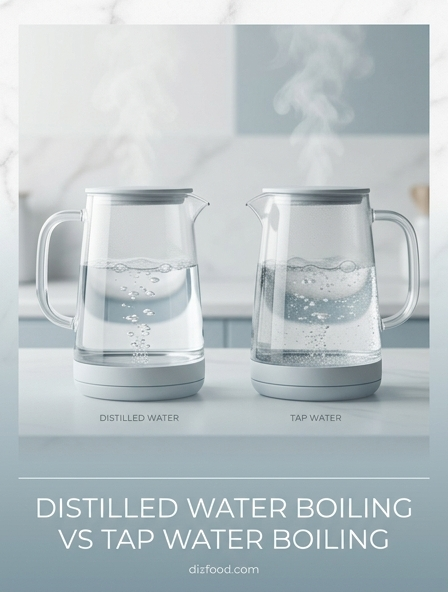
In the culinary arts, distinguishing between a simmer and a boil is fundamental to achieving the desired texture and flavor in cooked dishes. A full boil occurs when a liquid reaches its maximum temperature-212°F at sea level-resulting in large, aggressive bubbles that break the surface rapidly. This turbulent environment is ideal for cooking pasta or blanching vegetables quickly, but it can be catastrophic for delicate proteins or long-term braises, as the agitation can toughen meat fibers and cloud stocks.
Simmering is a more controlled application of heat, sitting just below the boiling point. It allows for a gentle transfer of energy that softens connective tissues without the violent movement of a rolling boil. The primary differences can be categorized as follows:
- Vigorous Boil: Large, noisy bubbles, high evaporation rate, and intense agitation.
- Gentle Simmer: Small, infrequent bubbles (often called "lazy" bubbles) that rise slowly to the surface.
- Poach: Very few bubbles, minimal surface movement, and the lowest heat setting.
Mastering the transition between these states ensures that sauces emulsify properly and meats remain succulent throughout the cooking process.
Ideal Temperature for Gentle Heat
Achieving the perfect gentle simmer requires precision in temperature management. While a boil is fixed at 212°F, simmering occupies a specific range that allows for chemical transformations like the Maillard reaction to continue subtly within the liquid. Generally, a simmer is maintained between 185°F and 205°F. Within this range, there are nuances that professional chefs utilize to control the rate of extraction from aromatics and the softening of proteins.
| Cooking Technique | Temperature Range (°F) | Visual Description |
|---|---|---|
| Poaching | 160°F - 180°F | Still water with occasional shimmering. |
| Gentle Simmer | 185°F - 195°F | Small bubbles breaking the surface every few seconds. |
| Full Simmer | 195°F - 205°F | Constant stream of small bubbles across the surface. |
| Rolling Boil | 212°F | Violent, large bubbles that cannot be stirred away. |
Monitoring these temperatures with a digital thermometer can help beginners identify the exact point where their stove settings correspond to these critical culinary milestones.
Best Meat Cuts for Braising
Not all proteins respond equally to the long, moist heat of a gentle simmer. While lean cuts like chicken breast or pork tenderloin become dry and stringy when subjected to prolonged heat, tougher cuts thrive. These specific portions of the animal are typically high-use muscles containing significant amounts of connective tissue. Through the braising process, these tough tissues transform into succulent gelatin, creating a rich mouthfeel and tender results.
When selecting meat for a simmered dish, look for marbled fat and a high collagen content. Some of the most effective cuts include:
- Beef Chuck Roast: High fat content and excellent flavor profile for pot roasts.
- Short Ribs: Rich in bone marrow and connective tissue for deep, savory sauces.
- Pork Shoulder (Boston Butt): Ideal for low-and-slow cooking until it pulls apart easily.
- Lamb Shanks: Contain thick membranes that melt into a silky texture over several hours.
- Chicken Thighs: More resilient than breasts, maintaining moisture during simmering.
Choosing the right cut is the first step in ensuring that the final dish is tender rather than rubbery.
The Science of Breaking Down Collagen
Collagen is a structural protein found in the connective tissues, tendons, and ligaments of animals. In its raw state, collagen is tough and inedible, forming a tight triple-helix structure that resists mastication. The science of simmering is essentially the science of thermal denaturation. When collagen is exposed to moist heat over a long duration, the hydrogen bonds holding the triple helix together begin to weaken and eventually collapse.
As these fibers unravel, they transform into gelatin. Gelatin is a protein that can hold many times its weight in water, which provides the "moist" sensation in well-cooked braised meats, even if the muscle fibers themselves have technically lost their internal juices. This transformation is not instantaneous; it requires a sustained temperature above 160°F but below the boiling point to ensure the muscle fibers do not contract too violently. If the heat is too high, the fibers squeeze out all moisture before the collagen can convert, resulting in meat that is both dry and tough. Controlled simmering facilitates this conversion perfectly, yielding a melt-in-the-mouth consistency.
Choosing Flavorful Cooking Liquids
The liquid used during a simmer does more than just conduct heat; it serves as the flavor foundation for the entire dish. Because simmering involves a long cooking time, the liquid will reduce and concentrate, intensifying every note present in the pot. Selecting a balance of acidity, salt, and aromatics is vital to preventing a one-dimensional final product. A combination of liquids often yields the most complex results.
To build a robust simmering base, consider the following layers of flavor:
- Primary Body: Use high-quality beef, chicken, or vegetable stock rather than plain water to provide an immediate depth of umami.
- Acidity: Incorporate dry wine, cider, or a splash of vinegar to help break down fibers and brighten the heavy fats.
- Aromatics: Add a mirepoix (onions, carrots, celery) along with garlic and peppercorns.
- Herbs: Use "hard" herbs like rosemary, thyme, or bay leaves which can withstand hours of heat without losing their essence.
By thoughtfully selecting these components, the liquid eventually transforms into a sophisticated sauce that coats the main ingredients perfectly.
Visual Cues for the Perfect Simmer
While thermometers provide accuracy, many experienced cooks rely on visual cues to maintain a gentle simmer. Observation is often the quickest way to adjust a stove's dial to account for the thickness of the pot or the volume of the ingredients. A perfect simmer is characterized by subtle movement rather than chaotic bubbling. Learning to read the surface of the liquid prevents the common mistake of over-boiling.
Look for these specific visual indicators during the cooking process:
- The Shiver: The surface of the liquid should vibrate slightly, with tiny bubbles occasionally breaking through.
- Lazy Bubbles: One or two small bubbles should rise to the surface every second or two, usually from the center or the edges of the pot.
- Wisps of Steam: Steady, gentle steam should rise from the pot, but it should not be a thick, obscuring cloud.
- Minimal Turbulence: The ingredients in the pot should remain mostly stationary rather than being tossed around by the liquid.
If the surface looks still, the temperature is likely too low for collagen breakdown; if it is rolling, the heat is too high.
Essential Cookware for Braising Success
The vessel used for simmering is just as important as the heat source itself. A high-quality simmering pot must have excellent heat retention and a tight-fitting lid to minimize evaporation. If the lid is loose, the liquid level will drop too quickly, leaving the top of the food dry and potentially scorching the bottom. Materials that distribute heat evenly are preferred to prevent "hot spots" that cause localized boiling.
| Material | Pros | Cons |
|---|---|---|
| Enameled Cast Iron | Superior heat retention; easy to clean. | Very heavy; slow to heat up. |
| Stainless Steel (Tri-ply) | Responsive to heat changes; durable. | Can have hot spots if thin-bottomed. |
| Copper | Ultimate temperature control. | Extremely expensive; high maintenance. |
| Ceramic/Clay | Very gentle, even heating. | Fragile; can crack with thermal shock. |
For most home kitchens, a heavy Dutch oven is the gold standard, providing the mass necessary to maintain a constant internal temperature despite minor fluctuations in the stovetop's output.
Searing for Deep Flavor Profiles
Before the simmering liquid is ever added to the pot, a crucial step must occur: searing. This process involves browning the surface of the meat in a small amount of fat over high heat. Searing does not "lock in juices," a common culinary myth, but it does initiate the Maillard reaction. This chemical reaction between amino acids and reducing sugars creates hundreds of different flavor compounds and a characteristic brown crust that provides the complexity necessary for a successful braise.
Once the meat is browned and removed from the pot, you will notice brown bits stuck to the bottom, known as the "fond." This fond is a concentrated source of flavor. When you deglaze the pan with wine or stock, these bits dissolve into the liquid, ensuring that the savory, roasted notes from the sear are distributed throughout the entire dish during the simmer. Skipping the sear results in a gray, lackluster appearance and a finished sauce that lacks the savory "bass notes" required for a truly professional result.
Optimal Timing for Tender Results
Simmering is a test of patience where the clock is the most important tool. Unlike grilling or sautéing, where seconds matter, simmering occurs over hours. The goal is to reach the "fork-tender" stage, where the meat holds its shape but yields effortlessly when pressed with a utensil. Because every cut of meat has varying amounts of connective tissue, fixed times are often just estimates. However, general guidelines can help in planning a meal.
To determine if the simmer is complete, follow these steps:
- The Piercing Test: Insert a meat fork or skewer; it should slide in and out with zero resistance.
- The Shred Test: Using two forks, pull at the edge of the meat; it should flake apart along the grain.
- The Visual Check: Look for the meat pulling away from the bone (in shanks or ribs).
Typically, beef chuck requires 2.5 to 3 hours, while chicken thighs may only need 45 minutes. Cooking beyond the tender stage can eventually lead to "over-braising," where the meat becomes mushy and loses its structural integrity entirely.
Common Simmering Mistakes to Avoid
Even though simmering is a "low-maintenance" technique, several common pitfalls can ruin an otherwise perfect meal. The most frequent error is rushing the process by increasing the heat. High heat causes muscle fibers to contract tightly, resulting in a dry, rubbery texture that no amount of sauce can fix. Another mistake is using too much liquid; the meat should be partially submerged (braised), not drowned, to allow the flavors to concentrate properly.
Avoid these habits to ensure success:
- Peeking Constantly: Every time you lift the lid, you lose heat and moisture, extending the cooking time significantly.
- Neglecting the Fond: Forgetting to deglace the pan means leaving the best flavors behind.
- Adding Delicate Herbs Too Early: Parsley, cilantro, or basil should be added at the very end to preserve their bright colors and volatile oils.
- Ignoring the Liquid Level: If the liquid reduces too much, the sugars can burn, turning the sauce bitter.
By maintaining a steady, low temperature and respecting the ingredients, you can avoid these issues and produce a perfect gentle simmer every time.

Comments