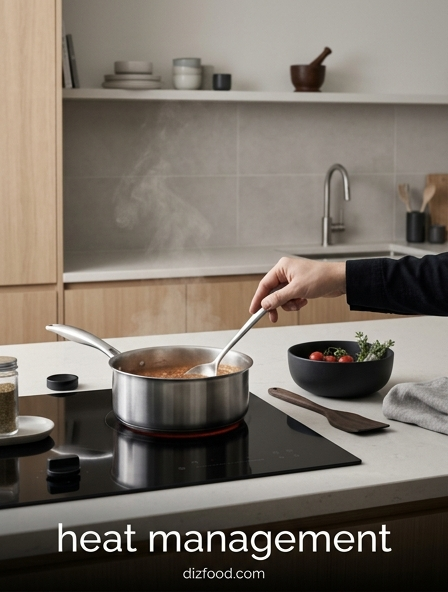
Mastering daily kitchen tasks requires a keen eye on temperature control, especially when dealing with different liquids. Effective heat management is the ultimate secret to boiling milk and water successfully without the frustration of messy boil-overs or scorched pans. While water is relatively straightforward and handles high heat well, milk is a delicate emulsion that requires frequent stirring and a gentle, steady flame to prevent its proteins from sticking to the bottom. By utilizing heavy-bottomed cookware and monitoring the surface tension, you can ensure consistent results and better safety in your kitchen. To elevate your culinary precision, it is essential to understand the unique thermal behaviors and differences between boiling milk vs boiling water.
Heat Conductivity and Pot Selection
The efficiency of heat transfer in the kitchen begins with the physical properties of the cookware. Thermal conductivity determines how quickly and evenly heat travels from the burner to the food. Materials like copper and aluminum possess high conductivity, ensuring rapid response to temperature adjustments and minimal hotspots. Conversely, stainless steel is a poor conductor but is frequently bonded with aluminum or copper cores to improve performance. Cast iron, while slow to heat, offers superior heat retention, making it ideal for maintaining steady temperatures during long cooking processes.
| Material | Conductivity Level | Best Use Case |
|---|---|---|
| Copper | Excellent | Precise sugar work and sauces |
| Aluminum | High | General frying and boiling |
| Cast Iron | Low | Searing and long braising |
| Stainless Steel | Poor | Acidic foods and boiling |
Selecting the right pot involves balancing these thermal properties against the specific requirements of the dish. A thin-bottomed pot may cause delicate sauces to break or scorch, whereas a heavy-bottomed vessel provides the thermal mass necessary to stabilize temperature fluctuations when cold ingredients are added.
Differences Between Water and Milk Boiling
While both liquids are staples in heat management, their physical compositions dictate vastly different boiling behaviors. Water is a simple substance with a consistent boiling point of 212°F (100°C) at sea level. As it reaches this threshold, bubbles of water vapor form at the bottom and rise freely to the surface. Milk, however, is a complex emulsion containing fats, proteins, and sugars, which complicates the heating process significantly.
- Vapor Pressure: The presence of dissolved solids slightly raises the boiling point of milk compared to pure water.
- Surface Tension: Proteins in milk create a stronger surface tension that traps steam, leading to rapid expansion.
- Chemical Reaction: Unlike water, milk undergoes Maillard browning and protein denaturation when exposed to high heat.
When heating milk, the proteins-specifically casein and whey-tend to coagulate and form a physical barrier on the surface. This barrier prevents steam from escaping efficiently, causing the liquid to foam and rise quickly. Water lacks these structural components, allowing for a steady, predictable transition from liquid to gas without the risk of sudden volume expansion or structural changes.
Controlling Temperature for Milk Stability
Maintaining the structural integrity of milk during heating requires precise temperature management to avoid curdling or separation. Milk is sensitive to rapid thermal shifts; applying high heat too quickly can cause the whey proteins to denature and bind with calcium, resulting in a grainy texture. To keep milk stable, it is essential to use a "low and slow" approach, allowing the temperature to rise gradually. This gives the molecules time to adjust without breaking the emulsion that keeps fats and water suspended together.
Temperature control is especially critical when incorporating acidic ingredients or thickeners. At approximately 150°F (65°C), the chemical structure of milk begins to shift, and by 180°F (82°C), it reaches a scalding point where many culinary applications, such as yogurt making or proofing yeast, are optimized. Using a heavy-bottomed pan or a double boiler can provide a buffer against the direct flame, ensuring that the liquid does not exceed these critical thresholds. Constant monitoring with a digital thermometer is recommended to ensure the milk remains within the safe stability zone, preventing the irreversible damage caused by overheating.
Preventing Surface Film and Scorching
Scorching and film formation are the primary challenges when managing heat with dairy or thick soups. Surface film, often called "milk skin," occurs when water evaporates from the surface, concentrating the proteins and fats into a solid layer. Scorching happens at the base of the pot where solid particles settle and burn due to direct contact with the heat source. Managing these issues requires a multi-faceted approach to kitchen heat application.
- Rinse the Pot: Rinsing the vessel with cold water before adding milk creates a thin moisture barrier that inhibits sticking.
- Maintain Constant Motion: Frequent stirring prevents solids from settling on the bottom and breaking the surface tension to stop film formation.
- Apply Indirect Heat: Using a heat diffuser or a double boiler reduces the intensity of the contact point.
- Cover the Surface: Placing a lid or a piece of parchment paper directly on the liquid can minimize evaporation and prevent skin from forming.
By implementing these strategies, cooks can ensure a smooth texture and prevent the bitter flavors associated with burnt proteins. Controlling the evaporation rate is as important as controlling the flame height when working with high-protein liquids.
Identifying Simmering vs Rolling Boils
Distinguishing between a simmer and a rolling boil is fundamental to heat management and affects the texture and clarity of the final product. A simmer is characterized by small, gentle bubbles that break the surface occasionally, typically occurring between 185°F and 205°F. This lower energy state is ideal for tough cuts of meat or delicate grains, as it prevents the mechanical agitation that can break food apart. In contrast, a rolling boil occurs at 212°F and is identified by large, vigorous bubbles that cannot be "stirred away."
Visual cues are the most reliable way to identify these stages without a thermometer. During a simmer, the surface of the liquid should barely quiver, with bubbles approximately the size of a pinhead rising from the bottom. A rolling boil involves a violent upheaval of the liquid, creating significant steam and movement. Choosing between these two depends on the desired outcome: simmering preserves the integrity of ingredients and clarifies stocks, while a rolling boil is necessary for pasta or reducing liquids quickly. Understanding these thermal states allows for better control over the rate of evaporation and the physical impact of heat on the food.
Strategies to Prevent Liquid Boil Over
A boil over occurs when bubbles are stabilized by starches or proteins, creating a foam that rises faster than it can pop. This is common with pasta water, potatoes, and dairy. To manage this risk, one must address the surface tension and the volume of the vessel. Selecting a pot that is significantly larger than the volume of the liquid provides a "safety zone" for expansion. Additionally, introducing a fat, such as a small amount of oil or butter, can break the surface tension of the bubbles, causing them to collapse before they reach the rim.
- The Wooden Spoon Trick: Placing a wooden spoon across the top of the pot breaks the bubbles as they rise, though this is a temporary fix.
- Temperature Reduction: Immediately lowering the heat reduces the energy entering the system, slowing bubble formation.
- Surface Agitation: Blowing on the foam or stirring vigorously can temporarily vent steam and lower the foam level.
- Anti-Foaming Agents: Commercial foam inhibitors or a simple splash of cold water can provide an instant correction.
Effective heat management involves proactive monitoring; once a boil over begins, the residual heat in the pot often keeps the reaction going even after the burner is turned off.
Impact of Stirring on Heat Distribution
Stirring is a mechanical form of heat management that facilitates convection within a liquid. In a static pot, heat moves primarily from the bottom upward, often creating a significant temperature gradient where the bottom is much hotter than the surface. This gradient is where scorching and uneven cooking occur. By stirring, the cook manually circulates the cooler liquid from the top to the bottom and vice versa, ensuring a homogenous temperature throughout the vessel.
The frequency and technique of stirring should be tailored to the viscosity of the liquid. Thicker substances, like stews or purees, have higher resistance to natural convection and require more frequent agitation to prevent localized overheating. Stirring also aids in the evaporation process by bringing hot liquid to the surface where steam can escape. Furthermore, it prevents the buildup of steam pockets at the base of the pan, which can lead to "burping" or splattering. In professional heat management, stirring is not merely for mixing ingredients but is a critical tool for maintaining thermal equilibrium and protecting the food from the intensity of the heat source.
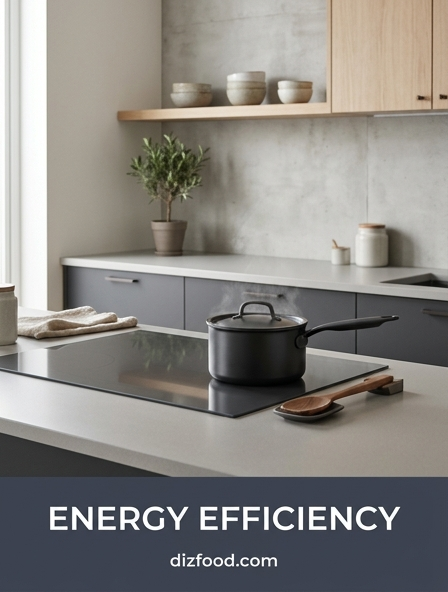
Using Lids for Thermal Efficiency
The use of a lid is one of the simplest yet most effective ways to manage heat and energy in the kitchen. When a pot is uncovered, a significant amount of energy is lost through evaporation and radiation. Placing a lid on the vessel traps the steam and heat, creating a pressurized environment that accelerates the heating process. This "greenhouse effect" within the pot allows liquids to reach a boil much faster while consuming less fuel. It also ensures that the temperature remains consistent from the bottom of the pot to the top of the food.
However, lid management requires nuance. While a tight-fitting lid is excellent for boiling water or steaming vegetables, it can be detrimental when reduction is the goal. For heat management in stews, a partially covered lid (propped open slightly) allows for a slow release of steam, preventing the internal temperature from rising too high and causing a rolling boil when a simmer is desired. Additionally, lids prevent moisture loss, which is essential for braising but can lead to soggy textures in other applications. Understanding when to seal, vent, or remove the lid is a hallmark of sophisticated thermal control.
Managing Heat for Large Volumes
Scaling up the volume of liquid introduces challenges related to thermal mass and recovery time. A large pot of water or soup has significant thermal inertia, meaning it takes a substantial amount of energy to change its temperature. When cold ingredients are added to a large volume of simmering liquid, the temperature can drop drastically, often taking several minutes to return to the desired state. This "recovery time" can affect the texture of foods like pasta or blanched vegetables, which may become mushy if they sit in lukewarm water for too long.
To manage heat in large volumes, it is often necessary to use a higher BTU (British Thermal Unit) burner or to pre-heat ingredients before adding them. Spreading the volume across two smaller pots can also increase the total surface area in contact with the heat source, reducing the time required to reach a boil. Additionally, using a lid during the initial heating phase is mandatory for efficiency. Once the target temperature is reached, the high thermal mass of a large volume becomes an advantage, as it will resist temperature drops even when the heat is lowered, providing a very stable environment for long-term poaching or simmering.
Cooling and Residual Heat Control
Heat management does not end when the burner is turned off. Residual heat, or "carry-over cooking," continues to affect the food long after the primary energy source is removed. Thick liquids and heavy cookware, such as cast iron or heavy-duty stainless steel, retain heat for an extended period. This can lead to overcooking if the food is left in the hot vessel. Understanding how to arrest the cooking process is just as vital as knowing how to initiate it.
- Ice Bathing: Submerging the base of the pot in a mixture of ice and water provides a rapid thermal transfer to stop the cooking immediately.
- Decanting: Transferring the liquid to a cold, wide-bottomed container increases the surface area and speeds up cooling.
- Wand Chillers: Using frozen cooling paddles can lower the internal temperature of large volumes quickly to meet food safety standards.
Properly managing the cooling phase is essential for maintaining the desired texture and preventing the growth of bacteria. By anticipating residual heat, cooks can remove food from the stove several minutes early, allowing the internal energy to finish the cooking process perfectly without exceeding the target temperature.


Comments