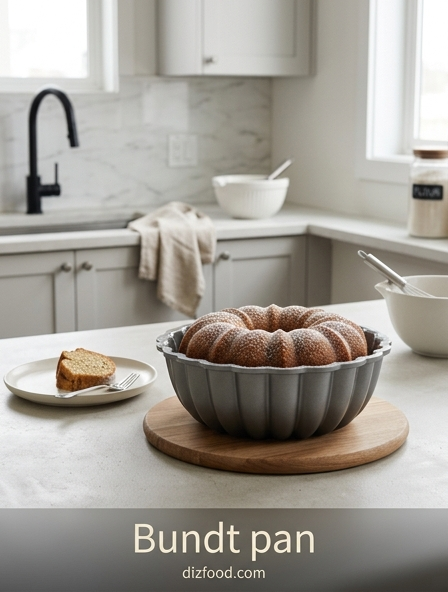
Mastering Pan Preparation Techniques
Achieving a flawless release starts with meticulous pan preparation, especially when dealing with the complex geometries of modern Bundt designs. Standard greasing methods often fail in deep flutes or sharp corners. The most reliable approach involves using a pastry brush to apply a homemade baking paste, typically a blend of equal parts softened shortening, neutral oil, and all-purpose flour. This creates a thick, opaque barrier that stays in place even as the oven temperature rises. Unlike liquid sprays that may pool at the bottom, a brushed-on coating ensures every crevice is covered.
- Use a soft-bristled silicone brush to reach the deepest ridges of the mold.
- Apply the coating just before adding the batter to prevent the fat from sliding down the sides.
- For chocolate cakes, substitute flour with cocoa powder to avoid a white residue on the finished crust.
- Avoid using butter alone, as its milk solids can act as a glue, causing the cake to stick.
Consistency is paramount; even a single missed spot can result in a significant tear that compromises the cake's structural aesthetic. Proper preparation ensures that the intricate patterns of the cast aluminum are perfectly mirrored in the baked sponge.
Selecting Batters for Structural Integrity
Not every cake recipe is suitable for the demanding environment of a Bundt pan. The ideal batter must possess enough structural integrity to support its own weight without collapsing or sticking to the intricate details of the mold. High-fat, dense batters like pound cakes, sour cream cakes, and butter-based sponges perform best. These recipes create a sturdy crumb that holds the shape of the pan's design once cooled. In contrast, very light, airy sponges or chiffon cakes lack the necessary density and often tear upon release.
| Batter Type | Structural Rating | Recommended Use |
|---|---|---|
| Traditional Pound Cake | Excellent | High-detail geometric pans |
| Sour Cream/Yogurt Cake | Superior | Standard fluted designs |
| Box Mix with Pudding | Good | General Bundt baking |
| Angel Food/Chiffon | Poor | Not recommended for Bundts |
When selecting a recipe, consider the moisture content. Too much liquid can lead to a fragile crust, while the right balance of fats and leavening agents ensures the cake expands into every corner of the pan, capturing the intended silhouette.
Techniques for Eliminating Air Pockets
Air bubbles are the enemy of a crisp Bundt definition. When batter is poured into the pan, it often traps pockets of air against the walls, resulting in unsightly pits on the surface of the finished cake. To combat this, one must be deliberate during the filling process. Start by adding a small amount of batter and using a small spatula or spoon to press it firmly into the bottom crevices of the pan.
- Fill the pan halfway and tap it firmly on a folded kitchen towel on the counter several times.
- Use a wooden skewer or knife to swirl through the batter, popping hidden bubbles and ensuring even distribution.
- Smooth the top of the batter with a spatula, pushing it slightly up the sides of the pan to encourage an even rise.
- Give the pan a final series of sharp taps before placing it in the oven.
These physical interventions force the batter into the fine lines of the mold, ensuring that the final product displays sharp, clean edges. Eliminating these voids is essential for cakes that will be served with a light glaze or simple dusting of sugar.
Optimizing Oven Temperature for Detail
Temperature control is a critical factor in how well a Bundt cake takes the shape of its container. Most Bundt recipes call for a moderate temperature, typically around 325°F to 350°F (160°C to 175°C). Baking at a slightly lower temperature for a longer duration allows the heat to penetrate the thick center of the cake evenly without burning the exterior. This slow bake gives the batter time to expand into the pan's intricate details before the crust sets.
Placement within the oven also matters. The middle rack provides the most consistent airflow around the pan and the central tube. If the oven is too hot, the exterior will harden prematurely, leading to large cracks or an uneven "dome" that makes the cake sit crookedly when inverted. Using an oven thermometer is highly recommended to verify that the internal environment is accurate. A steady heat ensures that the sugars in the batter caramelize evenly, creating a durable, golden-brown crust that serves as a protective shell for the moist interior, facilitating a cleaner release once the baking process is complete.
Perfecting the Critical Release Window
The timing of when to invert a Bundt cake is perhaps the most stressful part of the process. If you try to remove it too soon, the cake is too fragile and will break. If you wait too long, the cooling sugars and fats will act like cement, bonding the cake to the metal. The industry standard is the "ten-minute rule," which provides the optimal balance between structural setting and temperature contraction.
- Set a timer for exactly ten minutes the moment the pan leaves the oven.
- Place the pan on a wire cooling rack to allow air to circulate underneath.
- Gently jiggle the pan horizontally to see if the cake has pulled away from the edges.
- Place a cooling rack over the top of the pan, grip both firmly, and flip in one swift motion.
If the cake does not drop immediately, let it sit inverted for another few minutes; the trapped steam often helps loosen any stubborn spots. Avoid the temptation to use a knife to pry the cake out, as this will damage both the cake's surface and the pan's non-stick coating.
Enhancing Definition with Translucent Glazes
A glaze should complement the architecture of a Bundt cake, not obscure it. The goal is to highlight the ridges and valleys created by the pan. To achieve this, the viscosity of the glaze must be carefully calibrated. A glaze that is too thin will run off completely, while one that is too thick will clump and hide the design. The ideal consistency is similar to heavy cream or warm honey, allowing it to flow slowly over the peaks and settle slightly in the grooves.
- Apply glazes when the cake is completely cool to prevent them from soaking in.
- Pour the glaze from a vessel with a spout, starting at the highest point of each ridge.
- Use translucent fruit glazes or simple sugar washes for a sophisticated, professional look.
- Warm the glaze slightly if it becomes too stiff to ensure a smooth, glossy finish.
By controlling the flow, you create a visual contrast that emphasizes the cake's sculpted depth. A well-applied glaze provides a professional sheen that makes the intricate patterns of the pan stand out, turning a simple cake into a centerpiece.
Dusting Techniques for Sculpted Depth
For many Bundt cakes, a simple dusting of powdered sugar or cocoa is the most effective way to showcase intricate designs. This technique, while simple, requires precision to avoid a messy appearance. The key is to use a fine-mesh sieve and hold it at least six to eight inches above the cake. This height allows the particles to distribute evenly, creating a soft, snow-like effect rather than heavy patches. The powder will naturally settle more heavily in the recessed areas, which serves to emphasize the three-dimensional quality of the cake.
Timing is also essential; ensure the cake is entirely cool before dusting. If the cake is even slightly warm, the sugar will melt, creating a sticky, transparent film instead of the desired matte finish. For cakes with very deep grooves, you can apply a light first layer, let it settle, and then add a second pass to brighten the highlights. This minimalist approach is often preferred for high-detail pans where a heavy frosting would mask the labor-intensive shape. Using a stencil can also add another layer of visual interest to the flat top of the cake once inverted.
Troubleshooting Common Release Failures
Even experienced bakers encounter the occasional Bundt disaster where the cake refuses to emerge intact. Understanding the root causes of these failures can prevent future heartaches. Most issues stem from improper preparation or environmental factors during the cooling process. Tearing usually indicates that the pan was not greased sufficiently or that the cake was inverted while the internal structure was still too hot and soft.
| Symptom | Probable Cause | Recommended Fix |
|---|---|---|
| Bottom Stuck in Pan | Grease pooled or missed spot | Use a brush for even application |
| Crumbly Exterior | Over-baked or low fat content | Check oven temp and use pound cake recipes |
| Damp/Soggy Surface | Left in pan too long | Strict adherence to the 10-minute rule |
| Large Holes on Surface | Trapped air pockets | Tap pan and use a skewer to pop bubbles |
If a cake does stick, you can sometimes "glue" pieces back on with a bit of frosting or hide the blemish with a strategic thick glaze or fruit garnish, but prevention remains the best strategy.
Preserving Intricate Pan Details
The longevity and performance of a Bundt pan depend heavily on how it is cleaned and stored. Modern pans often feature non-stick coatings that are easily damaged by harsh chemicals or abrasive tools. Once the cake is removed, soak the pan in warm, soapy water to loosen any remaining crumbs. Avoid using metal scrubbers or stiff brushes that can scratch the surface; instead, use a soft cloth or a dedicated Bundt cleaning brush designed to reach into tight corners.
- Never put high-quality cast aluminum pans in the dishwasher, as the detergents can degrade the coating.
- Dry the pan thoroughly before storing to prevent any oxidation or spotting.
- Store pans with a layer of parchment paper between them if stacking to prevent scratching.
- Check for "seasoning" buildup over time, which can actually cause sticking if it becomes gummy.
Treating your pans as precision kitchen tools ensures that they will provide clean releases for years to come. Maintaining the integrity of the interior surface is the only way to guarantee that the sharp details of the mold continue to transfer perfectly to your baked goods.
Professional Plating for Bundt Cakes
The final presentation of a Bundt cake should honor its unique shape. Choosing the right platter is the first step; a flat, rimless pedestal or a wide ceramic plate provides a clean stage that doesn't distract from the cake's geometry. Center the cake carefully, as the symmetry of the Bundt is its most striking feature. If the cake has a hole in the center, you can fill it with fresh berries, edible flowers, or even a small bowl of whipped cream to add color and texture.
When garnishing, less is often more. A few sprigs of mint or a light scattering of zest can add a pop of color without overwhelming the sculpted design. If you are serving the cake with a side of sauce or coulis, consider pooling the sauce on the plate rather than pouring it over the cake, allowing the guest to appreciate the "naked" beauty of the bake. For formal occasions, a light spray of edible luster dust can add a metallic sheen that catches the light on the cake's ridges, creating a truly professional, bakery-quality finish that celebrates the iconic Bundt form.

Comments