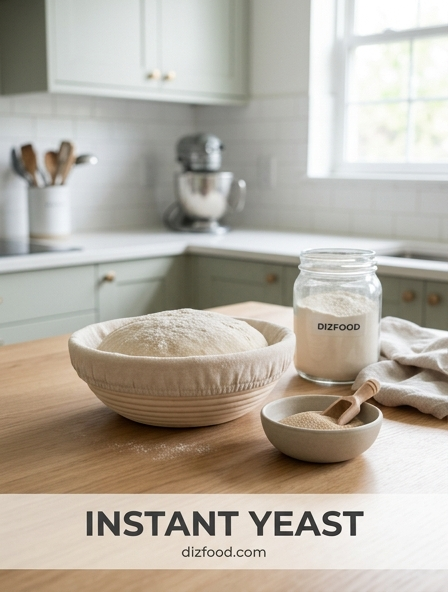
If you've ever craved fresh, homemade bread but felt intimidated by the long wait times, instant yeast is your ultimate kitchen shortcut. This powerful leavening agent is designed for speed, featuring smaller granules that dissolve immediately and allow you to skip the traditional "blooming" step. By mixing it directly into your dry ingredients, you can cut down on fermentation time and enjoy quicker proofing cycles, resulting in soft, airy loaves in record time. It's the perfect solution for busy bakers who want bakery-quality results without the all-day commitment. To ensure your next recipe rises perfectly, it is essential to understand the functional differences between Active Dry Yeast vs. Instant Yeast.
The Science of Instant Yeast
Instant yeast, known scientifically as a specific strain of Saccharomyces cerevisiae, is a biological leavening agent engineered for efficiency and speed. Unlike traditional varieties, this yeast undergoes a specialized drying process that results in significantly smaller, more porous granules. These microscopic pores allow for rapid rehydration, enabling the fungal cells to activate almost immediately upon contact with moisture. The manufacturing process involves selecting strains that exhibit high levels of glycolytic activity, which translates to a more vigorous production of carbon dioxide gas during the early stages of fermentation.
From a biochemical perspective, instant yeast contains a higher percentage of live cells per gram compared to active dry yeast. It is often treated with ascorbic acid or other dough conditioners during production to enhance the structural integrity of the gluten network. When the yeast consumes the simple sugars present in flour, it releases ethanol and carbon dioxide. The rapid gas release creates pressure within the dough's protein matrix, causing it to expand. This scientific optimization ensures that the yeast remains potent and reliable, providing consistent results for both professional pastry chefs and home enthusiasts alike.
Instant Versus Active Dry Yeast
Understanding the distinctions between instant and active dry yeast is fundamental for achieving the desired crumb and crust in bread. While both are dried forms of the same fungal species, their physical properties and preparation requirements differ substantially. The primary difference lies in the size of the granules and the moisture content remaining after the dehydration process. Instant yeast is finely milled, whereas active dry yeast features larger granules protected by a layer of dormant, dead yeast cells that must be dissolved before the interior cells can function.
| Feature | Instant Yeast | Active Dry Yeast |
|---|---|---|
| Granule Size | Fine, needle-like | Large, round pellets |
| Rehydration | Not required | Mandatory blooming |
| Fermentation Speed | Rapid and vigorous | Moderate and steady |
| Typical Usage | Direct mix with flour | Dissolved in water |
Because instant yeast is more concentrated, bakers typically use about 25 percent less by weight when substituting it for active dry yeast. The lack of a "blooming" phase makes instant yeast the preferred choice for modern high-speed baking environments and automated bread machines.
Skipping the Proofing Stage
One of the most significant advantages of using instant yeast is the ability to bypass the traditional blooming or proofing stage. In older baking protocols, yeast had to be dissolved in warm water with a pinch of sugar to "prove" that the organisms were alive. This step was necessary because older manufacturing techniques resulted in inconsistent viability. With modern instant yeast, the manufacturing standards are so high that the proofing step is largely redundant, saving the baker approximately ten to fifteen minutes of preparation time per batch.
The unique porous structure of instant yeast allows it to absorb liquid directly from the dough mass. As soon as the flour, water, and yeast are combined and agitated, the yeast cells begin their metabolic processes. This immediate activation is particularly beneficial in lean doughs where the hydration levels are high enough to support rapid enzyme activity. By eliminating the liquid-only proofing phase, bakers also maintain better control over the total water temperature of the dough, as the yeast does not require a specific pre-soak environment to wake up from its dormant state.
Faster Rise Times for Busy Bakers
Instant yeast is specifically formulated to decrease the duration of fermentation cycles, making it a powerful tool for those with limited time. Because the strain is selected for its aggressive gas production, the first rise (bulk fermentation) often takes 30 to 50 percent less time than doughs made with active dry yeast. This efficiency does not necessarily sacrifice the quality of the final product; rather, it shifts the focus to rapid volume expansion. For recipes that traditionally require two hours for a first rise, instant yeast can often achieve the same volume in just sixty minutes.
This accelerated timeframe is ideal for same-day baking projects, such as dinner rolls or focaccia, where the goal is a light, airy texture within a compressed schedule. However, bakers should remain vigilant, as the faster metabolic rate means the "window of perfection" is shorter. Over-proofing can occur more quickly if the dough is left unattended. By monitoring the dough closely, bakers can harness this speed to produce fresh bread without the multi-day commitment often associated with sourdough or long-fermentation starters, ensuring that home-baked loaves fit into a modern, busy lifestyle.
Direct Mixing Techniques for Success
To maximize the efficacy of instant yeast, it is essential to utilize the direct mixing method. This approach involves blending the dry yeast granules directly into the flour and other dry ingredients before any liquids are added. This ensures an even distribution of yeast cells throughout the flour matrix, preventing clumps that could lead to uneven pockets of fermentation or unsightly brown spots in the finished crumb. When the dry ingredients are thoroughly integrated, the yeast is perfectly positioned to interact with the moisture as soon as it is introduced.
- Always whisk the yeast into the flour to ensure total dispersion.
- Keep the yeast away from direct contact with salt and sugar initially, as high concentrations can inhibit early cell hydration.
- Add liquids last to trigger the immediate activation of the yeast throughout the entire dough mass.
- Ensure all dry ingredients are at room temperature to avoid shocking the yeast cells upon contact.
This method simplifies the workflow and reduces the number of bowls used during preparation. It also allows for more consistent hydration of the gluten-forming proteins, as the yeast and flour absorb the water simultaneously during the mixing and kneading phases.
Optimizing Dough Temperature for Speed
Temperature is the primary catalyst for yeast activity, and instant yeast is particularly sensitive to thermal changes. While traditional yeast often requires water between 100°F and 110°F, instant yeast can thrive at slightly higher temperatures during the initial mixing phase, often between 120°F and 130°F, provided it is mixed with the dry ingredients first. This higher temperature range jumpstarts the enzymes, leading to an incredibly fast rise. However, precision is vital; if the dough temperature exceeds 140°F, the yeast cells will begin to die, resulting in a flat, dense loaf.
A digital thermometer is an indispensable tool for managing this process. By calculating the "desired dough temperature," bakers can adjust the water heat to compensate for the ambient kitchen temperature and the friction generated by a stand mixer. In cooler environments, using slightly warmer water ensures the yeast remains active and the rise time stays within the predicted window. Conversely, in a hot kitchen, using cooler water can prevent the yeast from exhausting itself too quickly. Maintaining this thermal balance is the secret to achieving professional-grade consistency across different seasons and kitchen conditions.
Achieving Light and Airy Texture
The ultimate goal of using instant yeast is often the creation of a light, airy crumb with a delicate internal structure. Because instant yeast produces gas so efficiently, it creates a high internal pressure that stretches the gluten strands to their maximum potential. This results in larger air pockets and a softer texture, which is highly desirable in sandwich breads, brioche, and sweet rolls. The rapid expansion helps to "lift" the dough before the gluten has a chance to relax too much, ensuring that the final loaf has a proud, tall stature.
To achieve this texture, it is important to pair the yeast with a high-protein flour, such as bread flour, which provides the necessary strength to hold the gas. When the yeast releases carbon dioxide, the strong gluten network traps the bubbles, creating the honeycomb-like structure known as the crumb. Furthermore, the small amount of ascorbic acid often found in commercial instant yeast acts as a dough strengthener, further supporting the expansion. This combination of biological vigor and structural integrity results in a loaf that feels light in the hand and has a tender, melt-in-the-mouth quality when consumed.
Simplified Steps for Rapid Loaves
Baking a loaf of bread using instant yeast can be distilled into a few streamlined steps that maximize efficiency without compromising the end result. By following a rapid-rise protocol, a baker can go from raw ingredients to a finished loaf in under two hours. This process relies on the quick-acting nature of the yeast and a shortened proofing cycle.
- Combine all dry ingredients, including the instant yeast, in a large mixing bowl.
- Add warm water (125°F) and oil, mixing until a shaggy dough forms.
- Knead the dough for 8 to 10 minutes until smooth and elastic to develop the gluten.
- Allow the dough to rest in a warm spot for 30 to 45 minutes until doubled in size.
- Shape the dough into a loaf and place it in a prepared pan.
- Perform a final short proof of 20 minutes while the oven preheats.
- Bake until the internal temperature reaches 190°F.
This workflow eliminates the long wait times associated with traditional methods, making fresh bread an achievable daily task rather than a weekend-only project. The reliability of instant yeast ensures that even beginners can achieve success on their first attempt.
Storage Tips for Maximum Potency
The longevity and effectiveness of instant yeast are heavily dependent on how it is stored after the package is opened. Exposure to oxygen, moisture, and heat are the primary factors that degrade yeast viability. When yeast cells are exposed to the air, they slowly lose their ability to ferment sugars, leading to sluggish rise times or total failure. To maintain peak performance, it is crucial to keep the yeast in an environment that preserves its dormant state until it is ready for use.
For best results, store an open bag of instant yeast in an airtight container. While a cool, dry pantry is acceptable for short-term use, the refrigerator or freezer is much better for long-term storage. In the freezer, instant yeast can remain potent for up to two years. When using frozen yeast, there is no need to thaw it; the small granules will warm up instantly when mixed with the flour and warm liquids. Regularly testing the yeast by performing a small trial rise can help verify its potency if it has been stored for an extended period, ensuring that your baking efforts are never wasted on inactive leavening.
Mastering Quick Bread Baking Workflows
Optimizing your kitchen workflow when using instant yeast involves coordinating the preparation steps to match the yeast's fast-acting nature. Because the fermentation happens quickly, the baker must be ready to move from one stage to the next without delay. This means preheating the oven earlier than usual and having all shaping tools ready before the first rise is complete. Mastering this rhythm prevents the dough from over-proofing, which can lead to a coarse texture or a collapsed crust during baking.
A professional workflow also includes "mis en place," or having all ingredients measured and ready. Since instant yeast does not require a separate soaking step, the mixing phase happens rapidly. If the oven is not at the correct temperature when the dough finishes its final proof, the baker is forced to wait, risking an over-inflated loaf. By syncing the oven's recovery time with the dough's expansion, you ensure that the yeast receives the "oven spring" it needs-a final burst of activity caused by the sudden heat. This mastery of timing ensures that every loaf benefits from the maximum volume and best possible crust color provided by the instant yeast.

Comments