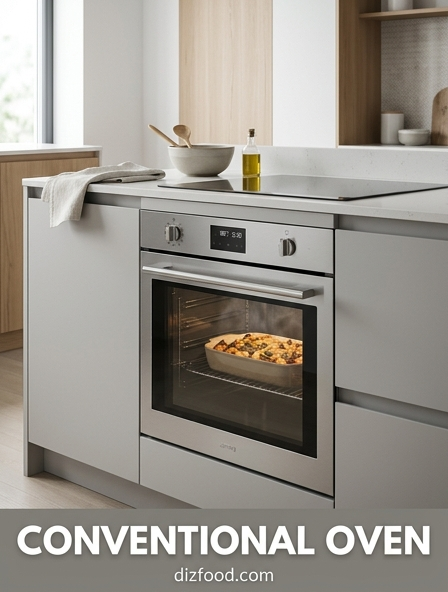
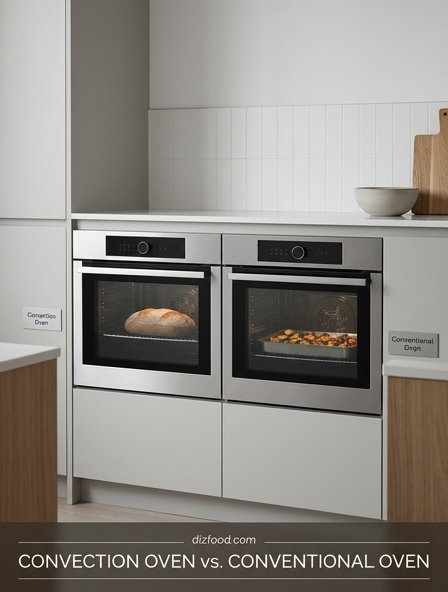
Understanding Radiant Heating Elements
Radiant heating elements serve as the fundamental power source in a conventional oven, typically situated at the top and bottom of the appliance interior. These components are comprised of resistive wires encased in durable metal sheathing, which transform electrical energy into infrared radiation. When the oven is activated, the elements glow as they reach high temperatures, projecting heat directly onto the food and the oven's internal surfaces. Unlike convection systems that utilize fans, radiant heating relies on the direct line-of-sight between the heat source and the target object.
The operation of these elements is governed by the oven's thermostat, which causes them to cycle on and off to maintain a specific temperature range. This cycling process creates a dynamic environment where the temperature fluctuates slightly above and below the set point. Understanding how these elements distribute heat is essential for preventing uneven cooking or localized burning on the surfaces of baked goods.
- Lower Element: Functions as the primary heat source for baking and roasting, providing steady upward energy.
- Upper Element: Often used for broiling, providing high-intensity heat for surface browning and caramelization.
- Thermostat Cycling: The rhythmic activation of elements to sustain the desired thermal environment.
Preheating for Thermal Equilibrium
Achieving thermal equilibrium within a conventional oven is a critical step that goes beyond simply waiting for the air to reach the desired temperature. While the internal thermometer may signal that the oven is ready within minutes, the heavy metal walls and floor of the appliance require significantly more time to absorb and stabilize heat. True preheating ensures that the entire cavity becomes a consistent radiator of energy, which prevents the temperature from dropping drastically when the door is opened to insert cold food.
When an oven is properly preheated, the radiant energy emitted from the saturated walls works in tandem with the heating elements to provide a balanced cooking environment. This thermal mass acts as a buffer, ensuring that cakes rise evenly and roasts cook through without the exterior burning before the interior is done. For optimal results, most culinary experts recommend allowing the oven to remain at the target temperature for at least fifteen to twenty minutes before beginning the cooking process.
- Initial Phase: The heating elements run continuously to raise the air temperature.
- Saturation Phase: The internal surfaces absorb heat, reaching a state of equilibrium.
- Stabilization: The thermostat cycles less frequently as the thermal mass maintains the environment.
Mapping Oven Hot Spots
Every conventional oven possesses unique thermal characteristics, often resulting in "hot spots" where certain areas are significantly warmer than others. These variations are frequently caused by the proximity of the heating elements, the location of the oven vent, or the thickness of the insulation in specific sections of the appliance. Identifying these zones is a vital skill for any cook, as it allows for better control over the browning and texture of various dishes. Without this knowledge, one might find that one side of a tray of cookies is burnt while the other remains doughy.
A common method for mapping these areas involves the bread slice test. By covering an oven rack with slices of white bread and baking them at a moderate temperature, the resulting browning patterns clearly reveal the intensity of heat distribution. Darker slices indicate hot spots, while lighter slices identify cooler zones. Once mapped, cooks can adjust their techniques, such as rotating pans halfway through the baking cycle to ensure even exposure to the radiant heat sources.
- Rear Corners: Often run hotter due to limited airflow and proximity to rear insulation.
- Center Rack: Generally provides the most consistent and balanced heat distribution.
- Door Vicinity: Typically the coolest area due to heat loss through the seal and glass.
Strategic Rack Positioning Techniques
The vertical placement of the oven rack significantly influences the final outcome of a dish by changing its proximity to the radiant heating elements. Because conventional ovens do not have fans to circulate air, the distance from the top and bottom elements dictates how much direct infrared energy the food receives. Strategic positioning allows the cook to prioritize either the top browning or the bottom crisping of a dish, depending on the specific culinary requirements of the recipe.
Selecting the correct rack position can be categorized into three primary zones, each serving a distinct purpose in the cooking process. Using the middle rack is the standard for most baking, as it offers the most balanced exposure to both the top and bottom heat sources. However, shifting to the upper or lower thirds can solve specific problems, such as a pale crust or a burnt base. The following table outlines the general applications for different rack levels:
| Rack Position | Primary Function | Ideal Food Types |
|---|---|---|
| Upper Third | Top-down browning and crisping | Casseroles, au gratin dishes, broiled meats |
| Middle | Balanced, even heat distribution | Cakes, cookies, muffins, general roasting |
| Lower Third | Bottom-up heat for crust development | Pizzas, pies, artisan breads, large roasts |
Bakeware Impact on Heat Absorption
The material, color, and finish of bakeware play a decisive role in how heat is absorbed and transferred to food in a conventional oven. Different materials react uniquely to the infrared radiation emitted by the heating elements. For instance, dark or matte-finished metal pans absorb radiant heat much more aggressively than shiny, light-colored pans. This can lead to faster browning and a thicker crust, which may be desirable for certain types of bread but detrimental to delicate pastries or light-colored cakes.
Glass and ceramic bakeware behave differently than metal; they are poor conductors but excellent retainers of heat. Once they become hot, they provide a very steady and consistent source of energy to the food, making them ideal for slow-cooked dishes and casseroles. However, because they take longer to heat up, they may not produce the immediate "oven spring" required for certain leavened goods. Understanding these material properties allows for more precise adjustments to oven temperatures and cooking durations.
- Anodized Aluminum: Offers excellent conductivity and even browning without excessive absorption.
- Dark Non-Stick: Absorbs heat rapidly; often requires a 25-degree temperature reduction.
- Insulated Pans: Feature a layer of air to slow heat transfer, preventing bottom over-browning.
Leveraging Thermal Mass Tools
Integrating heavy thermal mass tools into a conventional oven can drastically improve its performance by stabilizing temperature fluctuations. Tools such as baking stones, pizza steels, or heavy cast-iron Dutch ovens act as reservoirs of thermal energy. When these items are preheated along with the oven, they absorb a massive amount of heat and release it steadily into the food. This is particularly beneficial in conventional ovens where the air temperature can drop quickly when the door is opened or when the heating elements cycle off.
Baking stones, made of porous ceramic or cordierite, are excellent for drawing moisture out of dough while providing intense bottom heat, resulting in a crisp crust. Pizza steels offer even higher thermal conductivity, transferring heat faster than stone for a superior char. Even if not cooking directly on them, keeping a stone on the bottom rack can help maintain a more consistent ambient temperature throughout the entire cooking process, especially during long roasting sessions.
- Preheat the thermal mass for at least 45 minutes to ensure full saturation.
- Place the food directly on the heated surface for maximum energy transfer.
- Utilize the residual heat of the mass for gentle finishing or warming.
Managing Airflow and Heat Distribution
In a conventional oven, air moves primarily through natural convection, where hot air rises and cooler air sinks. This movement is relatively slow compared to the forced-air systems found in convection ovens. Consequently, managing the airflow within the cavity is vital for even cooking. If the oven is overcrowded with multiple pans or if a single pan is too large for the rack, the natural currents are obstructed. This leads to pockets of trapped heat and areas where the air remains stagnant, causing uneven results and extended cooking times.
To optimize airflow, it is essential to leave at least two inches of space between the pans and the oven walls. When baking on multiple racks simultaneously, pans should be staggered rather than placed directly above one another. This allows the rising heat from the bottom element to reach the upper pans more effectively. Without proper spacing, the bottom of the lower pan and the top of the upper pan may cook correctly, while the middle surfaces remain underdone.
- Staggering: Offsetting pans on different levels to allow vertical air passage.
- Airing: Ensuring the oven's exhaust vent is not blocked by foil or large trays.
- Single Layering: Prioritizing single-rack cooking for the most sensitive recipes.
Temperature Calibration and Accuracy
The internal thermostat of a conventional oven is often less accurate than users assume, frequently deviating by 25 to 50 degrees Fahrenheit from the displayed setting. This discrepancy occurs because the thermostat measures temperature at a single point, usually near the back or top, which may not represent the actual temperature at the center of the rack. Furthermore, over years of use, sensors can lose calibration, leading to consistent over- or under-heating that ruins sensitive recipes. Regular calibration checks are necessary to maintain culinary precision.
The most effective way to verify accuracy is through the use of an independent oven thermometer placed in the center of the middle rack. By comparing the thermometer's reading with the oven's dial after a full preheating cycle, you can determine the necessary offset. Many modern digital ovens allow users to manually adjust the calibration through the settings menu, while older manual ovens simply require the cook to adjust their target temperature accordingly. The following table illustrates common calibration variances:
| Oven Setting | Actual Temperature | Required Adjustment |
|---|---|---|
| 350°F | 325°F | Set to 375°F (+25 offset) |
| 350°F | 350°F | No adjustment needed |
| 350°F | 380°F | Set to 320°F (-30 offset) |
Controlling Radiant Heat Intensity
Controlling the intensity of radiant heat is essential when dealing with long cook times or delicate ingredients that are prone to scorching. Because radiant energy travels in a straight line, it can be easily blocked or redirected. If the top of a cake or a turkey is browning too quickly before the center is cooked, the cook must intervene to shield the surface from the direct infrared rays of the upper heating element. This management of "line-of-sight" heat allows for greater flexibility during the cooking process.
Aluminum foil is the most common tool for managing radiant intensity. By loosely tenting a dish with foil, the reflective surface bounces the infrared radiation away, effectively slowing down the browning process while allowing the ambient air temperature to continue cooking the interior. Additionally, adjusting the rack height during the cooking process can mitigate intensity; moving a dish further away from the active element reduces the energy density hitting the food surface, following the inverse-square law of physics.
- Tenting: Covering food with foil to reflect radiant energy.
- Positioning: Increasing the distance between the food and the heating element.
- Shielding: Placing an empty baking sheet on the rack above the food.
Heat Retention for Consistent Results
Heat retention is the ability of the oven to maintain its internal temperature despite external influences, such as the introduction of cold food or the opening of the door. Every time the oven door is opened, the internal air temperature can drop by as much as 50 degrees almost instantly. In a conventional oven, recovering this lost heat takes time because the air must be reheated by the radiant surfaces and elements. Minimizing door openings is therefore one of the most effective ways to ensure consistent results and prevent falling soufflés or uneven browning.
To maximize retention, ensure that the oven door gasket is in good condition, providing a tight seal that prevents hot air from escaping. High-quality insulation within the oven walls also plays a significant role in holding energy. Furthermore, the use of heavy-duty cookware like cast iron or stoneware contributes to the overall thermal stability of the environment. These materials act as secondary heat sources that continue to radiate energy even when the air temperature fluctuates.
- Use the oven light and window to check progress instead of opening the door.
- Ensure the door seal is clean and free of debris for a tight vacuum.
- Preheat for extra time to saturate the internal insulation and structure.

Comments