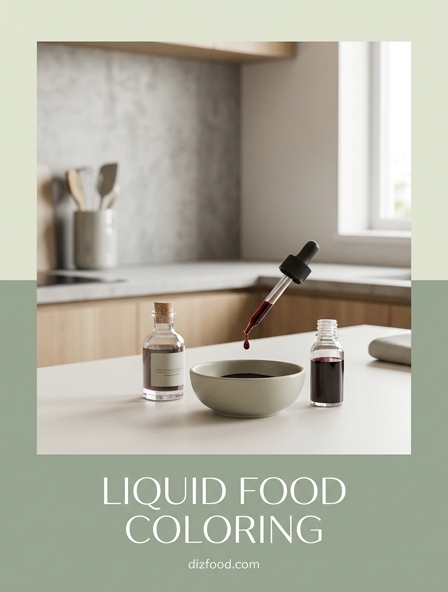
Mastering Subtle Shades With Liquid Dyes
Liquid food coloring is the secret weapon for bakers who prioritize elegance and restraint in their confectionery designs. Unlike high-viscosity alternatives, liquid dyes offer a fluidity that allows for an immediate and even dispersion across large batches of icing or dough. Mastering these subtle shades requires an understanding of how the water-based medium interacts with different fat contents. When working with lighter palettes, the goal is often to evoke a sense of sophistication rather than a bold, artificial impact. This is particularly useful for spring-themed treats, wedding cakes, and baby shower cookies where a soft touch is paramount.
Key advantages of using liquid dyes for subtle work include:
- Immediate integration without streaks or clumps.
- Ability to dilute the pigment further with water or alcohol.
- Greater control over the transparency of the final product.
- Lower risk of staining the tongue or teeth during consumption.
The process begins with a clear vision of the desired hue. By starting with a neutral base, such as a white buttercream or a pale vanilla cake mix, the liquid dye acts as a tinting agent that gently shifts the visual profile without overwhelming the aesthetic. This level of mastery ensures that the food remains appetizing while looking professionally curated.
Precise Drop Control For Soft Pastels
Precision is the hallmark of professional baking, and liquid food coloring provides the most reliable mechanism for drop-by-drop adjustment. Because the bottles are designed with narrow dispensing tips, the baker can achieve a level of repeatability that is difficult to replicate with gel tubs and toothpicks. For soft pastels, a single drop can represent the difference between a delicate sky blue and a saturated turquoise. Mastering this control involves a methodical approach where every addition is documented and stirred thoroughly before more color is introduced.
To achieve the perfect pastel through precise control, follow these steps:
- Start with your base mixture in a clear glass bowl to monitor color shifts.
- Dispense one drop of liquid dye onto a small spoon before adding it to the bowl.
- Incorporate the pigment using a folding motion to ensure total integration.
- Wait sixty seconds for the color to stabilize before adding a second drop.
- Record the final number of drops used to ensure consistency in future batches.
By treating the coloring process as a quantifiable measurement, you eliminate the guesswork often associated with more concentrated coloring agents. This systematic technique allows for the creation of identical batches, which is essential for large events where visual uniformity is required across hundreds of individual dessert servings.
Achieving Gentle Tints In Royal Icing
Achieving gentle tints in royal icing requires a delicate balance of moisture and pigment. Because royal icing is sensitive to added liquids, the water-based nature of standard food coloring must be accounted for to prevent the icing from becoming too runny for piping. When aiming for soft blushes or minty greens, the low-intensity pigment of liquid dyes allows for a gradual transition that preserves the icing's structural integrity. This table illustrates the typical ratios for achieving common pastel shades in standard royal icing:
| Target Color | Drops per Cup of Icing | Resulting Aesthetic |
|---|---|---|
| Pale Blush | 1 Drop Red | Soft, warm pink |
| Lavender Mist | 1 Drop Blue, 1 Drop Red | Muted, dusky purple |
| Cool Mint | 1 Drop Green | Refreshing, light tint |
It is vital to stir slowly to avoid incorporating air bubbles, which can ruin the smooth finish of flooded cookies. Using liquid dyes ensures that the tint is uniform throughout the entire batch, preventing the "speckling" effect sometimes seen with poorly mixed gels or powders. This consistency is vital for intricate royal icing designs that require perfection.
Why Low Pigment Concentration Prevents Over Saturation
The science behind why liquid food coloring is superior for avoiding over-saturation lies in its low pigment concentration. Most commercial liquid dyes are significantly more diluted than their gel or paste counterparts, which are designed for high-impact, neon, or dark colors. This lower concentration acts as a natural safeguard for the baker. In a high-pressure kitchen environment, it is easy to accidentally add too much color; however, with liquid dyes, the margin for error is much wider. A single accidental extra drop of gel might ruin a pastel aesthetic, whereas an extra drop of liquid dye results in a barely perceptible shift.
This property makes liquid dyes the ideal choice for beginners and professionals alike who are aiming for "barely there" colors. The high water content in the dye helps the pigment molecules spread further apart, ensuring that no single area of the frosting or batter becomes a "hot spot" of intense color. This dispersion creates a soft, matte finish that is highly desirable in modern, minimalist cake decorating. By choosing a medium that is inherently less intense, you prioritize the visual harmony of the dessert over raw vibrancy, ensuring that the food looks as good as it tastes.
Seamless Blending For Delicate Batter Hues
When working with cake batters or muffin mixes, the goal is often a seamless, uniform color that looks natural rather than dyed. Liquid food coloring is particularly effective here because its viscosity matches the liquid components of the batter, such as milk or eggs. This allows the color to blend effortlessly during the mixing stage without requiring over-beating, which could lead to a tough crumb. For delicate hues like a light lemon yellow or a soft pistachio green, liquid dyes provide a translucent quality that lets the natural texture of the baked good shine through.
To ensure seamless blending in your batters, consider these tips:
- Add the liquid dye to the wet ingredients before combining with dry flour.
- Use a whisk for initial distribution to break up any pigment pockets.
- Avoid over-mixing once the flour is added to prevent gluten development.
- Check the color under natural light, as kitchen lighting can distort pastels.
This technique results in a crumb that is evenly tinted from the center to the crust, providing a professional appearance when the cake is sliced and served. It creates a subtle aesthetic that surprises guests without overwhelming the palate with unnecessary chemicals or heavy concentrations of dye.
Cost Effective Solutions For Light Color Palettes
For large-scale baking projects where light color palettes are the focus, liquid food coloring stands out as a highly cost-effective solution. While gel colors are often more expensive due to their concentration, liquid dyes are affordable and widely available in larger quantities. Since pastel shades require very little pigment, a single bottle of liquid dye can color dozens of batches of frosting or batter. This makes it the preferred choice for high-volume catering or commercial bakeries that need to maintain tight margins without sacrificing visual appeal.
| Coloring Type | Relative Cost | Best Use Case |
|---|---|---|
| Liquid Dye | Low | Pastels, large batches |
| Gel Paste | Medium | Vibrant, saturated tones |
| Powdered Pigment | High | Macarons, chocolate |
Investing in a set of primary liquid colors allows for endless mixing possibilities. By combining inexpensive drops, you can create custom "boutique" colors like dusty rose or sage green for a fraction of the price of specialized gel jars. This economic efficiency is a key consideration for the budget-conscious home cook and the professional chef alike when planning extensive dessert menus.
Maintaining Perfect Texture In Soft Frostings
Maintaining the structural integrity of frosting is a primary concern when adding any liquid ingredient. Soft frostings, such as Swiss meringue buttercream or whipped cream stabilizers, can be sensitive to moisture changes. Liquid food coloring, while water-based, is ideal for light tinting because the volume required to achieve a pastel shade is so small that it does not disrupt the emulsion. When handled correctly, the frosting remains fluffy, stable, and easy to spread, without the weeping or curdling that can occur when too much liquid is introduced to a fat-heavy base.
To maintain the perfect texture while coloring, follow this sequence:
- Whip your frosting to the desired peak stiffness before adding color.
- Add the liquid dye in small increments, stirring by hand with a spatula.
- Monitor the consistency; if it softens, refrigerate for ten minutes.
- Avoid using liquid dyes for deep, dark colors in temperature-sensitive frostings.
By respecting the delicate balance of fats and liquids, you ensure that your decorative swirls and rosettes hold their shape while showcasing a beautiful, soft hue. This method preserves the mouthfeel and stability of the topping, ensuring it stands up to the rigors of display and service.
The Science Of Dilution For Pastel Perfection
The science of dilution is fundamental to achieving pastel perfection in the culinary arts. Liquid food coloring utilizes a solvent-usually water or propylene glycol-to carry the pigment molecules. When these drops are added to a white base, like marshmallow fondant or vanilla icing, the pigments undergo a process of massive dilution. The white particles reflect light, while the sparse pigment molecules absorb only specific wavelengths. This interaction creates the visual perception of a pastel color. Because liquid dyes are already diluted, they allow for a more even distribution of these molecules across the medium.
Unlike gels, which contain thickeners like corn syrup or glycerin, liquid dyes do not introduce unnecessary viscosity to the mix. This allows the pigment to move more freely during the mixing process, resulting in a hue that is optically smooth. Understanding this chemical dispersion helps the baker realize why "less is more." By slowly diluting the concentrated liquid into the larger mass, you are performing a controlled chemical titration, stopping exactly when the light reflection reaches the desired soft frequency for that perfect spring aesthetic.
Liquid Versus Gel For Muted Tones
When deciding between liquid and gel food coloring for muted tones, the choice often comes down to the desired intensity and the base material. While gels are celebrated for their ability to produce deep reds and dark blacks without thinning the mixture, they can be difficult to use for subtle work. A tiny speck of gel can often be too much, leading to a color that is brighter than intended. Liquid dyes, conversely, offer a "soft-start" approach that is naturally suited for muted, vintage, or earthy tones.
| Feature | Liquid Dye | Gel Coloring |
|---|---|---|
| Base Component | Water-based | Glycerin-based |
| Intensity | Low to Medium | Very High |
| Ease of Mixing | Very Easy | Requires Effort |
| Color Accuracy | High for Pastels | High for Neons |
For the baker seeking a sophisticated, understated look, the liquid medium provides a transparent quality that gels often lack. This transparency allows for a more natural-looking product, especially in jellied glazes and light syrups where clarity is as important as the color itself. Choosing liquid over gel ensures a delicate touch for refined desserts.
Essential Tips For Even Color Distribution
Achieving even color distribution is the final step in mastering liquid food coloring. One of the most common mistakes is failing to mix the dye thoroughly, resulting in streaks or "hot spots" of color that can detract from a professional finish. Because liquid dyes have a low viscosity, they can sometimes settle in the crevices of a mixing bowl or cling to the bottom of a whisk. To prevent this, a systematic approach to stirring and resting the mixture is necessary to ensure the pigment has fully bonded with the base material.
Follow these tips for a perfectly uniform distribution:
- Use a "swipe and fold" technique with a silicone spatula to reach the bottom.
- Allow the colored mixture to rest for five minutes to let the color "develop."
- Scrape the sides of the bowl multiple times during the mixing process.
- Mix in small batches if working with large quantities to ensure consistency.
By taking these extra steps, you ensure that every bite of your cake or every cookie in the batch looks identical. Even distribution is what separates amateur baking from artisanal confectionery, turning simple ingredients into a visual masterpiece that displays consistency and professional care.

Comments