Understanding the Science of Blooming Yeast
Yeast is a living organism, a single-celled fungus that remains dormant in its commercial dry form. Blooming is the process of rehydration, which signals to the cells that it is time to exit dormancy and begin metabolic activity. When yeast is introduced to warm water, the protective outer layer of the granules dissolves, allowing the cells to absorb moisture and "wake up." This biological transition is essential for ensuring that the yeast is alive and capable of leavening dough. During this phase, the yeast begins to consume available sugars and produce carbon dioxide gas and ethanol. The carbon dioxide becomes trapped within the dough's gluten structure, causing it to expand and rise. This scientific reaction is what creates the airy, porous texture characteristic of high-quality breads. Beyond functionality, blooming acts as a proof of life; if the yeast does not react in the water, it indicates the cells are dead, saving the baker from wasting time and expensive ingredients on a loaf that will never rise. Understanding this cellular awakening is the first step toward mastering the art of fermentation in the kitchen.
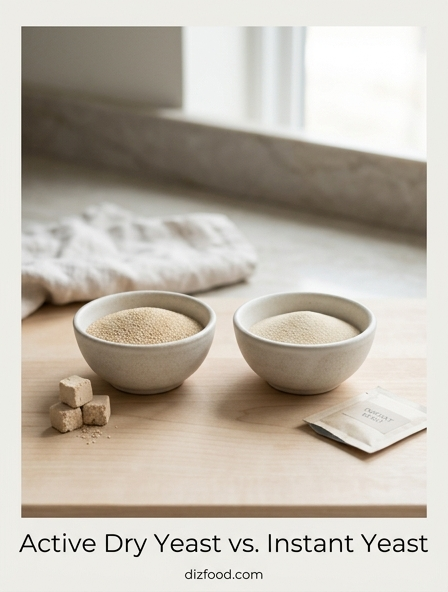
Difference Between Active Dry and Instant Yeast
Understanding the distinction between active dry and instant yeast is critical for successful blooming and dough development. Active dry yeast consists of larger granules with a layer of dead yeast cells surrounding the living core. Because of this protective coating, it must be dissolved in warm liquid to release the active cells. In contrast, instant yeast is processed into much smaller granules, which dissolve faster and can often be mixed directly into dry ingredients. While both types serve the same primary function, their behavior in recipes varies significantly.
| Feature | Active Dry Yeast | Instant Yeast |
|---|---|---|
| Granule Size | Large granules | Fine, small particles |
| Activation Req | Must bloom in water | Can be added dry |
| Rise Time | Slower, gradual rise | Rapid, faster rise |
| Processing | Low heat dried | Gentle, rapid drying |
While instant yeast is engineered for convenience, many professional bakers still prefer blooming it to ensure the yeast is fresh and to jumpstart the fermentation process. Using them interchangeably without adjusting the liquid temperature or hydration method can lead to inconsistent results in the final bake. Choosing the right type depends on your schedule and the specific requirements of the bread variety you are preparing.
Choosing the Right Water Temperature
Water temperature is perhaps the most sensitive variable in the blooming process, acting as the catalyst for cellular activity. If the water is too cold, generally below 70°F, the yeast will remain in its dormant state, failing to activate within a reasonable timeframe for baking. Conversely, if the water exceeds 120°F, the heat will begin to damage the delicate cell walls, and at 140°F, the yeast is killed instantly, rendering it useless for leavening. The ideal "sweet spot" for blooming active dry yeast is between 105°F and 115°F. At this specific temperature range, the water is warm enough to dissolve the protective coating on the yeast granules without stressing the living organisms inside. Using a digital kitchen thermometer is highly recommended for accuracy, as the "feel" of water can be deceptive. Even a small deviation outside the optimal range can significantly slow down the fermentation process or result in a dense, flat loaf. Consistency in temperature ensures that every batch of dough starts with a vigorous and healthy population of active yeast cells, leading to a reliable and predictable rise.
The Role of Sugar in Yeast Activation
Sugar is not strictly necessary for yeast to activate, as yeast can eventually break down the starches in flour for food. However, in the initial blooming stage, adding a small amount of sugar acts as a potent fuel source that accelerates the process. When yeast consumes sugar, it undergoes fermentation more rapidly, providing a visual confirmation of health much faster than water alone. This metabolic boost is particularly helpful when working with older yeast or in cooler kitchen environments. Different sweeteners can be used to facilitate this reaction, each contributing slightly different nuances to the final flavor profile of the bread.
- Granulated Sugar: The most common choice, providing a quick energy boost.
- Honey: Offers natural sugars and helps retain moisture in the finished crumb.
- Maple Syrup: Provides a distinct flavor while feeding the yeast efficiently.
- Agave Nectar: A neutral-tasting alternative that dissolves quickly in warm water.
It is important not to over-saturate the blooming mixture with sugar, as excessive concentrations can actually inhibit yeast activity through osmotic pressure. A single teaspoon is usually sufficient to kickstart the fermentation and ensure a vigorous rise without overwhelming the delicate balance of the dough chemistry.
Signs of Healthy Yeast Fermentation
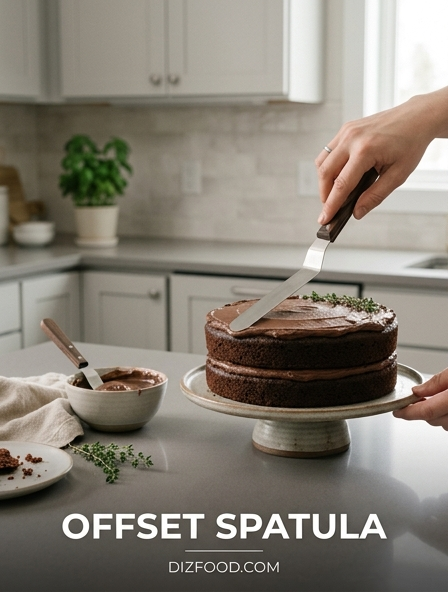
Identifying healthy yeast fermentation is a sensory experience that requires observing changes in appearance and aroma. Within five to ten minutes of being added to warm water and sugar, healthy yeast will begin to exhibit several clear signs of life. The most prominent indicator is the formation of a creamy, tan-colored foam on the surface of the liquid. This foam, often called the "bloom," is composed of thousands of tiny carbon dioxide bubbles trapped in a protein-rich suspension. As the gas is released, the volume of the mixture should noticeably increase, sometimes doubling in height within the container. Beyond visual cues, the aroma is a significant factor; healthy yeast should emit a pleasant, earthy, and slightly bready scent. If the mixture remains flat and watery, or if it produces an unpleasantly sharp or sour odor, it is likely that the yeast is dead or contaminated. A robust, frothy head of foam confirms that the yeast is vigorous and ready to be incorporated into the flour, guaranteeing that the dough will have the necessary strength to rise properly during the proofing stages.
Step by Step Yeast Blooming Process
The step-by-step process of blooming yeast is a precise ritual that ensures the success of your bread-making endeavor. Following a structured approach minimizes the risk of failure and provides a consistent baseline for your recipes.
- Measure the required amount of water and heat it to approximately 110°F.
- Pour the warm water into a small, clean glass or ceramic bowl.
- Add a teaspoon of sugar or honey to the water and stir until fully dissolved.
- Sprinkle the yeast granules evenly over the surface of the liquid.
- Stir gently to ensure all yeast particles are moistened and submerged.
- Set the bowl in a warm, draft-free area and let it sit undisturbed for 10 minutes.
- Observe the surface for the development of a thick, frothy foam.
Once the foam has reached a height of about half an inch, the yeast is considered fully bloomed. At this point, the mixture can be poured directly into the dry ingredients. If after ten minutes no foam has formed, the yeast is inactive, and the process should be restarted with a fresh batch to avoid wasting more ingredients.
Why Your Yeast Failed to Foam
It is incredibly frustrating when yeast fails to foam, but understanding the underlying causes can prevent future disappointment. The most common culprit is expired yeast; these living organisms have a finite lifespan, and once they die, no amount of warmth will revive them. Another frequent issue is improper water temperature. If the liquid was too hot, you likely pasteurized the yeast, killing the cells before they could begin fermenting. Conversely, water that is too cold may simply fail to trigger the enzymatic reactions needed for activity. High concentrations of salt can also be a factor; if salt is added directly to the blooming water, it can dehydrate the yeast cells through osmosis, preventing them from foaming. Furthermore, the presence of certain chemicals in tap water, such as high levels of chlorine, can act as an antimicrobial agent, effectively neutralizing the yeast. Finally, ensure that your containers are free from soap residue or sanitizing agents, as these can disrupt the cellular membranes of the yeast. Diagnosing which of these factors led to the failure is essential for adjusting your technique and ensuring a successful rise in your next project.
The Impact of Chlorine and Water Quality
Water quality is an often-overlooked variable that significantly impacts the efficacy of yeast blooming. Most municipal tap water contains chlorine or chloramines, which are added to kill harmful bacteria. Unfortunately, these same chemicals can be detrimental to the delicate, single-celled yeast organisms. High levels of chlorine can stun or kill yeast cells, leading to a sluggish bloom or a complete lack of fermentation. Furthermore, the mineral content of the water, known as "hardness," plays a role in the structural integrity of the dough. While some minerals are beneficial for yeast health, excessively hard water can toughen the gluten, while extremely soft water can make the dough overly sticky. If you live in an area with highly treated or very hard water, using filtered water or bottled spring water can yield much better results. Distilled water is generally not recommended, as it lacks the essential minerals that yeast needs to thrive. By paying attention to the chemical composition and purity of the liquid used for blooming, you provide the yeast with a cleaner, more hospitable environment, resulting in a more predictable and vigorous fermentation process throughout the baking session.
Proper Storage for Long Term Potency
To maintain the long-term potency of yeast, proper storage is absolutely essential. Yeast is sensitive to three main environmental factors: heat, moisture, and oxygen. When yeast is exposed to air, the cells begin to oxidize and slowly lose their viability. Similarly, moisture can cause the yeast to activate prematurely or develop mold, rendering it useless. To maximize the shelf life of your yeast, follow these storage guidelines:
- Keep unopened packages in a cool, dry pantry away from direct sunlight.
- Once opened, transfer dry yeast to an airtight container, such as a glass jar.
- Store the airtight container in the refrigerator for use within four months.
- For even longer storage, place the yeast in the freezer for up to two years.
Freezing yeast does not kill it; rather, it puts the cells into a deep state of suspended animation. When you are ready to bake, you can measure the yeast directly from the freezer, though letting it sit at room temperature for a few minutes before blooming can help avoid temperature shock. Consistently protecting your yeast from the elements ensures it remains ready to bloom whenever you decide to bake.
Troubleshooting Common Yeast Problems
Troubleshooting common yeast problems is an essential skill for any home baker. If your dough is rising slowly, the environment may be too cold, or your yeast might be near the end of its lifespan. You can often compensate by moving the dough to a warmer spot, such as near a preheating oven. If the yeast bloomed successfully but the dough fails to rise later, the issue might be related to the amount of salt or fat in the recipe, both of which can slow down fermentation if used in excess. Another common problem is a "yeasty" or alcoholic smell in the finished bread, which usually indicates that the dough was allowed to ferment for too long or at too high a temperature. To fix this, try a shorter proofing time or a slightly cooler location for the next batch. If you find your yeast is clumping and not dissolving during the blooming phase, ensure you are adding the yeast to the water, not the water to the yeast, and stir more thoroughly. By observing these small details and making incremental adjustments, you can overcome almost any obstacle in the fermentation process and achieve consistent results.

Comments