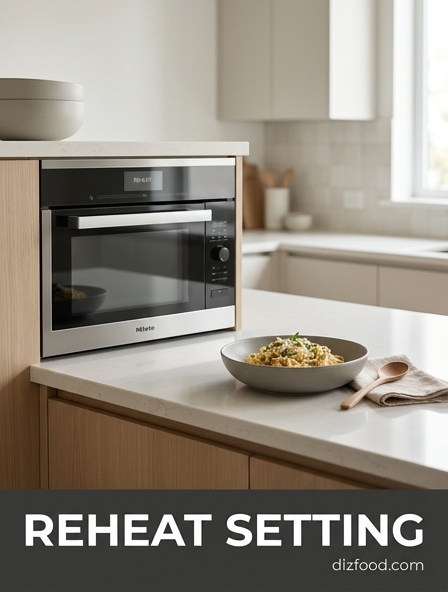
Tired of soggy pizza or rubbery leftovers? Mastering your appliance's reheat setting is the secret to reviving yesterday's meal without sacrificing texture or flavor. Instead of blasting your food with intense, uneven power, the reheat function utilizes targeted cycles to ensure moisture stays locked in while warming your dish thoroughly. It's an essential kitchen skill for anyone looking to reduce food waste and enjoy restaurant-quality results on a busy schedule. Understanding these subtle temperature nuances makes a massive difference in your daily dining experience. However, knowing which mode to choose is crucial for culinary success, so be sure to explore the differences between the defrost setting vs reheat setting to ensure every meal is prepped to perfection.
The Science Behind the Reheat Setting
The reheat setting on modern kitchen appliances, particularly microwaves and smart ovens, is far more than a simple timer. It typically utilizes sophisticated humidity sensors, often called "sensor cook" technology, to detect the volume of steam being released from the food. As the internal temperature rises, water molecules vibrate and eventually transition into vapor. The appliance's microprocessor monitors this steam production to determine the exact moment the food has reached a palatable temperature without overshooting into a rubbery or dry state. This process relies on modulating the magnetron or heating element to provide gentler energy cycles than the standard high-power mode.
By using lower duty cycles, the reheat setting allows for better thermal conduction. In denser foods, heat needs time to travel from the outer layers to the center. If the energy is too intense, the exterior molecules become over-excited and evaporate, leading to tough textures. The science of reheating is essentially a balance of dielectric heating and thermal equilibrium, ensuring that the moisture remains trapped within the cellular structure of the food for a better mouthfeel.
Comparing Toaster Oven Reheating to Microwaves
Choosing between a toaster oven and a microwave for reheating depends largely on the desired final texture. Microwaves work by exciting water molecules, which is incredibly efficient for hydrating items like soups, stews, and steamed vegetables. However, this method often leaves breaded or fried foods soggy because it drives moisture from the interior to the surface. Conversely, a toaster oven uses convection or radiant heat to warm food from the outside in. This is superior for items that require a crisp exterior, such as pizza or fried chicken, as the dry air evaporates surface moisture while the internal temperature rises more gradually.
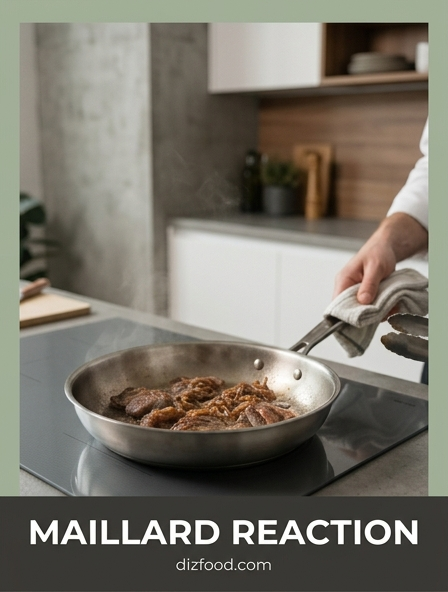
While the microwave is undisputed in terms of speed, usually completing a task in under three minutes, the toaster oven provides a more "oven-fresh" quality. The toaster oven's heating elements can trigger a secondary Maillard reaction, slightly browning the surface and enhancing flavor profiles that may have dulled during refrigeration. For the best results, users should consider the original cooking method of the dish; if it was meant to be crispy, the toaster oven is the correct tool for the job.
Maximizing Texture and Flavor Retention
The primary challenge when reheating leftovers is preventing the degradation of fats and the tightening of protein fibers. When food is cooled, fats solidify and starches can undergo retrogradation, making them hard or gritty. To maximize flavor retention, it is essential to reheat food slowly. Rapid temperature spikes can cause volatile organic compounds-the elements responsible for aroma and taste-to evaporate before the food even reaches the table. Using a dedicated reheat setting helps maintain these compounds by applying consistent, moderate heat that coaxes the fats back into a liquid state without scorching them.
Texture is preserved by managing the environment around the food. For proteins like steak or chicken breast, adding a small amount of fat, such as a pat of butter or a teaspoon of olive oil, can create a protective barrier that prevents the fibers from drying out. Additionally, flavor can be "awakened" by adding a pinch of salt or a squeeze of lemon juice after reheating, as cold temperatures often mute the palate's perception of seasoning. Understanding that reheating is a secondary cooking process allows for better control over the final gastronomic outcome.
Ideal Temperature Ranges for Leftover Foods
Ensuring that leftovers reach the correct internal temperature is vital for both culinary quality and biological safety. While the standard safety threshold is often cited as 165°F (74°C), different food groups benefit from specific ranges to maintain their structural integrity. Overheating delicate items like seafood can result in a rubbery texture, while underheating starchy foods like pasta may leave them with an unappealing, chalky core. Utilizing a digital thermometer can help home cooks achieve precision that a simple touch-test cannot provide.
| Food Category | Recommended Reheat Temp | Reasoning |
|---|---|---|
| Poultry & Casseroles | 165°F (74°C) | Eliminates pathogens in dense mixtures. |
| Red Meats (Steak/Roast) | 145°F (63°C) | Prevents overcooking and toughness. |
| Soups and Sauces | 212°F (100°C) | Should reach a rolling boil for safety. |
| Vegetables | 140°F (60°C) | Maintains color and slight crispness. |
Reviving Crispy Leftovers Without Overcooking
Reviving the crunch of fried or roasted leftovers is one of the most difficult tasks in the kitchen. The enemy of crispiness is trapped steam. When food is placed in a microwave, the internal water turns to steam and softens the crust. To avoid this, the reheat setting on an air fryer or a convection toaster oven is the most effective solution. These devices use high-velocity fans to circulate hot air around the food, stripping away excess surface moisture and re-crisping the fats. This process, often called "recrisping," works best at a slightly lower temperature than the original cooking temperature to prevent burning the exterior before the interior is warm.
For those without an air fryer, a dry skillet on a stovetop can work wonders for items like pizza or gyoza. Placing the item in a preheated pan over medium heat allows the bottom to crisp up while a lid placed briefly over the top can help melt cheeses or warm the upper layers. The goal is to apply direct conductive heat to the surface that was originally crispy while ensuring the radiant heat doesn't dry out the core of the meal.
Moisture Control Tips for Reheated Grains and Proteins
Grains like rice and quinoa, along with lean proteins, are notoriously difficult to reheat because they lose moisture rapidly in the refrigerator. To restore their original fluffiness and tenderness, you must reintroduce hydration during the reheating cycle. The "ice cube trick" is a popular method for rice: placing an ice cube in the center of a bowl of rice and covering it with a microwave-safe lid creates a localized steam chamber. Surprisingly, the ice cube does not melt completely, but provides just enough humidity to soften the grains.
- Add a tablespoon of water or broth to pasta dishes to loosen the starch.
- Cover proteins with a damp paper towel to create a moist micro-environment.
- Use a splash of milk when reheating creamy sauces to prevent separation.
- Keep the lid slightly ajar to allow excess pressure to escape without drying the food.
- Reheat stews and legumes with a lid to trap the existing liquid.
By focusing on moisture management, you prevent the common "desert-dry" texture associated with second-day meals. These small additions act as a buffer against the intense drying effect of electrical heating elements.
Step by Step Guide to Even Heating
Achieving a uniform temperature throughout a dish is the hallmark of a successful reheat. Most people make the mistake of leaving a large mound of food in the center of the plate, which results in scalding edges and a frozen center. Following a systematic approach ensures every bite is equally warm and enjoyable.
- Arrange Food Strategically: Place thicker or denser items on the outer edges of the plate and thinner items toward the center.
- Create a "Donut" Shape: If reheating grains or pastas, leave a hole in the middle of the pile to allow heat to penetrate from all sides.
- Use a Cover: Use a vented lid or microwave-safe wrap to trap steam, which helps heat the food through convection.
- The Halfway Stir: Stop the heating process halfway through to stir the food, breaking up hot spots and moving cold sections to the exterior.
- Allow for Carryover Cooking: Let the dish rest for one to two minutes after the timer ends. This allows the temperature to equalize naturally.
Safety Standards for Reheating Cooked Meals
Food safety is the most critical aspect of reheating leftovers. According to USDA guidelines, cooked leftovers should be stored in the refrigerator for no more than three to four days before being consumed or frozen. When it comes time to reheat, the food must reach an internal temperature of 165°F (74°C) to effectively kill any bacteria that may have grown during storage. This is particularly important for high-risk foods like poultry, stuffed meats, and casseroles. Using a food thermometer is the only certain way to verify that this safety threshold has been met.
Furthermore, it is recommended to only reheat the portion you intend to eat. Repeatedly cooling and reheating the same batch of food significantly increases the risk of foodborne illness and causes the nutritional value and texture to plummet. If using a microwave, ensure the dish is labeled microwave-safe to avoid chemical leaching from plastics. By adhering to these standards, you protect your health while ensuring that your kitchen practices remain professional and hygienic.
Common Mistakes to Avoid When Using Reheat
One of the most frequent errors in reheating is using the "High" power setting for every type of food. High power is designed for boiling water, not for gently warming a delicate piece of lasagna. When the power is too high, the water inside the food turns to steam too violently, which can lead to "popping" and messes inside the appliance. Another common mistake is failing to stir or rotate the food. Even with a rotating turntable, microwaves have "nodes" and "antinodes" (hot and cold spots) that can leave parts of the meal dangerously undercooked or unpleasantly cold.
Additionally, many users ignore the importance of the resting period. Carryover cooking is a real phenomenon where the heat continues to distribute through the food even after the energy source is turned off. Skipping this step often leads to a burnt tongue or a disappointing cold bite. Finally, avoid reheating food in original takeout containers unless they are explicitly marked as heat-safe. Styrofoam and certain plastics can melt or release toxic fumes at high temperatures, ruining both the meal and the appliance.
Essential Cookware for Superior Reheated Quality
The material of the container used during the reheating process significantly impacts the speed and quality of the heat transfer. Borosilicate glass and high-quality ceramics are the gold standards for microwave and oven reheating. These materials are non-porous, meaning they won't absorb flavors from previous meals, and they distribute heat more evenly than thin plastics. Ceramic, in particular, retains heat well, keeping your food warm on the table for longer periods. For toaster ovens, heavy-duty aluminum foil or small cast-iron pans are excellent choices as they handle high temperatures without warping.
When selecting cookware, consider the depth of the vessel. Shallow containers are preferable because they increase the surface area exposed to the heat source, allowing for faster and more uniform warming. Avoid using metal in the microwave, as it reflects waves and can cause arcing. For the best results, invest in a set of glass containers with vented, BPA-free lids. These allow you to transition directly from the refrigerator to the microwave or oven, providing a seamless and efficient reheating experience that maintains the integrity of your culinary efforts.


Comments