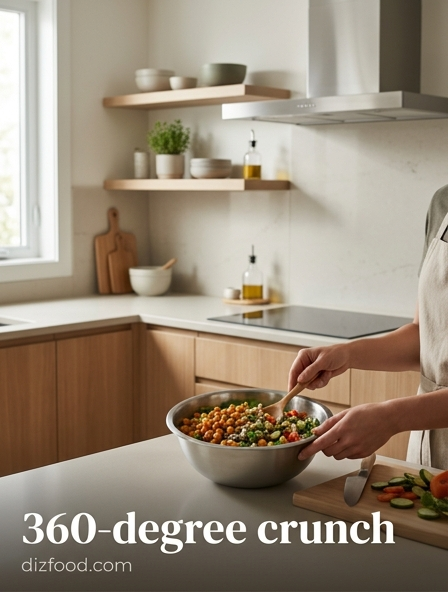
Choosing the Perfect Bread Foundation
The quest for a 360-degree crunch begins with selecting a bread that possesses the structural integrity to withstand high heat while maintaining a porous surface for fat absorption. Not all loaves are created equal; a standard white sandwich bread may provide nostalgia, but it often lacks the density required for a truly artisanal crunch. Sourdough remains a top contender due to its tight crumb and natural acidity, which provides a sophisticated flavor profile that complements melted fats. For a more uniform texture, a Pullman loaf offers a square, consistent surface area that ensures every millimeter of the bread makes contact with the skillet.
- Sourdough: Best for a rustic, chewy crunch and complex tang.
- Brioche: High sugar content leads to rapid browning and a delicate, buttery crisp.
- Ciabatta: Large air pockets create varying textures, from shattering crispness to soft interior.
- Rye: Dense structure allows for longer toasting times without burning.
When selecting your foundation, thickness is paramount. A slice between 1/2 inch and 3/4 inch is ideal; too thin, and the bread collapses under the weight of the fillings; too thick, and the center remains cold while the exterior overcooks. Achieving the perfect crunch requires a balance between the bread's moisture content and its ability to dehydrate quickly under dry heat.
The Butter vs Mayo Fat Debate
To achieve a golden-brown exterior, the choice of fat is perhaps the most debated element in the kitchen. Traditionalists swear by butter for its incomparable flavor and the way its milk solids caramelize, creating a rich, nutty aroma. However, mayo enthusiasts point toward its higher smoke point and ease of spreadability. Mayonnaise is essentially an emulsion of oil and egg yolks; the proteins in the egg facilitate a more even Maillard reaction, resulting in a consistent, lacquer-like finish that is less prone to burning than butter.
| Feature | Unsalted Butter | Mayonnaise |
|---|---|---|
| Smoke Point | Low (approx. 302°F) | High (approx. 450°F) |
| Flavor | Rich, nutty, salty | Tangy, neutral, savory |
| Browning | Patchy but deep | Uniform and golden |
| Ease of Use | Requires softening | Spread-ready from fridge |
For those seeking the ultimate hybrid experience, some chefs recommend a 50/50 blend or using butter on the interior of the bread while applying a thin, even layer of mayonnaise to the exterior. This technique leverages the flavor of butter with the superior browning capabilities of the mayo emulsion, ensuring a crunch that is both structurally sound and delicious.
Edge-to-Edge Spread Coverage Techniques
A common pitfall in creating the perfect crunch is the "naked edge" phenomenon, where the perimeter of the bread remains dry and pale while the center chars. Achieving a 360-degree crunch necessitates a meticulous application of fat that reaches every corner of the slice. This is not merely a matter of quantity, but of precision. A thin, translucent layer of fat acts as a heat conductor, ensuring that the skillet's energy is transferred evenly across the entire surface of the bread. When spots are missed, the bread simply toasts in the dry heat, resulting in a dusty texture rather than a fried, crispy one.
- Soften your butter to room temperature to ensure it spreads without tearing the bread.
- Use an offset spatula or a wide butter knife to push the fat all the way to the crust.
- Apply the fat in a "cross" pattern, then fill in the four quadrants to ensure total coverage.
- Check for "dry valleys" in textured breads like sourdough and fill them specifically.
By treating the bread like a canvas, you ensure that the entire surface undergoes the same chemical transformation. This creates a monolithic crust that shatters uniformly upon the first bite, providing a consistent sensory experience from the first corner to the very last crumb of the sandwich.
Optimizing Heat for Even Browning
The temptation to crank the heat to high for a quick sear is the enemy of a deep, resonant crunch. True 360-degree crispness requires a "low and slow" approach, allowing the heat to migrate through the bread to melt the interior fillings while simultaneously dehydrating the exterior. If the pan is too hot, the sugars and proteins on the surface will carbonize before the fat has had time to fry the bread fibers. This results in a sandwich that looks done on the outside but remains soggy or cold in the middle.
Ideally, you should aim for a medium-low setting on your stovetop. This temperature range allows for a longer "dwell time" in the pan, which is essential for the moisture inside the bread to evaporate. As the moisture leaves, it is replaced by the fat, essentially "confitting" the bread slice. You should hear a gentle, consistent sizzle rather than a violent hiss. If the pan begins to smoke, the temperature is too high. A patient approach ensures that the browning is deep and amber-toned, indicating a complex flavor profile and a crunch that persists even as the sandwich begins to cool on the plate.
Weight and Pressure for Surface Contact
Air is a poor conductor of heat. Even the flattest slice of bread has microscopic ridges and valleys that prevent 100% contact with the cooking surface. To overcome this, physical pressure must be applied to force the bread into the skillet. This technique, often referred to as "pressing," ensures that every part of the bread is actively frying in the fat. Without weight, the sandwich may only develop crunch on the highest points of the bread, leaving the rest soft and un-caramelized.
- Cast Iron Press: Provides heavy, even pressure and retains heat to cook from the top.
- Heavy Skillet: Placing a second pan on top of the sandwich creates a makeshift press.
- Chef's Press: A smaller, stainless steel weight used for targeted pressure.
- Manual Spatula Pressure: Requires active engagement but allows for tactile feedback during cooking.
Applying weight also helps to compress the fillings, creating a cohesive unit where the cheese acts as a glue. However, be cautious not to apply so much pressure that you squeeze out all the moisture or crush the bread's internal structure. The goal is a firm, even contact that maximizes the Maillard reaction across the entire surface area, resulting in a professional-grade, uniform crunch that sounds like a cracker when tapped with a knife.
Moisture Control in Sandwich Fillings
The greatest threat to a perfect crunch is internal moisture. If your fillings-such as tomatoes, pickles, or sautéed greens-are too wet, they will release steam during the cooking process. This steam travels outward, hitting the toasted crust and turning it into a soggy mess from the inside out. This is known as "steaming the crumb," and it can ruin even the most perfectly fried exterior. Achieving a 360-degree crunch requires a defensive strategy to keep the interior dry and the exterior crisp.
- Salt watery vegetables like tomatoes and let them drain on paper towels before assembly.
- Place a layer of cheese on both the top and bottom slices of bread to act as a moisture barrier.
- Pat dry any deli meats or pickled items to remove surface brine.
- Allow hot fillings, like caramelized onions, to cool slightly so they don't emit immediate steam.
By creating a "fat barrier" with cheese or spreads, you protect the bread from the hydrating effects of the internal ingredients. This ensures that the only moisture the bread encounters is the fat it is frying in, preserving the structural integrity of the toasted surface for a crunch that lasts until the very last bite.
The Art of the Double Flip
Standard sandwich preparation usually involves cooking one side, flipping once, and finishing. However, the "Double Flip" technique is a secret weapon for those seeking an elite level of crunch. By flipping the sandwich multiple times, you prevent any single side from spending too much time in direct contact with the intense heat of the pan floor. This rotation allows for more gradual moisture evaporation and prevents the bread from becoming overly greasy, as the fat is redistributed each time the sandwich is turned.
The first flip should occur once the bread is just beginning to turn a pale gold. Flip it back to the first side after the second side has reached the same stage. This alternating exposure to heat ensures that the internal temperature rises steadily, melting the cheese without burning the exterior. Furthermore, the brief moments of "rest" each side gets when it is facing upward allow steam to escape into the air rather than being trapped against the pan. This technique yields a lighter, crispier texture that feels less like a fried sponge and more like a perfectly toasted wafer, achieving that elusive 360-degree crunch through thermal management.
Mastering Skillet Temperature Zones
Not every part of a skillet is heated equally. Most pans have a "hot spot" directly over the flame or heating element, with the edges being significantly cooler. If you leave your sandwich in one position, you will likely end up with a gradient of crunch: burnt in the middle and soft on the edges. Mastering the temperature zones of your cookware is essential for uniform browning. This is especially true when using large skillets where the sandwich only occupies a fraction of the total surface area.
- Rotation: Spin the sandwich 180 degrees every few minutes to account for pan imbalances.
- Centering: Keep the sandwich centered over the heat source, but move it to the cooler edges if the browning is happening too fast.
- Material Choice: Use cast iron or heavy-bottomed stainless steel for better heat retention and fewer hot spots.
- Preheating: Always preheat the pan for at least three minutes on low heat to ensure the entire surface is thermally saturated.
By actively managing the sandwich's position in the pan, you ensure that every square inch receives the same amount of thermal energy. This spatial awareness is what separates a haphazardly toasted sandwich from a masterpiece of texture. Constant vigilance and minor adjustments result in a flawless, edge-to-edge golden finish.
Ventilation and Resting for Crisp Retention
The final stage of the crunch journey happens after the sandwich leaves the pan. Many people make the mistake of placing a piping hot sandwich directly onto a flat plate. This is a recipe for disaster; the residual heat from the sandwich creates steam, which becomes trapped between the plate and the bread. Within seconds, your hard-earned crunch is replaced by a damp, limp texture. Proper resting and ventilation are mandatory for maintaining the 360-degree crunch while the sandwich stabilizes.
| Resting Method | Effect on Crunch | Recommended For |
|---|---|---|
| Wire Cooling Rack | Maximum retention; allows air to flow underneath. | All grilled sandwiches. |
| Paper Towel | Absorbs excess oil but can trap some steam. | Very oily or buttery melts. |
| Vertical Lean | Minimal plate contact; prevents bottom sogginess. | Quick serving when racks aren't available. |
Allow the sandwich to rest on a wire rack for at least 60 seconds before cutting. This "setting" period allows the melted cheese to firm up slightly and the steam to dissipate completely. When you finally do cut into it, use a sharp serrated knife and a sawing motion to avoid crushing the delicate, aerated crust you have worked so hard to build.
Enhancing Texture with Outer Crust Additions
For those who believe there is no such thing as too much crunch, adding a secondary layer of texture to the exterior of the bread is the ultimate kitchen hack. This technique involves pressing dry ingredients into the fat layer before the sandwich hits the pan. As the sandwich cooks, these additions toast and fuse with the bread, creating a multi-dimensional crunch that offers different levels of resistance and flavor. This not only enhances the sound of the bite but also adds a professional, "crusted" appearance that is visually striking.
- Parmesan Cheese: Creates a salty, lacy "frico" crust that is incredibly shatter-crisp.
- Everything Bagel Seasoning: Adds seeds and dried aromatics for a gritty, savory crunch.
- Panko Breadcrumbs: A thin dusting of panko provides an extra layer of jagged, fried texture.
- Finely Chopped Nuts: Pecans or walnuts can add an earthy crunch to sweet-and-savory melts.
When using these additions, be mindful of their individual burning points. Hard cheeses like Parmesan or Pecorino Romano work best because they have low moisture and high protein. Press the ingredients firmly into the mayo or butter so they don't fall off during the flip. The result is a sandwich with a "super-crunch" shell that provides a complex mouthfeel and a 360-degree sensory experience that goes far beyond standard toasted bread.


Comments