
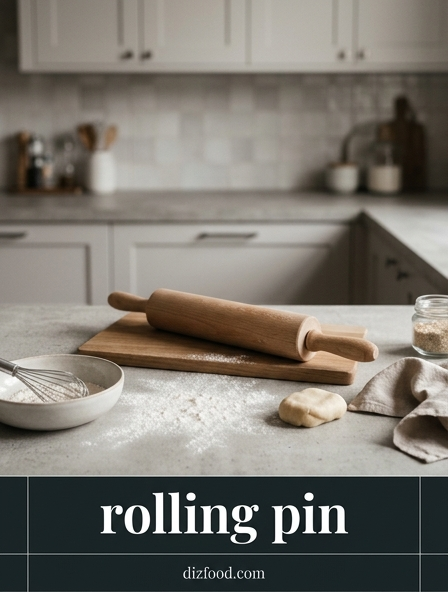
The Fundamentals of Traditional Rolling Pins
The traditional rolling pin remains a cornerstone of the culinary world, serving as the primary bridge between raw dough and a finished crust. Understanding the nuances between various designs is essential for any baker. The two most prominent styles are the American pin, which features a central barrel rotating on an internal axle with two handles, and the French pin, a solid piece of wood often tapered at the ends. The American version provides significant leverage and is ideal for heavy, cold doughs, while the French pin offers superior tactile feedback, allowing the baker to "feel" the dough's thickness directly through the wood.
Material selection is equally critical to performance. Hardwoods like maple, beech, and walnut are favored for their durability and natural resistance to moisture when properly seasoned. Beyond wood, marble pins provide a naturally cool surface that prevents butter-heavy puff pastry from melting, while stainless steel options offer hygienic benefits and can be chilled. Choosing the right tool depends on the specific requirements of the pastry, the desired level of control, and the physical comfort of the user during repetitive motions.
Proper Hand Placement for Maximum Control
Achieving mastery over a rolling pin begins with the anatomical alignment of the hands and wrists. For those using a tapered French pin, the most effective technique involves placing the palms flat against the center of the barrel rather than gripping the ends. This allows for a wider distribution of pressure and enables the baker to use their body weight rather than relying solely on arm strength. The fingers should remain relaxed, slightly splayed, and sensitive to the undulations of the dough beneath the wood.
- The Palm Pivot: Use the fleshy base of the thumb to guide the pin's direction.
- Weight Distribution: Keep shoulders relaxed and lean into the motion to provide steady force.
- Finger Sensitivity: Use fingertips to occasionally scan the dough surface for thin spots.
- Handle Grip: If using an American pin, hold the handles lightly to avoid "locking" the wrists, which can cause uneven pressure.
When the hands are positioned correctly, the rolling pin becomes an extension of the baker's arms. This connection is vital for maintaining a consistent plane across the dough's surface, preventing the common mistake of over-compressing the edges while leaving the center too thick.
Perfecting the Center Outward Rolling Motion
The most common error in rolling dough is pushing the pin all the way off the edges, which results in tapered, thin margins that burn easily in the oven. To achieve a professional result, one must master the center-outward technique. This involves starting the pin in the geometric center of the dough disc and rolling toward the perimeter, stopping just before the edge. This method ensures that the thickness remains uniform across the entire diameter and helps maintain the structural integrity of the gluten network.
- Position the pin in the dead center of the chilled dough.
- Apply gentle pressure and roll upward toward the twelve o'clock position.
- Return to the center and roll downward toward the six o'clock position.
- Rotate the dough ninety degrees and repeat the process to expand the circle.
By consistently returning to the center, the baker avoids the "bowing" effect where the middle stays thick. This disciplined approach also prevents the dough from sticking to the work surface, as the frequent lifting and rotating allow for a light dusting of flour to remain effective underneath the mass throughout the process.
Achieving Uniform Thickness Without Guide Rings
While silicone guide rings are popular for beginners, professional bakers rely on visual and tactile cues to achieve precision. Developing this "eye for thickness" requires practice and a systematic approach to scanning the dough. One effective method is to use the knuckles as a reference point; by placing a hand flat on the dough, you can gauge the height relative to your fingers. Alternatively, viewing the dough at eye level by crouching down can reveal subtle slopes or humps that are invisible from a standing position.
Consistency is often a product of the rhythm of the roll. If the pin is moved at a steady speed with a constant downward force, the dough will naturally flatten evenly. If you detect an area that is too thick, resist the urge to press harder in that one spot. Instead, perform several light passes over the area, gradually feathering the edges into the surrounding dough. This prevents the creation of "valleys" or depressions that can lead to uneven baking or structural failure in the finished pastry. With time, the baker develops a muscle memory that naturally compensates for variations in dough resistance.
Managing Dough Elasticity and Surface Tension
Dough is a living system influenced by gluten development and temperature. When rolling, you may encounter "snap-back," where the dough shrinks immediately after being stretched. This is a sign of high elasticity caused by overworking the gluten or insufficient resting. Managing this tension is crucial for achieving the desired dimensions without over-thinning the protein bonds. Resting the dough in the refrigerator allows the gluten strands to relax and the moisture to redistribute, making the mass more pliable and less prone to shrinking.
| Dough Type | Resting Time | Ideal Temperature |
|---|---|---|
| Pie Crust | 30-60 Minutes | Chilled (35-40°F) |
| Bread/Pizza | 15-20 Minutes | Room Temp (70°F) |
| Puff Pastry | 2 Hours | Cold (38°F) |
| Sugar Cookies | 1 Hour | Chilled (40°F) |
In addition to resting, controlling the temperature of the rolling pin itself can manage surface tension. A cold pin prevents the fats in the dough from softening, which maintains the internal structure and prevents the dough from becoming greasy or overly elastic during the rolling process.
The Science of Applying Consistent Manual Pressure
The physics of rolling involves a combination of downward force and lateral displacement. Applying consistent manual pressure requires an understanding of leverage. The further your hands are from the center of the pin, the more force is required to achieve the same compression. This is why French pins, which encourage central hand placement, often lead to more consistent results for delicate tasks. The pressure should be applied through the "heel" of the hand, channeled from the shoulders and core, rather than being generated by the small muscles in the forearms.
Gravity also plays a role; a heavier rolling pin, such as one made of marble or dense maple, does much of the work for you. For thinner doughs, like those used for crackers or phyllo, a lighter touch is required to avoid tearing. The key is to maintain a "follow-through" motion, similar to a golf swing, where the pressure is sustained throughout the entire length of the stroke. Sudden starts or stops create ridges in the dough that are difficult to remove later. Consistency in pressure ensures that the heat transfer during baking will be uniform across the entire surface area.
Essential Surface Preparation to Prevent Sticking
Sticking is the primary adversary of the baker, often leading to torn dough and frustration. Effective surface preparation involves more than just a handful of flour; it requires a strategic application of barriers. A "bench flour" should be used sparingly but effectively. The goal is to create a microscopic layer of dry particles that allows the dough to glide without being absorbed into the moisture of the recipe, which would toughen the final product. Wood surfaces are naturally better for this, as they "hold" a bit of flour in their grain.
- Material Choice: Marble and granite stay cool, which is essential for buttery doughs.
- Sifting: Use a fine-mesh sieve to apply flour evenly, avoiding clumps.
- The Slide Test: Frequently move the dough to ensure it isn't adhering to the board.
- Parchment Method: For extremely sticky doughs, roll between two sheets of parchment paper.
If sticking occurs, do not pull the dough. Instead, use a thin offset spatula or a bench scraper to gently lift the edge and toss a small amount of flour underneath. This proactive maintenance of the "slide" ensures the dough remains intact and easy to transfer to the baking tin.
Tactile Techniques for Sensing Uneven Dough
While the eyes can be deceived by shadows and flour dust, the hands rarely lie. Tactile sensing is a skill developed by frequently running the palms over the surface of the rolled dough. This "scanning" motion should be light and fluid. By closing your eyes and feeling the dough, you can identify microscopic variations in height that need correction. A professional baker uses the rolling pin itself as a sensory tool; the way the wood vibrates or resists as it passes over a specific area provides instant feedback about the density and thickness of the mass.
Another technique is the "light test." By lifting a section of the dough and holding it toward a light source, you can see the translucency. Areas that appear darker are thicker, while lighter spots are thinner. This is particularly useful for pasta and strudel doughs where paper-thin results are required. Developing these sensing techniques allows for mid-course corrections, ensuring that the final product is not only aesthetically pleasing but also structurally sound. High spots can be targeted with localized, gentle rolling, while thin spots can be reinforced by slightly folding and re-rolling if the dough is still sufficiently pliable.
Mastering Edge Control for Round Crusts
Creating a perfectly circular crust is a matter of geometry and disciplined rotation. The "compass technique" is the gold standard for maintaining a round shape. This involves rolling from the center to the edge, then lifting the dough and rotating it exactly one-eighth of a turn (45 degrees). By repeating this rotation consistently, the baker ensures that the dough expands equally in all directions. If the dough begins to look like an oval, focus the next few rolls on the "short" sides of the oval to bring it back into a circular balance.
- Roll from center to top, then center to bottom.
- Lift the dough gently to ensure it isn't sticking.
- Rotate the disc 45 degrees clockwise.
- Repeat the roll-and-rotate cycle until the target diameter is reached.
Edge control also involves managing the "fringe" of the dough. If the edges begin to crack, it is often a sign that the dough is too cold or too dry. A light touch of water on the fingertips can sometimes mend these micro-tears before they expand. Maintaining a clean, circular edge from the beginning makes the final crimping or fluting process much easier and more professional in appearance.
Maintaining Your Wooden Rolling Pin for Longevity
A high-quality wooden rolling pin can last for generations if maintained with the correct protocol. The most important rule is to never submerge a wooden pin in water or place it in a dishwasher. Excessive moisture causes the wood fibers to swell and eventually crack as they dry, ruining the smooth surface. Instead, after use, the pin should be wiped down with a damp cloth to remove any flour or dough residue. If stubborn bits of dough remain, a plastic bench scraper can be used to gently flake them off without gouging the wood.
- Oiling: Apply food-grade mineral oil every few months to keep the wood hydrated.
- Sanding: If the grain becomes "raised" or fuzzy, use very fine sandpaper (400 grit) to restore smoothness.
- Drying: Always air-dry the pin thoroughly before storing it in a drawer or cabinet.
- Avoid Soap: Strong detergents can strip the natural oils and leave a chemical taste.
Proper seasoning creates a naturally non-stick surface over time. As the wood absorbs oils from the dough and the occasional application of mineral oil, it becomes smoother and more resistant to sticking, turning a simple kitchen tool into a seasoned heirloom.


Comments