
Optimal Fridge Temperature for Safe Meat Defrosting
Maintaining the correct refrigerator temperature is the primary defense against bacterial proliferation during the thawing process. To ensure food safety, the internal environment should be consistently set between 34°F and 40°F (1°C to 4°C). This specific range is narrow for a reason: it is cold enough to inhibit the rapid growth of pathogens like Salmonella and E. coli, yet warm enough to allow ice crystals to transition back into liquid water over an extended period. If the temperature exceeds 40°F, the meat enters the "Danger Zone," where bacteria can double in population every twenty minutes. Conversely, if the fridge is too cold, the meat may never fully defrost, leading to uneven cooking and potential foodborne illness.
- 34°F - 37°F: Ideal range for maximum safety and extended shelf life.
- 38°F - 40°F: Acceptable, but requires quicker preparation after thawing.
- Above 40°F: Unsafe for long-term thawing; risks bacterial bloom.
Using a secondary appliance thermometer is highly recommended, as built-in digital readouts can sometimes be inaccurate or influenced by frequent door openings.
Bottom Shelf Placement to Prevent Cross Contamination
Strategic placement within the refrigerator is essential for maintaining a hygienic kitchen environment. Raw meat should always be stored on the lowest possible shelf during the thawing process. This positioning is a fundamental principle of food safety management designed to mitigate the risks associated with gravity. As meat defrosts, the potential for leakage increases significantly. If raw juices containing harmful microbes drip from an upper rack, they can contaminate ready-to-eat foods, fresh produce, or cooked leftovers stored below, often without being noticed by the naked eye.
Beyond simple height placement, ensure that the meat is not crowded against other items. Airflow is necessary to maintain the consistent temperature required for a safe thaw. When the bottom shelf is utilized correctly, it acts as a containment zone. Even in the event of a packaging failure, the spill is localized to the floor or the lowest glass surface of the unit, which is much easier to sanitize than the entire interior. This organized approach to fridge hierarchy is the most effective way to prevent the silent spread of pathogens throughout your household's food supply.
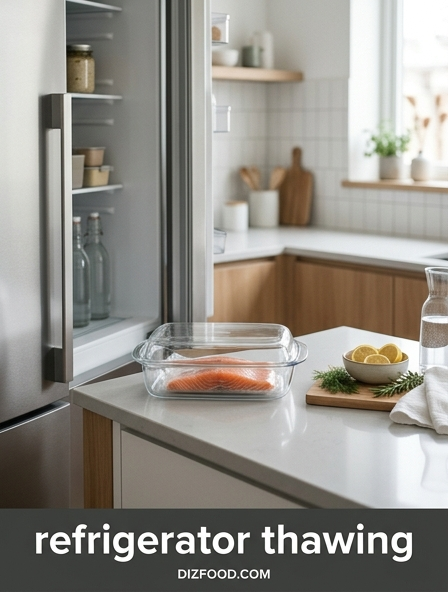
Using Drip Trays and Secondary Containers
Even when using the bottom shelf, relying solely on original store packaging is a gamble that often leads to messy cleanups. Most plastic wraps and styrofoam trays are prone to micro-tears or pinholes caused by ice crystals during the freezing process. To ensure absolute containment, always place the frozen meat into a secondary container or onto a high-rimmed drip tray. This extra layer of protection captures the "purge"-the protein-rich liquid that escapes the muscle fibers during thawing-preventing it from pooling on refrigerator surfaces.
- Rimmed Baking Sheets: Excellent for large roasts or multiple smaller packages.
- Glass Casserole Dishes: Non-porous and easy to sanitize after use.
- Plastic Storage Bins: Deep walls provide the best protection against splashing.
The container should be large enough that the meat sits flat, ensuring even exposure to the cool air. Avoid using wooden boards or porous materials that can absorb juices. By using a dedicated thawing vessel, you not only protect your fridge but also make it significantly easier to transport the meat from the refrigerator to the prep station without trailing drips across the kitchen floor.
Preserving Protein Cell Structure with Slow Thawing
The physical quality of meat is heavily dependent on how the ice crystals within the muscle fibers melt. When meat is frozen, the water inside the cells expands into sharp crystals. If the meat is thawed too rapidly-such as in a microwave or under hot water-these crystals can rupture the cell walls violently, leading to a loss of structural integrity. This results in a "mushy" texture and a significant loss of moisture. Slow refrigerator thawing allows these ice crystals to melt gradually, giving the dehydrated muscle fibers time to reabsorb some of the moisture.
By maintaining a steady, cold temperature, the proteins retain their natural elasticity and firmness. This is particularly important for high-quality steaks and delicate poultry. When the cell walls remain intact, the meat holds its shape better during seasoning and searing. A slow thaw ensures that the final product is juicy and tender rather than dry and stringy. While it requires more foresight and patience, the scientific benefits of preserving the cellular architecture are undeniable, resulting in a superior mouthfeel and overall culinary experience that faster methods simply cannot replicate.
Estimated Defrosting Times for Different Meat Cuts
Predicting exactly when your meat will be ready for the pan requires an understanding of density and surface area. As a general rule of thumb, you should allow approximately 24 hours of refrigerator thawing for every five pounds of weight. However, smaller cuts and different types of protein vary in their specific requirements. For instance, a thick ribeye steak will thaw faster than a dense roast of the same weight because air can circulate more efficiently around its flatter profile. Below is a general guide for planning your meals.
| Meat Type/Cut | Approximate Weight | Thawing Duration |
|---|---|---|
| Ground Beef/Poultry | 1 Pound | 12-24 Hours |
| Boneless Chicken Breasts | 1 Pound | 12-24 Hours |
| Whole Turkey/Chicken | 4-5 Pounds | 24 Hours |
| Thick Steaks/Chops | 1-1.5 Inches | 14-20 Hours |
Always factor in extra time for "cold spots" in the back of the refrigerator, which may slow the process. It is better to have the meat ready a few hours early than to be forced into unsafe quick-thaw methods at dinner time.
Moisture Retention and Preventing Excessive Purge
Purge is the reddish liquid often mistaken for blood that accumulates in the bottom of a thawing package. It is actually a mixture of water and myoglobin, a protein found in muscle tissue. While some purge is inevitable, excessive moisture loss can leave the meat dry and flavorless once cooked. To minimize this, it is essential to avoid temperature fluctuations. Every time the refrigerator door is opened and the internal temperature rises, the ice crystals melt and refreeze slightly, which acts like a pump, pushing more liquid out of the muscle fibers.
- Keep the meat in its original packaging to limit air contact.
- Maintain a consistent fridge temperature to prevent "sweating."
- Ensure the meat is placed in the coldest part of the fridge, typically the back.
By controlling these variables, you keep the moisture where it belongs-inside the meat. This retained hydration is what allows for a succulent finish. When meat loses too much purge, it also loses the minerals and compounds that contribute to the savory "umami" flavor, making moisture retention a key goal for any home cook.
Guidelines for Safely Refreezing Thawed Meat
A common misconception is that meat can never be refrozen once it has been thawed. According to USDA guidelines, it is safe to refreeze meat, poultry, and fish as long as they were thawed exclusively in the refrigerator and have been handled properly. Because the fridge keeps the meat out of the bacterial "Danger Zone," the safety profile remains relatively intact. However, while it is safe from a biological standpoint, there is a distinct trade-off regarding quality. Each time meat goes through a freeze-thaw cycle, the cell membranes are further damaged by ice crystallization.
If you choose to refreeze, do so as quickly as possible-ideally within 24 hours of the meat fully thawing. You will likely notice that the meat is slightly drier and less tender upon the second preparation due to the cumulative moisture loss. If the meat was thawed on the counter, in a microwave, or in cold water, it should never be refrozen raw, as it may have spent too much time at temperatures that encourage bacterial growth. In those cases, cook the meat thoroughly first, and then you may freeze the finished dish.
Post Thaw Storage Limits for Maximum Freshness
Once meat has completely transitioned from frozen to a chilled liquid state, the clock begins ticking on its shelf life. Refrigerator thawing is the safest method, but it does not pause the natural process of degradation indefinitely. Different proteins have varying levels of resistance to spoilage based on their fat content, surface area, and how they were processed. Ground meats and poultry are the most volatile and should be used shortly after they are ready.
- Ground Meats & Poultry: Use within 1 to 2 days after thawing.
- Red Meat (Steaks, Roasts, Chops): Use within 3 to 5 days.
- Fin Fish & Shellfish: Use within 1 day for best flavor and safety.
Check for signs of spoilage before cooking, even if you are within these timeframes. An off-putting odor, a slimy or tacky surface texture, or a distinct graying of the flesh are clear indicators that the meat has passed its prime. For the best culinary results, plan to cook your protein within the first 24 hours of it being fully defrosted to capture the peak flavor and texture profile.
Maintaining Integrity of Original Vacuum Packaging
Vacuum-sealed packaging is an excellent tool for preventing freezer burn and oxidation, but it requires specific care during the thawing phase. For most red meats and poultry, keeping the seal intact during a refrigerator thaw helps maintain moisture and prevents the meat from absorbing odors from other foods in the fridge. The lack of oxygen also prevents the fats from becoming rancid. However, there is a critical safety exception regarding vacuum-sealed fish. Some species of fish carry the risk of *Clostridium botulinum*, an anaerobic bacteria that thrives in oxygen-free environments.
When thawing vacuum-packed fish in the refrigerator, you must puncture the plastic or remove the fish from the sleeve entirely. This introduces oxygen and prevents the potential for toxin production. For all other meats, a sealed environment is generally beneficial. Check the packaging for any significant punctures before placing it on your drip tray; if the seal is broken, the meat will dry out faster and should be cooked sooner. By understanding when to keep the seal and when to break it, you balance the benefits of airtight storage with essential biological safety protocols.
Prepping Thawed Meat for Uniform Cooking Results
The final step in the thawing process occurs just before the meat hits the heat. Taking meat directly from the 37°F refrigerator to a 400°F pan can result in a "cold core," where the exterior is overcooked or charred while the center remains undercooked. To achieve uniform results, allow the meat to sit at room temperature for about 15 to 30 minutes. This process, known as "tempering," reduces the thermal shock and ensures the heat penetrates the center more efficiently.
- Remove the meat from the fridge and its secondary container.
- Pat the surface completely dry with paper towels to remove excess purge.
- Season the meat only after the surface is dry to ensure better adhesion.
Removing surface moisture is vital for the Maillard reaction-the chemical process that creates a savory brown crust. If the meat is wet, it will steam rather than sear. By combining a slow refrigerator thaw with a brief tempering period and thorough drying, you bridge the gap between food safety and professional-level cooking performance, ensuring your meal is both safe and delicious.




Comments