Ever wonder why some sharpening tools feel like coarse sandpaper while others are smooth as silk? It all comes down to the grit level, which dictates exactly how much metal you're stripping away to reveal a fresh edge. Lower grits are aggressive, perfect for repairing chips by removing significant material, whereas higher grits polish the steel to a razor-sharp finish. Finding that sweet spot between coarse abrasion and fine refinement is the secret to maintaining a high-performance kitchen knife. To get the best results for your culinary kit, it is crucial to understand the functional differences between Whetstone Sharpening Vs Honing Rod.
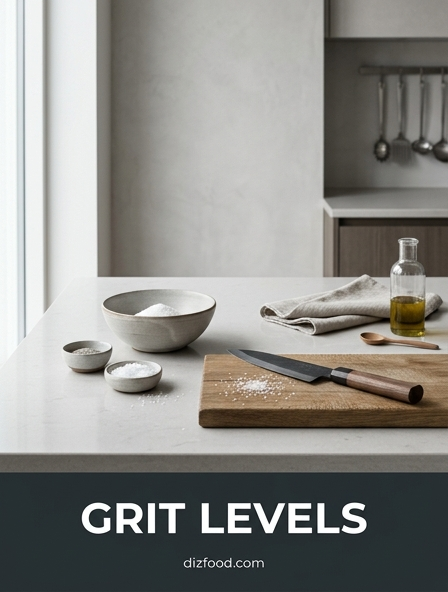
Defining Grit in Knife Sharpening
In the context of culinary tool maintenance, grit refers to the density and size of abrasive particles embedded in a sharpening stone or honing surface. This measurement determines how much steel is removed during each stroke and the texture left on the blade's edge. Generally, grit is quantified by numerical values; lower numbers represent larger, more aggressive particles, while higher numbers indicate smaller, finer particles that produce a smoother finish. Understanding these values is essential for any chef or home cook looking to maintain professional-grade equipment.
- JIS (Japanese Industrial Standard): The most common scale used for water stones in modern kitchens.
- CAMI/ANSI: A standard often found on Western oil stones or sandpaper.
- Micron Rating: A precise measurement of the actual size of the abrasive grains.
The choice of grit affects not only the sharpness of the knife but also the tactile feedback the sharpener receives during the process. Proper grit selection ensures that the steel is shaped efficiently without unnecessary wear on the blade. Mastering this definition is the foundational step in transitioning from basic maintenance to precision edge geometry.
Coarse Grits and Initial Metal Removal
Coarse grits, typically ranging from 200 to 800, serve as the heavy lifters in kitchen knife restoration. These abrasives are designed for rapid metal removal, making them indispensable for repairing damaged edges or thinning a blade that has become too thick behind the edge. In a busy kitchen, a knife may suffer from chips or a broken tip; in such cases, starting with a fine stone would be inefficient and time-consuming. The coarse grit quickly grinds away the steel to establish a new apex.
- Assess the blade for visible chips or significant dullness.
- Apply consistent pressure to grind a new bevel at the desired angle.
- Continue until a visible burr forms along the entire length of the edge.
- Ensure the scratch pattern is uniform before moving to the next stage.
While coarse stones are effective, they leave deep scratches and a jagged edge that is unsuitable for delicate slicing. They are tools of reconstruction rather than refinement. Because they remove material so aggressively, they should be used sparingly to preserve the overall lifespan of the cutlery. Overuse of low-grit stones can lead to premature depletion of high-quality kitchen knives.
Refining the Edge with Medium Grits
Medium grits, generally spanning from 1000 to 3000, represent the most critical phase for general kitchen performance. A 1000-grit stone is widely considered the "workhorse" of the sharpening world, capable of taking a dull but undamaged knife and returning it to a functional level of sharpness. This range focuses on refining the deep scratches left by coarse stones and narrowing the apex of the blade to a cleaner point.
| Grit Range | Primary Function | Resulting Edge |
|---|---|---|
| 1000 - 1200 | Basic Sharpening | Aggressive, toothy bite |
| 2000 - 3000 | Refinement | Smooth but durable |
For most Western-style kitchen knives made of softer steels, a 1000 or 2000 grit finish is often the endpoint. It provides enough "bite" to cut through slippery tomato skins while remaining smooth enough for clean vegetable cuts. Medium grits balance the removal of the burr with the preservation of the edge's structural integrity. This stage is where the knife begins to feel truly sharp to the touch, moving beyond mere repair into the territory of culinary precision.
Fine Grits for High Polishing
Fine grits, starting at 5000 and reaching upwards of 12000, are utilized for polishing and honing the edge to a mirror-like finish. These stones do not remove significant amounts of metal; instead, they burnish the surface and refine the apex to a microscopic level. This process is particularly popular for high-carbon Japanese knives or precision tools like yanagibas used for sashimi. A highly polished edge minimizes friction, allowing the blade to glide through protein with almost no resistance.
- 5000 Grit: A common finishing point for high-end stainless steel.
- 8000 Grit: Provides a mirror polish and extreme push-cutting ability.
- 10000+ Grit: Used for professional-level refinement and aesthetic beauty.
The result of fine grit sharpening is an edge that excels at "push cutting"-where the blade is pressed directly down through the food. While these edges are aesthetically pleasing and incredibly sharp, they require a high degree of skill to maintain. In the kitchen, a polished edge is ideal for delicate herbs and soft fish, where bruising must be avoided at all costs to maintain flavor and texture.
The Relationship Between Grit and Sharpness
Sharpness is often misunderstood as a single metric, but in the kitchen, it is a combination of geometry and grit refinement. The grit level determines the "apex width" of the blade. A lower grit creates a wider, more rugged apex, while a higher grit creates a narrower, smoother one. Technically, a knife can be "sharp" at 400 grit if the two planes of the bevel meet at a clean point; however, the quality of that sharpness differs significantly from a 6000-grit edge. The relationship is defined by the intended use of the tool.
A coarser grit provides "mechanical sharpness" through friction and micro-serrations, which is excellent for sawing through tough materials. Conversely, high-grit sharpening provides "geometric sharpness," where the thinness of the edge allows it to part fibers with minimal force. The perceived sharpness also depends on the steel's hardness. Soft steels may not benefit from ultra-fine grits as the edge lacks the stability to hold such a refined point, whereas hard steels can support an extremely thin, high-grit apex without immediate deformation or rolling.
How Grit Size Affects Edge Durability
The durability of a kitchen knife's edge is inversely proportional to the level of polish in many high-impact scenarios. Coarser grits create a toothy edge that can withstand the rigors of chopping through fibrous vegetables or hitting a cutting board repeatedly. These micro-serrations act like a support structure for the edge. In contrast, an edge polished with very high grits is exceptionally thin and smooth, making it more susceptible to rolling or chipping if used on hard surfaces or for heavy-duty tasks.
| Grit Level | Edge Characteristics | Best Use Case |
|---|---|---|
| Low (400) | Durable, jagged | Butchery, heavy crusts |
| Mid (1500) | Balanced | General prep, all-purpose |
| High (8000) | Fragile, razor-like | Slicing, fine garnish |
For most home cooks, a medium-grit finish provides the best longevity. It stays functional for a longer period of time because the slight toothiness continues to cut even as the absolute peak of the apex begins to wear. Understanding this trade-off allows a chef to choose the right grit for the specific job, ensuring the knife doesn't fail mid-service due to an overly delicate edge.
Micro Serrations versus Polished Edges
The debate between micro-serrated and polished edges is central to kitchen performance. Micro-serrations are the invisible teeth left by coarser stones, typically in the 600 to 1000 grit range. These teeth excel at "slicing" motions, where the knife is drawn across the food. They are particularly effective for cutting through materials with a tough exterior and soft interior, such as tomatoes, peppers, or crusty bread. The teeth catch the surface and tear through the skin, initiating the cut efficiently.
- Micro-Serrated: High "bite," great for drawing cuts, holds up on plastic boards.
- Polished: Zero "bite," excels at push cuts, creates clean cellular surfaces.
Polished edges, achieved through grits above 4000, lack these micro-serrations. While they are technically sharper, they can "skate" off the surface of a tomato skin if not used with perfect technique. However, for tasks like cutting chives or julienning ginger, the polished edge is superior because it does not tear the delicate fibers of the plant. This prevents the release of enzymes that cause browning, resulting in food that stays fresher and looks more professional on the plate.
Optimizing the Sharpening Sequence
A successful sharpening outcome depends on a logical progression through different grit levels. Skipping too many steps in the sequence can lead to an edge that looks polished on the surface but retains deep structural damage underneath. The goal is for each subsequent stone to remove the scratches left by the previous one. A common mistake is moving to a fine stone before a proper apex has been established on a coarser one, which results in a blade that looks shiny but cannot cut.
- Start with a coarse stone (400-800) only if the knife is damaged or very dull.
- Move to a medium stone (1000-1200) to set the final edge geometry.
- Use a refining stone (2000-3000) to smooth the "bite."
- Finish with a high-grit stone (5000+) if the steel type and task require it.
The time spent on each stone should decrease as the grit number increases. Most of the work happens at the 1000-grit stage. By optimizing this sequence, you ensure that the edge is both sharp and structurally sound, maximizing the efficiency of your sharpening routine and the performance of your kitchen cutlery.
Grit Selection for Kitchen Performance
Selecting the right grit involves matching the abrasive to the specific steel and the intended culinary task. Not all knives benefit from a high-grit finish. For example, a German stainless steel chef knife is relatively soft and usually performs best when finished at 1000 to 2000 grit. Higher grits on this type of steel often result in an edge that goes dull almost immediately. Conversely, high-hardness Japanese steels can take full advantage of 6000 grit and beyond.
- Boning Knives: 600-1000 grit for durability against bone and connective tissue.
- Chef Knives: 1000-3000 grit for versatile vegetable and meat prep.
- Slicers: 5000+ grit for clean, single-stroke cuts of cooked meats or raw fish.
Performance in the kitchen is measured by how the knife interacts with food. If you find your knife sliding off onion skins, you may have polished it too far and lost the necessary "bite." If the knife feels like it is tearing the food, you likely haven't refined the edge enough. Proper grit selection is the key to creating a tool that feels like an extension of the hand during prep work.
Maintaining Edge Integrity Across Grits
Consistency is the final piece of the grit puzzle. As you move from one grit level to another, maintaining a constant angle is paramount to edge integrity. Any variation in the angle between stones will create multiple secondary bevels, which can weaken the apex and reduce the cutting efficiency. Furthermore, pressure control is vital; as you move into higher grits, the amount of force applied should decrease significantly. Heavy pressure on a fine stone can actually deform the delicate edge you are trying to create.
Deburring is another essential aspect of maintaining integrity across grits. A burr-a thin wire of steel-forms at the edge during sharpening. While a coarse stone creates a large, stubborn burr, a fine stone creates a much smaller, more brittle one. If the burr is not properly removed at each stage, it can fold over during use, making the knife feel dull even if it was just sharpened. By carefully managing angle, pressure, and burr removal throughout the grit progression, you ensure a clean, sharp, and resilient edge that can withstand the high-volume demands of a professional kitchen environment.


Comments