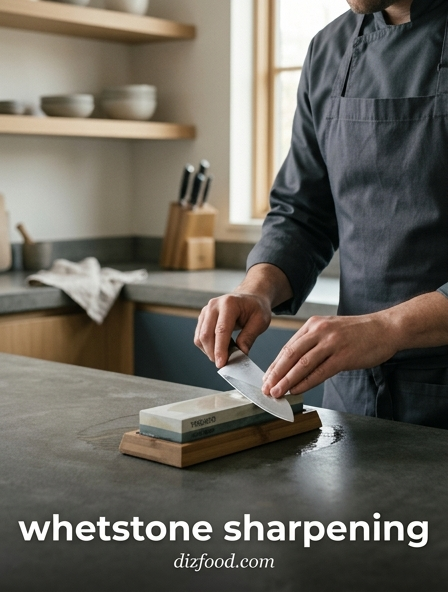
Achieving a professional-grade edge on your kitchen knives is an essential craft that transforms your culinary experience. Mastering whetstone sharpening represents the pinnacle of knife edge restoration, offering the precision needed to reshape a bevel and refine the steel for a surgical finish. While pull-through tools offer convenience, a whetstone provides the granular control required to restore a dull blade to its original factory sharpness. Embracing this rhythmic technique not only extends the life of your cutlery but also ensures every cut is effortless and safe. To maintain your tools effectively, you must recognize the distinct functional roles of Whetstone Sharpening Vs Honing Rod.
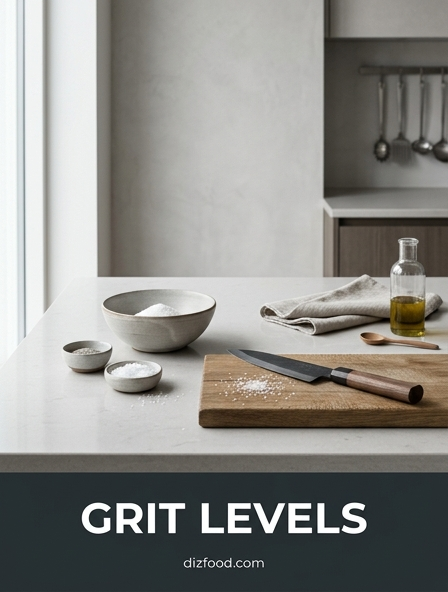
Understanding Whetstone Grit Gradations
Grit gradation is the most critical factor in determining the outcome of your sharpening process. Whetstone grits are categorized by the size of the abrasive particles embedded in the stone, which dictates how much steel is removed during each pass. Using the wrong grit at the wrong stage can either lead to inefficient sharpening or the unnecessary removal of valuable blade material. To achieve a professional edge, a sharpener must transition through various levels of coarseness.
| Grit Category | Grit Range | Primary Purpose |
|---|---|---|
| Coarse | 200 - 800 | Repairing chips and resetting bevels |
| Medium | 1000 - 3000 | Routine sharpening and refining edges |
| Fine | 5000 - 8000+ | Polishing and final honing |
For most kitchen knives, a 1000-grit stone serves as the foundation for the sharpening routine. It is coarse enough to produce a burr quickly but fine enough to leave a functional edge. Higher grits are reserved for precision tasks, such as preparing sashimi or delicate herbs, where a mirror-polished edge reduces cell damage to the food, preserving flavor and texture.
Selecting Professional Grade Water Stones
Choosing the right professional water stone involves more than just selecting a grit; it requires understanding the binder and the abrasive type. Professional-grade stones are generally categorized into "soakers" and "splash-and-go" varieties. Soaking stones, often made of softer bonds, require immersion in water for 10 to 20 minutes to saturate the internal pores, providing a creamy slurry that facilitates smooth sharpening. Conversely, splash-and-go stones utilize harder ceramic binders that do not absorb water, making them ideal for quick maintenance and high-volume kitchen environments.
- Aluminium Oxide: The most common abrasive, known for its versatility and durability across various steel types.
- Silicon Carbide: A harder abrasive often found in coarse stones for rapid metal removal on high-carbon blades.
- Ceramic Bonds: These stones wear slowly and stay flat longer, providing a consistent feel for experienced sharpeners.
- Natural Stones: Sourced from mines, these offer a unique feedback and finish highly prized by traditional Japanese blade enthusiasts.
When selecting a stone, consider the hardness of your knife's steel. High-HRC Japanese steels benefit from harder ceramic stones that won't "dish" quickly, while softer Western steels are more forgiving on traditional soaking stones. Investing in a dual-grit stone can also be a cost-effective way to enter the professional sharpening world.
Determining Optimal Knife Bevel Angles
The bevel angle of a kitchen knife determines the balance between sharpness and durability. A narrower angle provides a sharper, more effortless cut but makes the edge prone to chipping. A wider angle offers more support to the apex, ensuring the knife stays functional through heavy-duty tasks like chopping through dense vegetables or small bones. Understanding the geometry of your specific blade is essential before it touches the whetstone.
- 10 to 15 Degrees: Typical for Japanese Gyutos and Santokus, optimized for precision and slicing.
- 18 to 22 Degrees: Standard for Western-style Chef knives, designed for versatility and impact resistance.
- 25 to 30 Degrees: Reserved for heavy cleavers and butchery tools that face significant bone contact.
- Single Bevel: Specialized Japanese tools like Yanagibas, requiring a specific flat-side sharpening technique.
To maintain consistency, many beginners use angle guides, though professional sharpeners rely on muscle memory and the "matchbook" method to estimate the distance between the spine and the stone. Consistency is more important than the exact degree; a steady hand ensures that the entire edge meets the abrasive at a uniform plane, preventing rounding of the apex.
Proper Hand Positioning and Pressure
Mastering the physical mechanics of sharpening is what separates a novice from a professional. Proper hand positioning ensures stability and control, while regulated pressure determines the speed and quality of the metal removal. Without the correct technique, you risk creating an uneven edge or, worse, injuring yourself during the process. The goal is to create a rhythmic, fluid motion that utilizes the entire surface of the stone.
- The Grip: Hold the handle with your dominant hand, placing your thumb on the flat of the blade and your index finger on the spine for stability.
- The Support: Use two or three fingers from your non-dominant hand to apply downward pressure on the edge near the stone.
- Pressure Control: Apply moderate pressure on the "push" stroke (when the edge is trailing) and lighten the pressure on the "pull" stroke to avoid digging into the stone.
- Body Alignment: Stand comfortably with your shoulders relaxed, using your elbows and core to move the blade rather than just your wrists.
As you progress to higher grits, you must progressively lighten your pressure. Heavy pressure on a finishing stone can actually deform the delicate apex you worked so hard to create. Focus on a "whisper-thin" touch during the final polishing stages to achieve a truly surgical edge.
Repairing Micro Chips and Damaged Edges
Kitchen knives frequently suffer from micro-chipping due to contact with hard surfaces, bones, or improper storage. Repairing these defects requires a regressive approach where you must "remove the damage before you refine the edge." This process involves grinding the blade down past the depth of the deepest chip, effectively creating a new edge profile. This stage is work-intensive and requires a coarse whetstone to be efficient.
- Assessment: Run a fingernail carefully along the edge to locate chips that are not visible to the naked eye.
- Grinding: Use a 200 to 400 grit stone to flatten the edge or grind a new bevel until the chips disappear.
- Thinning: Because grinding the edge makes the blade thicker at the apex, you may need to grind the primary bevel (the "cheeks") to restore cutting performance.
- Smoothing: Once the damage is gone, transition to a 1000 grit stone to remove the deep scratches left by the coarse abrasive.
It is important to keep the stone well-lubricated during repair, as coarse stones generate significant heat and slurry. Patience is key; rushing this stage can lead to an asymmetrical blade profile that will be difficult to correct in later stages of sharpening.
Advanced Burr Removal Techniques
The burr is a microscopic flap of steel that forms on the opposite side of the edge being sharpened. Its presence is the primary indicator that you have reached the apex. However, leaving a burr on the knife results in a "wire edge" that feels sharp initially but rolls over and becomes dull after only a few cuts. Advanced burr removal, or "deburring," is the hallmark of a master sharpener. This process requires a delicate touch and specific movements to cleanly snap the wire edge from the blade.
- Leading Edge Strokes: Very light strokes with the edge facing forward can help "cut" the burr off the stone.
- Stropping on Stone: Dragging the blade backward under only the weight of the knife to realign the fibers.
- Cork or Wood Pull: Drawing the edge through a piece of soft wood or cork to catch and pull away stubborn metal fragments.
- Alternating Passes: Reducing the number of strokes on each side (5, 4, 3, 2, 1) until the burr is imperceptible.
A successful deburring process leaves the apex clean and centered. You can check for a remaining burr by very gently pulling a cotton ball across the edge; if any fibers snag, the burr is still present and requires further refinement on a high-grit stone.
The Importance of Whetstone Flattening
During the sharpening process, whetstones inevitably wear down in the center faster than at the edges, a phenomenon known as "dishing." A dished stone is the enemy of precision; it makes it impossible to maintain a consistent bevel angle because the surface is no longer flat. To keep your knives professional-grade, your stones must be perfectly level. Flattening should be a routine part of your maintenance cycle, often performed before or after every sharpening session.
- Diamond Flattening Plates: The gold standard for maintenance, utilizing industrial diamonds to quickly level any water stone.
- Silicon Carbide Powder: Spread on a glass plate, this abrasive slurry can be used to lap stones flat.
- Flattening Stones: Coarse, hard stones specifically designed with grooves to facilitate water flow and waste removal.
To check for flatness, draw a grid on your whetstone with a pencil. Use your flattening tool until the pencil marks are completely erased across the entire surface. If marks remain in the center, the stone is still dished. Regular flattening not only improves the quality of your sharpening but also extends the life of your stones by preventing deep, uneven wear patterns.
Polishing with High Grit Finishing Stones
Polishing is the stage where a functional edge becomes a work of art. Using stones in the 5000 to 10000 grit range, you remove the microscopic scratches left by medium stones, creating a mirror-like finish on the bevel. In the kitchen, a polished edge is not just about aesthetics; a smoother surface reduces friction during the cut, allowing the knife to glide through delicate proteins like raw fish without tearing the fibers. This level of refinement is essential for high-end culinary presentations.
| Stone Grit | Edge Characteristic | Best Application |
|---|---|---|
| 5000 Grit | Silky smooth with slight "bite" | All-purpose vegetable prep |
| 8000 Grit | Mirror finish, highly refined | Slicing cooked meats, Sushi |
| 12000 Grit | Surgical precision, zero friction | Competition cutting, showpieces |
When polishing, the slurry (or "mud") produced by the stone is your friend. It acts as a buffer, preventing the stone from grabbing the steel too aggressively. Use almost no downward pressure during these final stages, letting the weight of the blade do the work. The result should be an edge that reflects light perfectly and cuts with absolute silence.
Leather Stropping for Razor Keenness
The final step in the sharpening hierarchy is stropping. While high-grit stones do an excellent job of refining the edge, a leather strop provides the ultimate level of keenness by removing the last microscopic traces of the wire edge and perfectly aligning the apex. Stropping is a non-abrasive or micro-abrasive process that focuses on "honing" rather than "sharpening." It is a technique used daily by professional chefs to maintain their edge between full sharpening sessions.
- Preparation: Apply a polishing compound (usually green chromium oxide) to the rough side of the leather.
- The Stroke: Move the blade in a trailing-edge motion, pulling it away from the edge to avoid cutting the leather.
- The Angle: Maintain the same angle used on the whetstones, ensuring the apex makes contact without rounding.
- The Finish: Perform a few final passes on the clean, smooth side of the leather to wipe away any residual compound.
A properly stropped knife will achieve "razor" status, capable of shaving hair or push-cutting through delicate tissue paper. This step adds a level of crispness to the cut that cannot be achieved by stones alone, making it an indispensable part of the kitchen kit.
Testing Edge Performance on Ingredients
The ultimate proof of a successful sharpening session is found in the kitchen, not on a testing bench. Testing your edge on actual ingredients provides immediate feedback on the geometry and keenness of your blade. Different foods challenge the edge in different ways, allowing you to identify if your knife is truly ready for service. A professional sharpener looks for a "bite" that engages the skin of the ingredient without requiring horizontal sawing motions.
- The Tomato Test: A sharp knife should fall through a ripe tomato under its own weight, slicing the skin without bruising the flesh.
- The Onion Test: Slicing an onion vertically should be silent; any "crunching" sound indicates a thick edge that needs thinning.
- The Paper Test: While not an ingredient, slicing newspaper at a 45-degree angle reveals nicks in the edge that food might hide.
- The Chive Test: Cutting a bunch of chives should result in clean circles; if they stick together, the edge is not sharp enough at the heel.
If the knife fails any of these tests, it usually indicates a lingering burr or an inconsistent bevel angle. Mastery comes from recognizing these failures and returning to the stones to correct them. A truly sharp kitchen knife improves safety, speed, and the overall joy of cooking.

Comments