
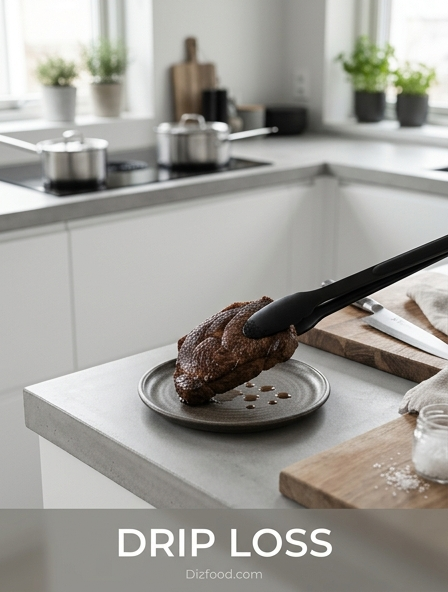
Understanding the Science of Drip Loss
Drip loss, often referred to in culinary circles as "purge," is the phenomenon where raw meat or seafood loses moisture in the form of a reddish liquid during thawing or storage. This liquid is not blood, but rather a combination of water and sarcoplasmic proteins, primarily myoglobin. At a molecular level, the majority of water in muscle tissue is held within the myofibrils. When meat is frozen, the water transitions into ice crystals. If these crystals are large, they puncture the delicate cell membranes and disrupt the structural integrity of the protein fibers.
Upon thawing, the damaged cells are no longer capable of reabsorbing or retaining the fluid, leading to significant moisture expulsion. Several factors influence the severity of this loss, including:
- Initial pH levels of the muscle tissue post-slaughter.
- The rate at which the product reached its freezing point.
- The duration and temperature fluctuations during storage.
- The specific cut and surface-area-to-volume ratio of the protein.
Understanding this process is vital for chefs because excessive drip loss results in a dry, fibrous texture and a loss of essential nutrients and flavor compounds, ultimately diminishing the quality of the final dish.
Optimal Freezing Techniques for Moisture Retention
To mitigate the detrimental effects of drip loss, the primary goal is to minimize the size of ice crystals formed during the freezing process. Small, uniform crystals are less likely to rupture cell walls than large, jagged ones. Achieving this requires passing through the "zone of maximum ice crystal formation"-typically between 31°F and 25°F-as quickly as possible. Industrial blast freezers are ideal, but home and professional kitchens can adopt specific strategies to mimic this efficiency.
- Pre-chill the item in the refrigerator to 33°F before placing it in the freezer to reduce the thermal load.
- Spread items out in a single layer on a metal sheet pan to maximize surface contact and heat transfer.
- Ensure the freezer is set to its coldest setting, ideally -10°F or lower, to accelerate the freezing rate.
- Avoid overcrowding the freezer, which can cause ambient temperatures to rise and slow down the freezing process for all items.
By focusing on speed and thermal conductivity, you preserve the internal structure of the protein, ensuring that the moisture remains trapped within the fibers once the product is eventually returned to a liquid state for cooking.
The Role of Vacuum Sealing in Prepping
Vacuum sealing is one of the most effective methods for preventing drip loss and freezer burn. By removing oxygen from the environment, the vacuum sealer eliminates the space where moisture could evaporate and later crystallize on the surface of the food. This airtight environment exerts a slight external pressure on the protein, which helps keep the muscle fibers compressed and reduces the migration of fluids out of the tissue.
| Feature | Standard Zip Bag | Vacuum Sealed Bag |
|---|---|---|
| Oxygen Exposure | High; promotes oxidation. | Near zero; prevents spoilage. |
| Ice Crystal Size | Large; builds in air pockets. | Small; internal only. |
| Moisture Retention | Moderate to Low. | Very High. |
| Storage Life | Short (months). | Long (years). |
When prepping for long-term storage, the combination of vacuum sealing and rapid freezing creates a synergistic effect. The lack of air prevents sublimation, ensuring the product retains its original weight and succulent mouthfeel upon thawing and preparation.
Safe Refrigerated Thawing Methods
Thawing is just as critical as freezing when it comes to managing drip loss. The most recommended method is slow thawing within a refrigerated environment maintained at approximately 34°F to 38°F. This gradual increase in temperature allows the ice crystals to melt slowly, giving the dehydrated protein fibers more time to reabsorb some of the moisture before it escapes the cell structure. If meat is thawed too quickly, the temperature gradient between the exterior and interior becomes too steep, causing the outer layers to release fluids rapidly.
- Always place the protein on a tray or in a container to catch any potential exudate and prevent cross-contamination.
- Keep the original packaging intact during the thawing process to maintain a humid micro-environment.
- Plan ahead, as large cuts like turkeys or roasts may require 24 hours of thawing time for every five pounds of weight.
- Avoid thawing at room temperature, which encourages both bacterial growth and excessive moisture loss.
This controlled approach ensures that the protein remains within a safe temperature zone while maximizing the retention of its natural juices, leading to a superior culinary outcome.
Using Cold Water Circulation Effectively
When time is a constraint, cold water circulation offers a much faster alternative to refrigerated thawing while still minimizing drip loss compared to microwave or warm water methods. Water is a much more efficient conductor of heat than air, allowing for a rapid yet controlled energy transfer. By keeping the water in motion, you prevent a "cold envelope" from forming around the food, which would otherwise slow down the thawing process.
- Ensure the protein is in a leak-proof, airtight vacuum bag or heavy-duty freezer bag.
- Place the item in a large basin and submerge it completely under cold tap water.
- Run a small, steady stream of cold water into the basin to maintain circulation and a constant temperature.
- Rotate or flip the item every 15 minutes to ensure even thawing across all surfaces.
This method significantly reduces the time the meat spends in the "danger zone" and prevents the protein from becoming "leached" or waterlogged. Because the temperature remains low, the muscle fibers do not contract violently, which helps keep the internal liquids from being squeezed out as the ice melts.
Impact of Freezing Speed on Cell Structure
The relationship between freezing speed and cell structure is the fundamental science behind drip loss. In slow-freezing scenarios, such as placing a large warm roast directly into a home freezer, water molecules have ample time to migrate and aggregate into large, extracellular ice crystals. These crystals grow in the spaces between cells, exerting mechanical pressure that tears the cell membranes and destroys the delicate matrix of the muscle.
In contrast, rapid freezing (or flash freezing) causes water to solidify almost instantly where it sits. This results in the formation of thousands of tiny, intracellular ice crystals. These micro-crystals are too small to cause significant structural damage to the cellular walls. Key differences include:
- Slow Freezing: Leads to high drip loss, mushy texture, and concentrated solute damage.
- Fast Freezing: Preserves the turgidity of the cells and maintains the natural "snap" of the protein.
- Temperature Cycling: Even if frozen fast, fluctuating temperatures can cause small crystals to melt and re-freeze into larger ones.
Professional kitchens prioritize blast chilling to lock in this cellular integrity, ensuring that the protein remains as close to its fresh state as possible upon reconstitution.
Essential Tools for Minimizing Liquid Loss
Investing in the right equipment is a prerequisite for any kitchen serious about protein quality. While skill is important, the physics of moisture retention often depend on the precision of your tools. A combination of temperature control and airtight packaging is the gold standard for preventing the loss of juice and flavor. The following table highlights the essential tools for managing this process:
| Tool | Primary Function | Benefit for Drip Loss |
|---|---|---|
| Chamber Vacuum Sealer | Removes all air and seals bags. | Compresses fibers; prevents evaporation. |
| Digital Probe Thermometer | Monitors internal temperatures. | Prevents over-thawing and heat damage. |
| Metal Sheet Pans | Conducts heat during freezing. | Accelerates freezing speed significantly. |
| Immersion Circulator | Circulates water at precise temps. | Provides controlled, rapid thawing. |
By using these tools, chefs can control the variables that lead to purge. For example, a vacuum sealer removes the air that facilitates sublimation, while a high-quality thermometer ensures that meat never reaches a temperature where the fibers begin to lose their grip on internal fluids.
Pre-Freezing Preparation and Brining Strategies
Preparation before the item ever hits the freezer can significantly impact the amount of drip loss that occurs later. One of the most effective strategies is the use of a brine-a solution of water and salt. Salt alters the structure of the muscle fibers by dissolving a portion of the protein filaments. This creates a more open structure that can hold onto more water. Even if some damage occurs during freezing, the brined meat has a higher initial moisture content and a stronger chemical "grip" on its juices.
- Use a 5% to 6% salt concentration for most poultry and pork.
- Allow the meat to rest in the brine for several hours to ensure deep penetration.
- Pat the meat completely dry after brining to prevent surface ice from forming.
- Consider adding small amounts of sugar or phosphates, which further enhance water-binding capacity.
A dry brine (salting the surface well in advance) is also effective, as it draws moisture out, dissolves the salt, and then reabsorbs the brine into the meat. This process seasons the protein deeply while reinforcing the cellular structure against the expansion of ice crystals.
Maintaining Protein Integrity During Defrosting
Maintaining the integrity of protein during defrosting requires a balance between safety and science. As the meat warms, the enzymes within the tissue become active again. If the defrosting process is too slow in a warm environment, these enzymes can begin to break down the connective tissues prematurely, which, combined with the loss of fluids, leads to a mealy texture. To maintain integrity, the protein should be kept as cold as possible throughout the entire transition.
- Keep the protein in its vacuum-sealed environment to use the fluid pressure to keep the meat hydrated.
- Avoid "tempering" meat on the counter, as the exterior will reach room temperature while the interior remains frozen.
- If the product has a lot of purge in the bag, drain it and pat the meat dry before cooking to ensure a proper sear.
- Use a rack inside your thawing tray to ensure the meat does not sit in its own expressed juices, which can lead to off-flavors.
By respecting the delicate nature of the muscle fibers during this transition, you ensure that the protein retains its "bite" and does not become limp or flavorless before it even reaches the pan.
Post-Thaw Handling for Maximum Juiciness
Once a protein has been successfully thawed with minimal drip loss, the final handling steps are crucial to ensuring that moisture stays put during the cooking process. Even perfectly thawed meat can lose all its juice if subjected to thermal shock or improper resting. The goal is to keep the protein fibers relaxed so they don't squeeze out the moisture you worked so hard to preserve.
- Bring the meat to a cool room temperature (about 20 minutes) before cooking to ensure even heat penetration.
- Sear the meat quickly at high heat to create a crust; while this doesn't "seal in" juices, it provides flavor and texture.
- Use lower finishing temperatures for roasting or grilling to prevent the "wringing" effect of high heat on muscle fibers.
- Rest the meat after cooking for at least 10 minutes. This allows the fibers to relax and reabsorb the internal juices.
The resting phase is the most critical; cutting into a steak or roast too early will cause an immediate flood of liquid-effectively a "second drip loss"-leaving the meat dry. Patience in the final stages of preparation is the key to a succulent, professional-grade result.


Comments