
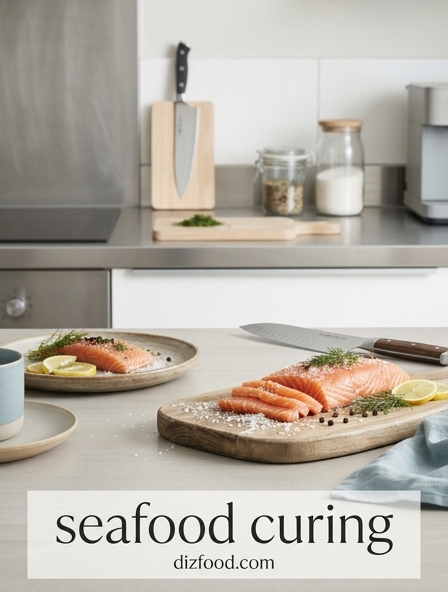
The Science of Osmosis in Seafood Curing
At the heart of seafood curing lies the principle of osmosis, a biological process where water molecules migrate through a semi-permeable membrane from an area of low solute concentration to high solute concentration. When a fillet of fish is blanketed in a dry cure, the high concentration of salt on the exterior draws moisture out of the muscle fibers. This reduction in water activity is critical for preservation, as it inhibits the growth of spoilage-causing bacteria. Simultaneously, salt ions penetrate the flesh, interacting with myofibrillar proteins.
This interaction causes the proteins to denature and coagulate, resulting in a firm, translucent texture that is characteristic of high-quality cured products like gravlax or lox. Beyond preservation, osmosis facilitates the transport of fat-soluble flavor compounds from aromatics into the center of the fish. The rate of this exchange is influenced by the thickness of the fillet and the lipid content of the species. Understanding these variables allows a chef to manipulate the final moisture content and achieve a specific mouthfeel ranging from buttery and soft to dense and jerky-like.
Selecting Premium Species for Textural Integrity
The success of a cure is largely dictated by the initial quality and physiological makeup of the fish. High-fat species are generally preferred for dry curing because their lipid content provides a luxurious mouthfeel and prevents the salt from making the flesh overly aggressive or tough. When selecting species, one must consider the following characteristics to ensure structural integrity throughout the process:
- Fat Content: Species like Atlantic Salmon, King Mackerel, and Steelhead Trout contain intramuscular fats that remain supple when cured.
- Connective Tissue: Fish with delicate connective tissues, such as Fluke or Scallops, require much shorter cure times to avoid complete breakdown.
- Freshness: Only sushi-grade or previously frozen "parasite-guaranteed" fish should be used to ensure safety in raw preparations.
- Muscle Density: Leaner fish like Cod or Halibut produce a much firmer, almost translucent result that is excellent for thin shavings.
Sourcing fish with the skin intact is also beneficial, as the skin acts as a natural barrier that regulates the speed of the cure and helps the fillet maintain its shape during the heavy weighted pressing often required for traditional styles.
Perfecting the Salt and Sugar Equilibrium
The balance between salt and sugar is the primary lever a chef pulls to control both flavor and texture. Salt is the curing agent responsible for moisture extraction and protein denaturation, while sugar acts as a humectant and flavor balancer. Sugar softens the harshness of the salt and helps the fish retain a degree of suppleness that prevents it from becoming excessively saline. Depending on the desired outcome, the ratios can be adjusted according to the following guidelines:
| Style | Salt to Sugar Ratio | Resulting Texture |
|---|---|---|
| Traditional Gravlax | 1:1 | Balanced, tender, and moist | Nordic Hard Cure | 2:1 | Very firm, salty, and shelf-stable |
| Modern Sashimi Cure | 1:2 | Soft, delicate, and subtly sweet |
The type of salt also matters; kosher salt or sea salt is preferred over table salt because the larger crystal size allows for a more even distribution and prevents over-salting through accidental over-application. Using a weight-based approach (percentages of the fish's weight) ensures consistent results across different batches.
Temperature Control for Bacterial Safety and Firmness
Precision in temperature management is non-negotiable when curing seafood. The process must always take place within a refrigerated environment, ideally between 34°F and 38°F (1°C to 3°C). Keeping the fish below the "danger zone" of 40°F is essential to prevent the proliferation of pathogens such as Listeria monocytogenes and Clostridium botulinum. Cold temperatures also ensure that the fats within the fish remain stable and do not become rancid during the 12 to 48 hours required for a deep cure.
Furthermore, temperature affects the kinetic energy of the salt ions. In a cold environment, the curing process is slower and more controlled, allowing for a uniform gradient of salt throughout the fillet rather than a salty exterior and raw interior. High humidity within the refrigerator is also beneficial during the initial phase to prevent the surface from drying out too quickly, which could trap moisture inside and lead to spoilage. For professional results, using a dedicated curing fridge with monitored airflow provides the most consistent textural transformation and ensures the product remains firm and easy to slice.
Optimal Curing Durations for Specific Fish Varieties
Curing time is a critical variable that must be tailored to the thickness and oil content of the seafood. Over-curing can lead to a product that is "hammy" and unpleasantly salty, while under-curing leaves the center raw and lacks the desired shelf life. Chefs must monitor the process closely to achieve the perfect equilibrium. Generally, the following durations serve as a professional baseline:
- Scallops and Small Shrimp: 20 to 40 minutes for a light, translucent "quick cure."
- Thin Whitefish Fillets (e.g., Sea Bass): 2 to 4 hours to firm the flesh without losing delicacy.
- Standard Salmon Fillets (1.5 inches thick): 12 to 24 hours for a traditional melt-in-the-mouth texture.
- Large Tuna Loins or Thick King Salmon: 36 to 48 hours to ensure the cure penetrates the dense core.
During these windows, it is often necessary to flip the fish every 12 hours. This ensures that the liquid "brine" created by the salt and the fish's own juices stays in contact with all surfaces, preventing uneven patches and ensuring a consistent cure from belly to tail.
The Role of Aromatics and Botanical Infusions
While salt and sugar provide the structural foundation, aromatics define the character of the cured seafood. These additions do not significantly affect the chemistry of the cure but infuse the fats with complex flavor profiles. Fresh herbs, such as dill or chervil, are staples in Nordic traditions, while citrus zests provide bright, essential oils that cut through the richness of oily fish. Spices should be toasted and lightly crushed before being added to the cure mix to release their volatile oils.
Botanical infusions, such as gin, aquavit, or beet juice, can also be introduced. Beetroot is particularly popular for the vibrant crimson stain it imparts to the outer layers of the fish, creating a stunning visual contrast when sliced. When using liquids, they should be applied sparingly or mixed into the dry cure to create a paste-like consistency. This ensures the infusion stays in direct contact with the flesh. The goal is to enhance, not mask, the natural oceanic flavor of the seafood, creating a sophisticated harmony between the brine, the botanical notes, and the fish itself.
Rinsing and Air Drying for Surface Tension
Once the desired cure time is reached, the fish must be thoroughly rinsed under cold, filtered water to remove all remaining salt and sugar crystals. Failure to rinse properly will result in an aggressively salty product that continues to cure even after it is removed from the brine. After rinsing, the fish should be patted completely dry with lint-free towels. This stage is followed by a crucial "rest" or air-drying period in the refrigerator, typically lasting 2 to 6 hours.
During this rest, the moisture levels within the fish redistribute, evening out the texture. More importantly, this process facilitates the formation of a pellicle-a thin, slightly tacky layer on the surface of the flesh. The pellicle is essential for two reasons: it acts as a protective barrier that seals in moisture, and it provides a superior surface for smoke adhesion if the fish is to be cold-smoked. Even for unsmoked products, the pellicle gives the fish a professional, glossy sheen and improves the "snap" of the exterior when bitten, providing a subtle but important textural contrast to the soft interior.
Distinguishing Between Acid Denaturation and Dry Brining
It is important for a culinary professional to distinguish between curing with minerals (salt) and curing with acids (citrus juice). Dry brining, or salt curing, involves the extraction of water and the physical tightening of protein strands through osmosis. This results in a product that is preserved and has a significantly changed, firmer texture. In contrast, acid denaturation-commonly seen in ceviche or aguachile-involves the use of citric or acetic acid to "cook" the proteins. The acid changes the structure of the proteins, making them appear opaque and firm, but it does not remove moisture or preserve the fish in the same way salt does.
While salt curing takes hours or days, acid denaturation happens in minutes. If left too long in acid, the fish becomes mushy and chalky as the proteins completely break down. Professional curing often uses salt for the primary transformation and then incorporates acid only at the very end of the process, perhaps as a finishing vinaigrette or a quick marinade, to maintain the structural integrity of the fish while gaining the bright flavor profile that acids provide.
Advanced Tools for Professional Curing Results
To move beyond basic home techniques and achieve consistent, high-yield results, professional kitchens utilize specific equipment designed for precision. These tools allow for a scientific approach to curing that minimizes waste and maximizes flavor development. The following tools are considered essential for advanced seafood curing:
- Digital Equilibrium Scales: Used to measure salt and sugar in precise percentages (usually 2.5% to 3% of the fish's weight) rather than by volume.
- Vacuum Sealers: These remove oxygen and compress the cure against the flesh, accelerating the osmotic process and ensuring even coverage.
- pH Meters: Used to monitor the acidity levels in fermented or acid-heavy cures to ensure safety and consistency.
- Brix Refractometers: Useful for measuring the sugar concentration in wet brines to ensure the osmotic pressure is correct.
- Non-Reactive Curing Trays: High-grade stainless steel or food-safe plastics prevent metallic off-flavors during long contact times.
Using a vacuum sealer, in particular, has revolutionized the process, as it allows the fish to cure in its own extracted juices in a controlled, anaerobic environment, leading to a more intense flavor infusion and a more uniform texture across the entire fillet.
Slicing and Presentation for Professional Plate Appeal
The final presentation of cured seafood is where the chef's technical skill is most visible. Slicing should always be performed when the fish is very cold, as the fats are firmer and the muscle fibers are less likely to tear. A long, thin-bladed slicing knife, such as a sujihiki or a traditional smoked salmon knife, is required. The knife should be extremely sharp to allow for long, singular strokes that produce translucent, paper-thin ribbons. Slicing on a bias (at a 45-degree angle) across the grain maximizes the surface area of each piece and highlights the internal marbling and color gradients created by the cure.
When plating, the cured seafood should be the focal point. Traditional accompaniments like crème fraîche, capers, and pickled red onions provide the necessary acidity and fat to complement the salt. For a modern aesthetic, chefs may use herb oils, dehydrated citrus powders, or small mounds of roe to add texture and pops of brine. Arrangement is key; folding the slices into rosettes or draping them elegantly ensures height on the plate, while garnishing with fresh micro-greens or blossoms adds a final touch of vibrancy that suggests freshness and culinary precision.





Comments