Elevating your home cooking starts with the precision of your knife skills, and nothing adds a touch of professional flair quite like the julienne cut. By transforming simple vegetables into delicate, matchstick-sized strips, you ensure uniform cooking times and create a visually stunning presentation that mimics fine dining standards. Mastering this technique allows you to showcase vibrant colors and textures in everything from crisp salads to delicate stir-fries, making every meal feel special. While hand-cutting offers the most control for artistic garnishes, choosing the right equipment can significantly speed up your meal prep. To find the best tool for achieving those perfect, thin slices, it is helpful to compare the efficiency of a Mandoline vs Food Processor.

Essential Tools for Precise Julienne Cuts
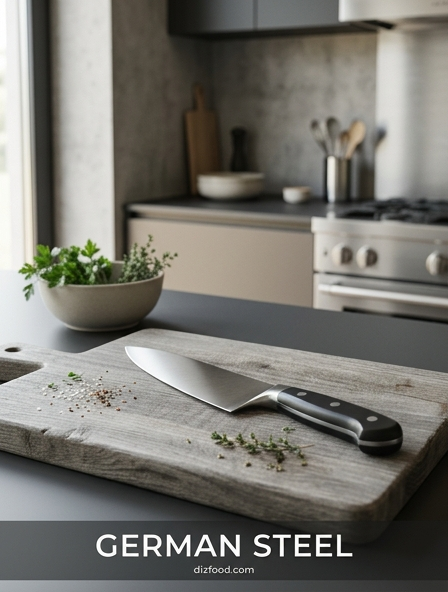
Mastering the julienne cut begins with selecting the appropriate equipment. A high-quality chef's knife is the most critical tool in your arsenal. Typically, an 8-inch knife with a sharp, thin blade allows for the necessary control and agility to create fine, matchstick-sized strips. The blade must be impeccably sharp; a dull knife requires more pressure, increasing the risk of the blade slipping and resulting in uneven cuts. Furthermore, a stable, heavy-duty cutting board is essential to provide a secure surface. Wooden or high-density plastic boards are preferred to protect the knife's edge.
- Chef's Knife: An 8-inch blade provides the best balance between reach and precision.
- Honing Rod: Essential for maintaining the blade's alignment between professional sharpenings.
- Y-Peeler: Useful for removing tough skins from carrots or parsnips before slicing.
- Damp Kitchen Towel: Placed under the cutting board to prevent any sliding during rapid knife work.
Beyond the blade, consistency is aided by having a clear workspace. While specialty julienne peelers exist, they rarely offer the same level of uniformity and structural integrity as a hand-cut vegetable. Investing time in maintaining your primary blade ensures that every stroke through the produce is clean and effortless.
Knife Safety and Proper Grip Techniques
Safety is the foundation of professional knife skills, especially when performing high-precision tasks like the julienne cut. The most effective way to hold a chef's knife is the "pinch grip." By gripping the base of the blade between the thumb and the side of the index finger, you gain maximum control over the angle and movement of the steel. The remaining three fingers should wrap comfortably around the handle. This technique transforms the knife into an extension of your arm rather than a separate tool.
- The Pinch Grip: Secure the bolster with your thumb and forefinger for stability.
- The Claw: Curl the fingertips of your non-cutting hand inward to hold the vegetable.
- Knuckle Guide: Use the flat side of the blade against your tucked knuckles to guide the depth of the cut.
- Anchor Point: Keep the tip of the knife in contact with the board to create a rhythmic rocking motion.
The "claw" grip protects your fingertips from the blade while providing a stable platform for the vegetable. By using your knuckles as a guide, you can precisely gauge the thickness of each slice without looking directly at the edge, allowing for both speed and safety during long prep sessions.
Step by Step Guide to the Perfect Matchstick
Achieving the classic julienne dimension-traditionally 1/8 inch by 1/8 inch by 2 inches-requires a systematic approach to breaking down the vegetable. The process begins with "squaring off" the produce. By trimming the rounded edges of a vegetable like a potato or carrot, you create a stable rectangular block that will not roll on the cutting board. This initial preparation is the secret to ensuring every subsequent strip is identical in shape and size.
- Trim: Cut the vegetable into segments roughly two inches in length.
- Square: Slice off the four rounded sides to create a flat-sided cuboid.
- Plank: Slice the block lengthwise into thin, uniform sheets approximately 1/8 inch thick.
- Stack: Lay two or three planks on top of one another to save time.
- Strip: Slice through the stack lengthwise at 1/8-inch intervals to create the final matchsticks.
Once the final strips are cut, they should be stored in a bowl of ice water if they are not being used immediately. This technique, particularly effective for root vegetables, helps maintain the crispness and prevents oxidation, ensuring the matchsticks remain vibrant and firm for service.
Best Vegetables for Practicing Julienne Skills
Not all vegetables respond equally to the julienne technique. For beginners, it is best to start with firm, dense produce that holds its shape under the pressure of the knife. Carrots are the gold standard for practice because they are inexpensive and have a consistent internal texture. Avoid soft or overly fibrous vegetables until your speed and precision have improved, as they tend to crush rather than slice cleanly. The following table highlights ideal candidates for practicing this specific culinary skill.
| Vegetable | Difficulty | Primary Use |
|---|---|---|
| Carrots | Easy | Salads, Slaws, Mirepoix |
| Zucchini | Medium | Stir-fries, Garnish |
| Russet Potato | Easy | Shoestring Fries |
| Celery | Hard | Soup Bases, Salads |
| Bell Peppers | Medium | Fajitas, Fresh Wraps |
As you progress, try practicing with daikon radish or parsnips. These vegetables offer different resistance levels, helping you calibrate the force required for a clean cut. Mastering these items provides a solid foundation for more delicate tasks like julienning ginger or citrus peels.
Maintaining Uniformity for Professional Results
Uniformity in julienne cuts is not merely an aesthetic choice; it is a functional requirement in professional cooking. When every piece of a vegetable is the same size, they all cook at the exact same rate. If your matchsticks vary in thickness, the thinner pieces will turn to mush while the thicker ones remain raw. This consistency is what separates home cooking from high-end culinary execution. Achieving this requires a disciplined eye and a refusal to rush the initial planking stage.
- Visual Benchmarks: Use your thumb joint or a ruler to verify the two-inch length.
- Steady Pace: Maintain a consistent rhythm rather than bursts of speed to ensure even pressure.
- Minimal Stacking: Avoid stacking too many planks at once, which can cause the bottom layers to slide.
- Discard Scraps: Do not include the rounded "waste" pieces in the final pile; save them for stocks instead.
Professional chefs often use the "eye-test" to check their work. A successful julienne should look like a bundle of identical wooden matchsticks. If you find your cuts tapering at the ends, check your knife's path to ensure it is traveling straight down rather than at an angle.
Comparing Manual Cutting versus Mandoline Slicing
In a high-volume kitchen, the debate between using a traditional chef's knife and a mandoline slicer is common. The mandoline offers unparalleled speed and mechanical precision, producing hundreds of identical slices in minutes. However, the manual method with a knife builds essential culinary dexterity and allows for adjustments on the fly. Each method has distinct advantages depending on the specific needs of the dish and the skill level of the cook.
| Feature | Chef's Knife | Mandoline Slicer |
|---|---|---|
| Precision | High (Skill Dependent) | Absolute |
| Speed | Moderate | Extreme | Works on all shapes | Best for firm items |
| Safety | Controlled | Higher Risk of Cuts |
While the mandoline is a powerful tool, it lacks the versatility of a knife for small-batch prep or irregularly shaped vegetables. Furthermore, over-reliance on a mandoline can stunt the development of hand-eye coordination. Most professional chefs recommend mastering the knife first to ensure you have the skills to perform even if a mandoline is unavailable.
Elevating Plate Presentation with Julienne Garnishes
The julienne cut is one of the most effective ways to add height and sophistication to a plate. Rather than laying food flat, a tangled nest of julienned vegetables can create a three-dimensional effect that draws the eye. This technique is frequently used in fine dining to provide a delicate, lace-like appearance to garnishes. Brightly colored vegetables like beets, radishes, and scallions are particularly effective when cut this way, as they provide a vibrant contrast to the main proteins.
- The Nest: Lightly toss julienned carrots and leeks to create a base for seared scallops.
- The Fan: Arrange matchsticks in a semi-circle to add a sense of movement to the dish.
- Color Contrast: Use purple carrots or red peppers against white plates for maximum visual impact.
Beyond aesthetics, these fine cuts allow for a delicate distribution of flavor. Instead of a large bite of a single vegetable, a julienne garnish provides a subtle hint of flavor in every forkful. This allows the chef to introduce bold aromatics, like ginger or lemongrass, without overwhelming the palate.
How Julienne Cuts Enhance Texture and Flavor
The physics of the julienne cut significantly impacts the dining experience by altering the surface-area-to-volume ratio of the food. Because the vegetables are sliced so thinly, a larger percentage of the vegetable's surface is exposed to heat and seasoning. This leads to rapid caramelization in a stir-fry or immediate absorption of dressings in a cold salad. The result is a more intense flavor profile and a texture that is simultaneously crisp and tender.
In raw applications, such as a slaw or a spring roll, the julienne cut provides a unique "crunch" that is different from a dice or a slice. The long, thin strands create air pockets within the pile, making the dish feel lighter and more refined on the tongue. In cooked dishes, the thinness allows the vegetables to soften just enough to be pliable while retaining a structural "bite." This balance is essential in Asian cuisines, where the harmony of textures-often referred to as "mouthfeel"-is just as important as the balance of spices.
Common Mistakes to Avoid When Slicing Matchsticks
Even experienced cooks can struggle with the julienne if they overlook the fundamentals. One of the most common errors is failing to square off the vegetable properly. Attempting to cut a rolling object leads to uneven planks and, more importantly, increases the likelihood of the knife slipping toward the fingers. Another frequent mistake is "rocking" the knife too aggressively, which can cause the matchsticks to be thicker at one end than the other.
- Dull Blades: Using a knife that hasn't been honed leads to "crushed" edges rather than clean cuts.
- Inconsistent Planking: If the initial sheets aren't uniform, the final strips never will be.
- Over-Stacking: Trying to slice through a stack that is too high causes the middle layers to buckle.
- Ignoring the Grain: Cutting against the natural fibers of certain vegetables can cause them to break.
To fix these issues, slow down and focus on the "reset" after every few cuts. Ensure your guide hand is repositioned frequently and that the blade remains perpendicular to the cutting board at all times. Consistency comes from deliberate practice, not from rushing to finish the prep list.
Advanced Tips for Speed and Kitchen Efficiency
Once the mechanics of the julienne are mastered, the focus shifts to efficiency and speed. In a professional environment, being able to produce a quart of julienned vegetables in minutes is a requirement. The key to speed is minimizing unnecessary movements. This involves organizing your "mise en place" so that the whole vegetables, the squared-off blocks, and the finished strips are always in the same place. This creates a rhythmic, assembly-line flow that reduces mental fatigue.
- Batch Processing: Square off all your vegetables first, then plank them all, then strip them all.
- Utilize the Heel: Use the back half of the knife (the heel) for more power and control during the initial squaring.
- Gliding Motion: Focus on a smooth forward-and-down motion rather than a simple vertical chop.
- Minimize Waste: Learn to square the vegetable with as few cuts as possible to maximize yield.
Another advanced technique involves using the "walking" method with your guide hand, where your fingers move back in perfect synchronization with the knife's rhythm. This allows for a continuous flow of cutting without stopping to readjust your grip, significantly increasing your output during heavy prep periods.


Comments