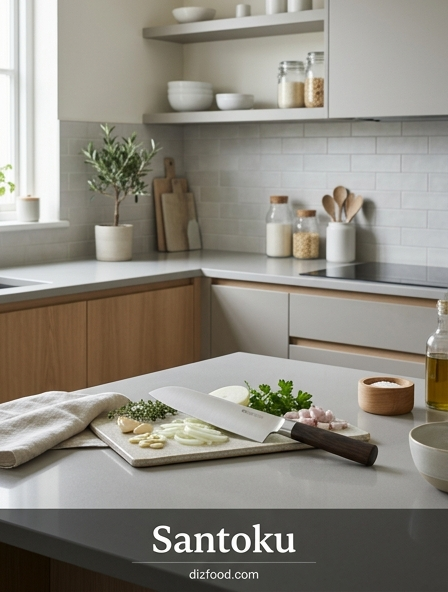
Understanding the Santoku Knife Anatomy
The Santoku knife, a staple of Japanese culinary tradition, possesses a distinctive silhouette that sets it apart from its Western counterparts. At its core is the blade, typically ranging from five to seven inches in length, featuring a "sheep's foot" design where the spine curves downward to meet the tip. This construction provides a flatter cutting edge, maximizing contact with the cutting board for efficient, linear strokes. The knife is often lighter and thinner than a traditional chef knife, allowing for extreme precision and reduced hand fatigue during long prep sessions.
- The Blade: Made from high-carbon stainless steel for edge retention.
- The Bolster: The junction between the blade and handle, providing balance.
- The Tang: The part of the blade extending into the handle for structural integrity.
- The Heel: The rear part of the edge used for tasks requiring more force.
Modern Santoku knives often feature a full tang construction, meaning the steel runs the entire length of the handle. This ensures the knife is well-balanced and durable enough to withstand the rigors of a professional kitchen environment.
The Three Virtues Slicing Dicing and Mincing
The term "Santoku" literally translates to "three virtues" or "three uses," referencing the knife's exceptional proficiency in three specific cutting tasks. Unlike specialized blades that serve a single purpose, the Santoku is a multipurpose powerhouse designed to handle the diverse needs of modern cooking. Its flat edge and slight taper make it an ideal tool for home cooks and professional chefs who prioritize versatility without sacrificing the quality of the cut.
- Slicing: The thin blade glides through proteins and vegetables with minimal resistance.
- Dicing: The vertical motion allowed by the flat edge creates uniform cubes of onions or potatoes.
- Mincing: The sharp tip and manageable length allow for rapid, fine chopping of herbs and garlic.
By mastering these three virtues, a cook can complete almost any preparation task with a single tool. The knife's geometry encourages a "push-cut" motion, which is more efficient for these tasks than the rocking motion used with curved Western blades, leading to cleaner cuts and better preservation of the ingredient's texture.
Mastering the Perfect Pinch Grip
The foundation of effective knife skills begins with how the tool is held. For a Santoku, the "pinch grip" is widely considered the gold standard for achieving maximum control and safety. Instead of wrapping all fingers around the handle, the user pinches the blade itself between the thumb and the side of the index finger, just ahead of the bolster. The remaining three fingers wrap loosely around the handle to provide stability and leverage during the cutting process.
This grip effectively shortens the distance between the hand and the cutting edge, turning the knife into an extension of the arm. It shifts the balance point toward the center of the knife, allowing for more nuanced movements when performing delicate tasks like julienning or fine dicing. Beginners may find this grip unusual at first, but it significantly reduces the risk of the knife slipping or twisting in the hand. Over time, the pinch grip minimizes wrist strain and enhances the speed of repetitive motions, making it an essential technique for anyone looking to improve their culinary efficiency.
The Science of the Granton Edge
Many Santoku knives feature a series of shallow indentations or dimples along the side of the blade, known as a Granton edge. These divots are not merely decorative; they serve a vital mechanical function during the cutting process. As the blade passes through dense or sticky foods-such as potatoes, cucumbers, or raw proteins-the indentations create small pockets of air between the steel and the ingredient. This air buffer breaks the vacuum seal that typically causes food to cling to the side of a flat blade.
By reducing surface tension and suction, the Granton edge allows for smoother, faster slicing. The food falls away from the knife more easily, preventing the buildup of sliced pieces that can obstruct the next stroke. This feature is particularly beneficial when working with starchy vegetables that are notoriously difficult to slice cleanly. While the Granton edge does not necessarily make the blade sharper, it significantly improves the overall "flow" of prep work, making the Santoku a favorite for tasks that require high-volume slicing with consistent results.
Precision Cutting with the Push Stroke
The geometry of a Santoku knife dictates a specific cutting technique known as the "push stroke." Unlike the Western chef knife, which is designed for a rocking motion where the tip remains in contact with the board, the Santoku features a flatter profile that favors a forward-and-down movement. The user pushes the knife forward as they press down through the ingredient, lifting the entire blade off the board between each cut. This technique results in extremely clean, vertical slices without the "accordion" effect often seen with poor rocking technique.
- Start with the heel of the knife slightly above the ingredient.
- Push the blade forward and downward in one fluid motion.
- Complete the cut as the entire edge meets the cutting board.
- Reset by lifting the knife and pulling it back for the next slice.
This method is highly effective for maintaining the structural integrity of delicate herbs and vegetables. Because the blade is thinner and sharper, the push stroke requires less physical pressure, allowing the edge of the steel to do the work rather than the weight of the cook's arm.
Santoku vs Western Chef Knife Comparison
Choosing between a Santoku and a Western chef knife often comes down to personal preference and the specific tasks at hand. While both are considered multipurpose kitchen tools, their physical characteristics lead to different performance profiles. Western knives are generally heavier and feature a significant curve along the edge, making them better for heavy-duty tasks like disjointing poultry. In contrast, the Santoku is lighter and sharper, excelling in precision and speed for vegetable-heavy prep work.
| Feature | Santoku Knife | Western Chef Knife |
|---|---|---|
| Blade Shape | Flatter edge, sheep's foot tip | Curved edge, pointed tip |
| Weight | Light and agile | Heavy and robust |
| Standard Length | 5 to 7 inches | 8 to 10 inches |
| Edge Angle | 10 to 15 degrees | 20 to 22 degrees |
The thinner blade of the Santoku allows for a smaller edge angle, typically resulting in a sharper out-of-the-box experience. However, this thinness also makes the blade more brittle and less suitable for hacking through bone or frozen foods compared to the thicker Western spine.
Essential Safety Tips for Sharp Blades
Operating a Santoku knife requires a disciplined approach to safety, as its extreme sharpness can be unforgiving. The most critical safety technique is the "claw grip" for the guiding hand. By tucking the fingertips inward and using the knuckles to guide the side of the blade, the user ensures that the sharp edge never comes into contact with flesh. The thumb should also be tucked behind the fingers to avoid accidental nicks. A stable cutting surface is equally important; always ensure the cutting board is flat and does not slide by placing a damp paper towel underneath it.
- Never leave a sharp knife submerged in a sink of soapy water.
- Always cut away from the body and keep fingers clear of the path.
- Store knives in a block, magnetic strip, or sheath to protect the edge.
- If a knife falls, step back and let it drop; never attempt to catch it.
Furthermore, maintaining a sharp edge is actually a safety measure. A dull blade requires more force to penetrate food, increasing the likelihood of the knife slipping. A sharp Santoku should glide through ingredients with minimal effort, providing the user with more control over every movement.
How to Sharpen and Hone Santoku Steel
Maintaining the edge of a Santoku requires two distinct processes: honing and sharpening. Honing is a daily maintenance task performed with a ceramic or steel rod to realign the microscopic teeth of the blade's edge. Because Santoku steel is often harder than Western steel, a ceramic rod is generally preferred to avoid damaging the blade. Sharpening, on the other hand, involves removing metal to create a new edge and is usually done using whetstones when the knife begins to feel dull even after honing.
- Soak the whetstone in water until bubbles stop rising.
- Hold the knife at a consistent 15-degree angle against the stone.
- Apply light pressure and move the blade in a sweeping motion.
- Flip the blade and repeat on the other side until a burr forms.
- Progress to a finer grit stone to polish the edge.
It is vital to maintain the specific 15-degree angle characteristic of Japanese cutlery. Using a standard 20-degree sharpener intended for Western knives will thicken the edge and degrade the Santoku's performance. For many users, professional sharpening once or twice a year is a viable alternative to DIY whetstone work.
Daily Maintenance for Long Lasting Sharpness
The longevity of a high-quality Santoku is largely determined by how it is treated after the cooking is done. Heat and harsh chemicals from dishwashers are the primary enemies of fine cutlery; they can warp the handle, corrode the steel, and dull the sharp edge in a single cycle. Instead, always hand wash the knife immediately after use with warm, soapy water and a soft sponge. Dry the blade thoroughly with a clean towel before storing it to prevent the formation of water spots or rust, especially if the knife is made of high-carbon steel.
The cutting surface also plays a significant role in edge retention. Hard surfaces like glass, granite, or marble will instantly dull or even chip the thin blade of a Santoku. It is best to use wooden or high-quality plastic cutting boards that have some "give" to them. End-grain wood boards are particularly prized as they allow the knife edge to slide between the wood fibers rather than cutting across them. Finally, never use your Santoku to scrape food off a board using the sharp edge; instead, flip the knife over and use the spine to clear the surface, preserving the delicate edge for the next meal.
Choosing the Right Santoku for Your Kitchen
Selecting the ideal Santoku involves balancing material quality, ergonomics, and budget. For those new to Japanese cutlery, a stainless steel Santoku offers a great entry point as it is resistant to rust and relatively easy to maintain. More advanced cooks may prefer high-carbon steel, which can achieve a much sharper edge and hold it longer, though it requires more diligent care to prevent oxidation. Look for "VG-10" or "AUS-10" labels, which indicate high-quality Japanese steel known for its durability and sharpness.
The handle is another critical factor. Traditional "Wa-handles" are D-shaped or octagonal and made of wood, offering a light, forward-balanced feel. Western-style handles are often more ergonomic and heavier, providing a familiar grip for those used to European knives. Before purchasing, hold the knife to ensure the weight feels comfortable in your hand and the balance point aligns with where you naturally grip the blade. Whether you choose a budget-friendly option or a hand-forged masterpiece, a well-chosen Santoku will become the most utilized tool in your culinary arsenal, transforming the way you approach food preparation.

Comments