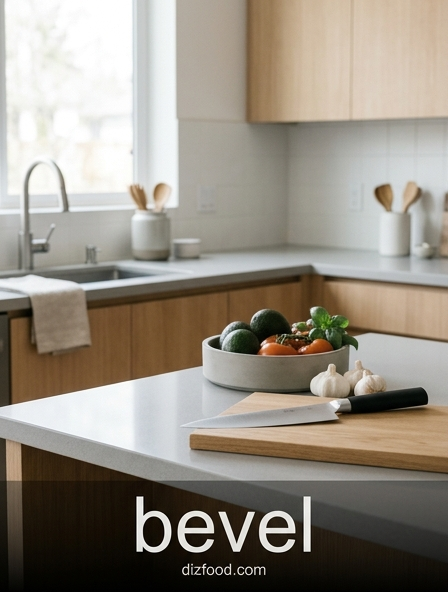
Understanding Blade Bevel Geometry
The bevel refers to the angled surface that forms the cutting edge of a kitchen knife. Understanding this geometry is fundamental for any culinary professional or home enthusiast, as it determines how the blade interacts with food fibers. Most kitchen knives feature either a double bevel, common in Western cutlery, or a single bevel, traditional in Japanese blades like the Yanagiba. The primary bevel is the main slope of the blade, while the secondary bevel is the actual sharpened edge that does the cutting.
Geometry dictates the balance between sharpness and durability. A thinner bevel profile allows for effortless slicing with minimal resistance, whereas a thicker profile provides the structural integrity needed for heavy-duty tasks like disjointing poultry. The following table summarizes the primary differences between common bevel configurations:
| Bevel Type | Common Application | Performance Characteristic |
|---|---|---|
| Double Bevel | Chef's Knives, Santokus | Versatile, balanced, and easier to maintain. |
| Single Bevel | Sushi Knives, Debas | Extreme precision and clean, surgical cuts. |
| Convex Bevel | Cleavers, Outdoor Knives | Maximum edge retention and durability. |
Selecting the Correct Sharpening Angle
Choosing the appropriate sharpening angle is a critical step in maintaining a kitchen knife's bevel. The angle is measured in degrees per side (dps). A smaller angle creates a narrower, sharper edge that excels at delicate tasks but is prone to chipping. Conversely, a larger angle creates a robust edge that withstands impact against hard surfaces. When selecting an angle, one must consider the steel's hardness and the intended use of the tool.
Standard guidelines help determine the best approach for various kitchen implements. Most modern kitchen tasks fall into specific angular categories:
- 10 to 15 Degrees: Reserved for high-carbon Japanese steel and specialty slicing knives.
- 15 to 20 Degrees: The industry standard for modern Western chef's knives, offering a blend of sharpness and resilience.
- 20 to 25 Degrees: Ideal for utility knives and blades used for dense vegetables or light butchery.
- 25 to 30 Degrees: Necessary for heavy cleavers and knives used for hacking through bone or frozen items.
Consistently matching the factory angle during maintenance ensures that the knife performs as intended without removing excessive material from the blade face.
Essential Tools for Bevel Maintenance
Maintaining a pristine bevel requires a specific set of tools designed to remove metal precisely while refining the edge. The most versatile tool is the whetstone, which comes in various grit levels. Coarse stones are used for reshaping damaged bevels, while medium and fine stones are reserved for routine sharpening and finishing. Synthetic water stones and diamond plates are popular choices due to their speed and flatness, which is essential for maintaining a consistent bevel angle across the entire length of the blade.
Beyond stones, several auxiliary tools assist in achieving professional results. These include:
- Angle Guides: Small clips that slide onto the spine of the knife to help beginners maintain a static angle during the stroke.
- Sink Bridges: Adjustable platforms that hold stones securely over a kitchen sink for easy lubrication and cleanup.
- Stone Flatteners: Coarse ceramic or diamond plates used to ensure whetstones remain perfectly flat, preventing rounded bevels.
- Honing Rods: Steel or ceramic rods used for daily maintenance to realign the microscopic teeth of the edge between sharpening sessions.
Honing Versus Sharpening Techniques
It is crucial to distinguish between honing and sharpening, as they serve different purposes in kitchen knife care. Sharpening is an abrasive process that removes metal to create a new bevel. This is necessary when the edge has become dull, rounded, or chipped. Because it involves significant material removal, sharpening should only be performed a few times a year for most home cooks. Over-sharpening can prematurely wear down a blade, shortening its lifespan significantly.
Honing, on the other hand, does not remove a meaningful amount of metal. Instead, it realigns the existing edge. As a knife is used, the very tip of the bevel can fold over at a microscopic level, known as "rolling." A honing rod pushes this folded metal back into a straight line, restoring the knife's "bite."
The following list highlights the primary differences:
- Sharpening: Uses whetstones; creates a new edge; performed occasionally.
- Honing: Uses a honing steel; realigns the existing edge; performed frequently, often before every use.
Mastering Consistent Stroke Pressure
The amount of pressure applied during the sharpening process significantly impacts the quality and uniformity of the bevel. Beginners often make the mistake of pressing too hard, which can cause the angle to fluctuate and lead to an uneven edge or heat buildup in the steel. The goal is to let the abrasive particles of the stone do the work. Consistent, moderate pressure is required during the initial stages of sharpening to remove metal efficiently, but this must be adjusted as the process moves toward refinement.
A successful sharpening stroke follows a specific pressure gradient. To master this, consider the following phases:
- The Shaping Phase: Apply firm, steady pressure to grind the bevel and establish a burr.
- The Refining Phase: Reduce pressure by half to smooth out the scratches left by the coarse grit.
- The Finishing Phase: Use extremely light pressure, almost just the weight of the knife itself, to polish the edge.
Consistency is key; varying the pressure within a single stroke will create high and low spots on the bevel, resulting in poor cutting performance and an unsightly finish.
Polishing the Edge for Refined Control
Polishing is the final stage of the sharpening process where the bevel is refined using high-grit stones, typically ranging from 5,000 to 10,000 grit. While a coarse edge has "teeth" that are useful for cutting through tough skins like tomatoes, a polished edge provides a mirror-like finish that glides through proteins with almost zero friction. This level of refinement is particularly sought after by chefs who specialize in sashimi or fine vegetable garnishes, where the aesthetic of the cut surface is as important as the speed of the preparation.
A polished bevel offers more than just visual appeal; it increases the corrosion resistance of the steel by reducing the surface area where moisture and acids can settle. However, a highly polished edge can sometimes feel "slippery" on certain foods. For general kitchen use, a "semi-tooth" finish achieved at around 3,000 to 5,000 grit is often considered the ideal compromise, providing both the refined control of a polished edge and the aggressive bite needed for daily culinary tasks.
Identifying Bevel Wear and Damage
Regular inspection of the bevel is necessary to catch wear and damage before it necessitates a major repair. Wear typically manifests as a "glint" or reflection of light when looking directly at the edge. A perfectly sharp bevel is so thin that it does not reflect light; if you see a bright spot or a continuous line of light along the edge, it indicates that the metal has rounded or flattened. This rounding occurs naturally through contact with cutting boards and food.
More severe damage includes chips and rolls. Chipping happens when the hard steel hits a bone or frozen object, causing small pieces of the bevel to break away. Rolling occurs when the edge bends to one side. You can identify these issues using several methods:
- Visual Inspection: Look for nicks or irregularities under a bright light.
- The Fingernail Test: Gently pull the edge across a thumbnail; a sharp blade will catch, while a dull or damaged one will slide.
- The Light Test: Observe the edge head-on to find reflective areas that signify dullness.
The Role of Stropping in Sharpness
Stropping is the ultimate finishing touch for a kitchen knife's bevel. It involves trailing the edge over a strip of leather, often loaded with a micro-abrasive polishing compound. Unlike sharpening on a stone, stropping is a "pull" motion where the spine leads the way, ensuring the edge does not dig into the leather. This process removes the microscopic "wire edge" or burr that remains after stone sharpening, resulting in a level of sharpness that is difficult to achieve by stones alone.
In a kitchen environment, a strop can be used to "touch up" a knife throughout a shift. It is gentler than a honing rod and can bring a slightly degraded edge back to life in seconds. To maintain a strop, it should be kept clean and occasionally reloaded with compound. For those without a dedicated leather strop, a piece of flat cardboard or a denim strip can serve as a functional substitute in a pinch, helping to align the bevel's apex for maximum precision during intricate kitchen work.
Testing Blade Performance and Precision
Once maintenance is complete, testing the bevel's performance confirms that the sharpening was successful. A truly sharp knife should require no downward force to initiate a cut; rather, the weight of the blade and its horizontal movement should suffice. Performance testing should move from simple checks to more demanding culinary applications to ensure the bevel is uniform from the heel to the tip.
Standard tests used in professional kitchens include:
| Test Method | What it Measures | Success Criteria |
|---|---|---|
| Paper Slice | Edge uniformity | Clean, snag-free cuts through thin paper. |
| Tomato Skin | Bite and sharpness | Piercing the skin with no pressure or squishing. |
| Onion Dice | Friction and geometry | Gliding through layers without "cracking" the vegetable. |
| Arm Hair Shave | Apex refinement | Effortlessly removing hair at the skin level. |
Proper Storage to Protect the Bevel
The longevity of a sharpened bevel is heavily dependent on how the knife is stored when not in use. In many kitchens, the biggest threat to a bevel is not the food being cut, but the storage environment. Tossing knives into a drawer where they can clash with other metal utensils is the fastest way to dull or chip a finely tuned edge. Protecting the bevel ensures that the time spent sharpening is not wasted and that the tool remains safe for the next use.
There are several effective ways to store kitchen knives to preserve their bevels:
- Magnetic Strips: These keep the blades visible and separate, preventing contact with other tools.
- Knife Rolls: Preferred by professional chefs, these offer individual padded slots for transport and storage.
- Edge Guards: Plastic or wooden sheaths that fit over the blade, allowing for safe storage in drawers or bags.
- Slotted Knife Blocks: Traditional blocks are effective if knives are inserted spine-first to avoid dulling the bevel against the wood.


Comments