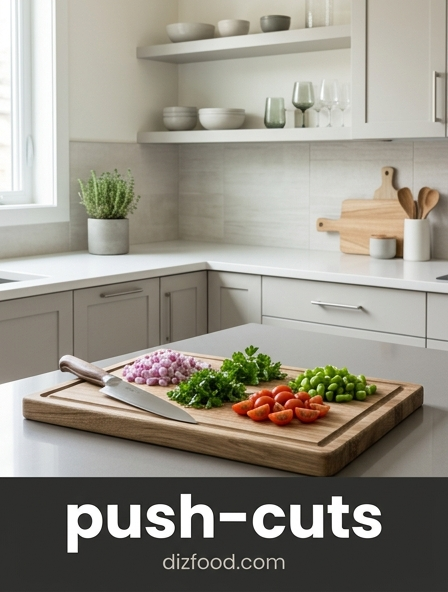
Mastering the Fundamental Vertical Push Cut Motion
The push cut is a foundational culinary technique that distinguishes itself from the traditional rocking motion. Unlike the circular path of a French roll, the push cut relies on a linear trajectory, moving simultaneously forward and downward. This technique is particularly effective for firm vegetables and delicate herbs where crushing must be avoided. By maintaining a consistent angle, the chef ensures that the entire edge of the blade contacts the cutting board at the conclusion of the stroke, resulting in a clean separation of the food fibers.
- Requires minimal vertical clearance compared to chopping.
- Reduces the likelihood of bruising the ingredient's cellular structure.
- Maintains the integrity of long, fibrous vegetables like scallions or celery.
- Provides a rhythmic tempo suitable for high-volume prep work.
Successful execution requires the blade to stay perfectly vertical throughout the transit. If the knife tilts, the resulting slices will be tapered rather than uniform. Mastery involves calibrating the ratio of forward momentum to downward force, ensuring the blade glides through the product rather than smashing it against the surface. This creates a professional finish essential for high-end presentation and even cooking times.
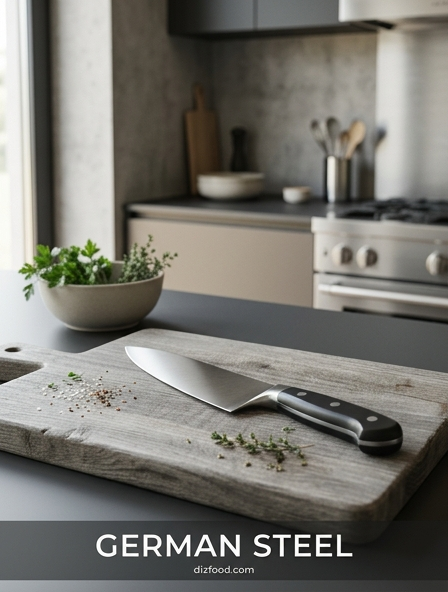
Essential Knife Characteristics for Precision Slicing
To execute a flawless push cut, the physical geometry of the knife is as critical as the chef's technique. A knife with a significant "belly" or curve is generally less suited for this motion than one with a flatter profile. For this reason, many professionals prefer a Nakiri or a Santoku when performing push cuts, as these blades allow for more surface area contact with the board during the downward phase of the stroke. The height of the blade also provides a stable surface against which the guiding knuckles can rest.
| Feature | Importance for Push Cutting |
|---|---|
| Flat Edge | Ensures full contact with the board in one motion. |
| Blade Height | Provides a safe guide for the non-cutting hand. |
| Thin Spine | Reduces resistance when passing through dense items. |
| Balanced Weight | Assists the downward force without requiring extra effort. |
A blade that is too thick may wedge into hard vegetables like carrots, causing them to crack rather than slice cleanly. Conversely, a blade that is too flexible might deviate from a straight vertical path. Choosing a tool with a rigid spine and a laser-thin edge ensures the push cut remains effortless and precise.
Optimizing Your Grip for Controlled Downward Pressure
The efficiency of a push cut is dictated by how the hand communicates force to the blade. A common mistake is using a "hammer grip," which restricts wrist mobility and reduces sensory feedback. Instead, a refined pinch grip is recommended for maximum control. By placing the thumb and the side of the index finger on the bolster or the base of the blade, the chef shifts the center of gravity forward, allowing the weight of the knife to do much of the work.
- Position the thumb on the spine or side of the blade for lateral stability.
- Wrap the remaining three fingers loosely around the handle for support.
- Keep the wrist relaxed to allow for a fluid forward-and-down motion.
- Ensure the index finger does not rest on top of the spine, as this limits precision.
This grip transforms the knife into an extension of the forearm. By engaging the shoulder and elbow rather than just the wrist, the downward pressure is distributed evenly. This prevents fatigue during long sessions at the cutting station and ensures that each slice receives the same amount of force, leading to a highly consistent product thickness across the entire batch.
The Role of Blade Sharpness in Clean Separation
Sharpness is the silent partner of the push cut. Because this technique involves less friction than a long drawing slice, the edge must be keen enough to bite into the surface of the ingredient immediately upon contact. A dull knife will slide off the waxy skin of a pepper or the smooth surface of an onion, creating a safety hazard. When the blade is truly sharp, it severs the plant's cell walls with surgical precision, which preserves the moisture and flavor within the ingredient.
- Hone the blade frequently with a ceramic rod to align the microscopic edge.
- Perform a paper test to ensure there are no nicks or burrs on the metal.
- Avoid using excessive force; a sharp blade should drop through the food.
- Maintain a consistent sharpening angle, typically between 12 and 15 degrees.
A dull edge necessitates increased downward pressure, which often leads to "crushing" rather than cutting. This is particularly evident when working with delicate greens, which will turn brown and wilt quickly if the cells are mashed. A sharp edge ensures that the push cut produces a clean, vibrant result every time.
Selecting the Ideal Cutting Board Surface
The surface beneath the knife is just as important as the blade itself when perfecting the push cut. Since the push cut involves the edge striking the board at the end of every stroke, the material must be "forgiving" enough to prevent premature dulling while remaining stable enough to support precision. Hard surfaces like glass, marble, or granite should be strictly avoided, as they will instantly roll the fine edge of a high-quality kitchen knife.
| Board Material | Pros | Cons |
|---|---|---|
| End-Grain Wood | Self-healing and very gentle on edges. | Requires frequent oiling and maintenance. |
| High-Density Plastic | Dishwasher safe and affordable. | Can develop deep grooves that harbor bacteria. |
| Rubberized Composite | Excellent grip and blade protection. | Can be heavy and more expensive. |
For the push cut, a heavy wooden board is often preferred because its mass prevents it from sliding during the forward motion. Ensuring the board is properly anchored-perhaps with a damp paper towel underneath-guarantees that the chef can focus entirely on the vertical alignment of the knife without worrying about the foundation shifting mid-stroke.
Proper Hand Positioning to Ensure Ingredient Stability
Stability is the cornerstone of safety and precision in the kitchen. While the dominant hand manages the knife, the non-dominant hand serves as both a guide and a stabilizer. The "claw grip" is the standard technique used alongside the push cut. By tucking the fingertips inward and using the middle knuckles as a fence for the blade, the chef creates a physical limit that prevents the knife from overshooting and protects the fingertips from injury.
- Tuck the thumb behind the fingers to keep it away from the cutting path.
- Use the knuckles to gauge the thickness of each subsequent slice.
- Maintain constant contact between the flat of the blade and your knuckles.
- Apply gentle downward pressure to the ingredient to prevent rolling.
The interaction between the knife and the guiding hand allows for "blind" cutting, where the chef can maintain a consistent rhythm without staring at the edge. This coordination is essential for speed. As the knife completes its downward push, the guiding hand moves back in tiny, incremental steps, dictating the exact thickness of the next slice with mechanical regularity.
Understanding the Physics of Forward and Downward Force
The push cut is a study in vector physics. If you apply only downward force, you are "chopping," which requires significant energy and can bruise the food. If you apply only forward force, you are "sliding," which may not penetrate the entire ingredient. The push cut combines these two vectors into a single diagonal force. This geometry allows the micro-serrations of the knife edge to catch and sever the fibers more efficiently than a vertical drop alone.
- Start with the heel of the knife slightly raised.
- Initiate a forward motion as the blade begins to descend.
- Ensure the blade is moving forward at the moment it contacts the food.
- Complete the motion with the blade flat against the board.
By utilizing this diagonal path, the chef reduces the amount of pressure needed to break the surface tension of the ingredient. This is particularly helpful when slicing items with a tough exterior and soft interior, such as a ripe tomato or a bell pepper. The forward momentum acts as a slicing action, while the downward force ensures the cut is completed in one clean pass.
Common Errors That Lead to Jagged Cuts
Even experienced cooks can encounter issues when their push cut technique lapses. One of the most frequent errors is "sawing," where the chef moves the knife back and forth multiple times to get through a single item. This creates a ragged, uneven surface on the food. Another common mistake is failing to complete the stroke, leaving "accordion" vegetables that are still attached at the bottom by a thin thread of skin.
- Lifting the tip of the knife too high, causing loss of control.
- Applying uneven pressure, which results in slanted slices.
- Using a knife that is too short for the ingredient being processed.
- Failing to move the knife forward, relying solely on a crushing downward drop.
Jagged cuts are often a sign of hesitation. If the motion is not fluid, the blade may catch on the fibers. To correct this, focus on a smooth, confident stroke. Ensure that the blade is long enough to cover the entire width of the ingredient, and check that the cutting board is level. Consistent practice will eliminate these errors, leading to the clean, sharp edges that define professional-grade prep work.
Maintaining Blade Alignment for Consistent Slice Thickness
Uniformity in the kitchen is not just about aesthetics; it is about ensuring that all pieces of food cook at the same rate. In a push cut, alignment is the variable that determines this consistency. The knife must remain perfectly perpendicular to the cutting board. If the blade leans even slightly toward or away from the guiding hand, the resulting slices will vary in thickness from top to bottom, a flaw known as "tapering."
- Check your elbow position; it should be tucked slightly toward your side.
- Visualize a vertical plane that the knife must stay within during the cut.
- Slow down the motion to verify that the blade is not tilting at the bottom of the stroke.
- Adjust your stance so you are square to the cutting board.
Maintaining alignment requires constant sensory feedback. The chef should feel the flat of the blade against the guiding knuckles at all times. If the contact is lost, the alignment has likely shifted. By mastering this verticality, you ensure that every julienne strip or brunoise cube is identical, which is the hallmark of a disciplined and skilled culinarian.
Step-by-Step Execution of the Perfect Push Cut
Executing the perfect push cut is a rhythmic process that begins with posture and ends with a clean follow-through. Once the ingredient is stabilized and the grip is secured, the motion should be practiced slowly until it becomes second nature. The goal is to create a seamless loop of movement that can be maintained for several minutes without causing physical strain or loss of accuracy.
- Place the ingredient on a stable cutting board and secure it with the claw grip.
- Position the heel of the knife against the guiding knuckles, slightly above the food.
- Push the knife forward and down in a single, fluid diagonal motion.
- Ensure the entire edge of the blade touches the board at the end of the stroke.
- Lift the knife slightly and reset while moving the guiding hand back for the next slice.
The "reset" phase is just as important as the cut itself. The knife should never travel further back than necessary, as excess movement wastes energy. By keeping the blade close to the ingredient and maintaining a tight, controlled loop, the chef can achieve remarkable speed while keeping the cuts identical. This methodical approach is the secret to professional efficiency in any kitchen environment.


Comments