
Disconnecting Power Sources Before Cleaning
Safety is the primary concern when maintaining kitchen heating elements. Before any moisture or cleaning agents are introduced to an appliance, you must ensure that all electrical connections are completely severed. For small appliances like toasters and air fryers, this simply involves pulling the plug from the wall outlet. However, larger appliances such as electric ranges or wall ovens may require you to switch off the dedicated circuit breaker at the main electrical panel to guarantee no current is flowing to the device.
Gas-powered units demand an additional layer of precaution. You should turn the gas supply valve to the "off" position to prevent accidental leaks while you are scrubbing near igniters or burners. Working on a powered device poses a significant risk of electric shock or short-circuiting the internal components, which can lead to expensive repairs or fire hazards. Always allow the heating elements to cool down completely to room temperature before beginning the disconnection process, as residual heat can cause burns or ignite flammable cleaning chemicals.
Removing Burnt Food From Heating Elements
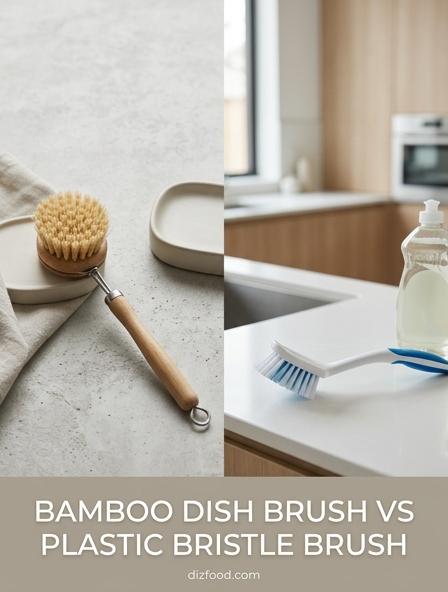
Burnt food particles on oven coils or grill elements not only create unpleasant odors but can also decrease the efficiency of the heat transfer. To clean these effectively, you should first identify the type of element you are working with. Most exposed oven coils are self-cleaning to an extent, but heavy crusting requires manual intervention. Start by using a soft-bristled plastic brush to gently scrape away loose debris once the element is cold. Avoid using metal scrapers or steel wool, as these can damage the protective outer coating of the element.
- Apply a paste of baking soda and water to stubborn spots.
- Let the paste sit for approximately 20 minutes to soften carbonized food.
- Wipe the element with a damp microfiber cloth until all residue is gone.
- Ensure the element is completely dry before reconnecting power.
For glass-top stoves with hidden radiant elements, use a specialized glass cleaner and a razor scraper held at a 45-degree angle to lift burnt sugars and proteins without scratching the surface.
Deep Cleaning Oven Vent Filters
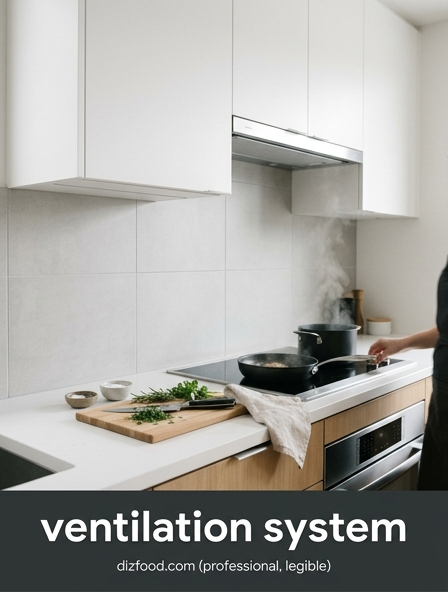
Oven vent filters and range hood screens are designed to trap airborne grease before it can settle into the exhaust ductwork. Over time, these filters become saturated, restricting airflow and causing the kitchen to become smoky during high-heat cooking. A deep clean involves removing the filters and submerging them in a high-alkaline solution to break down the polymerized fats. Boiling water mixed with heavy-duty degreaser or dish soap is usually sufficient for standard aluminum mesh filters.
| Filter Type | Cleaning Method | Frequency |
|---|---|---|
| Aluminum Mesh | Hot water soak and degreaser | Monthly |
| Stainless Steel Baffle | Dishwasher safe or hand scrub | Bi-monthly |
| Charcoal/Carbon | Replacement only | Every 6 months |
After soaking, use a soft brush to agitate the mesh, ensuring that all internal layers are cleared of blockage. Rinse thoroughly with hot water and allow them to air dry completely before reinstallation to prevent rust or mold growth within the vent housing.
Eliminating Grease From Convection Fans
Convection fans are critical for circulating hot air evenly around heating elements, but they are prone to heavy grease accumulation. When grease builds up on the fan blades, it can cause the motor to strain, leading to noisy operation or total mechanical failure. To clean the fan, you often need to remove a rear baffle plate inside the oven. Once accessed, the blades should be wiped down with a concentrated degreaser. It is vital to avoid spraying liquids directly into the motor housing located behind the blades.
If the grease is particularly thick, a non-abrasive scouring pad can be used to lift the film. Constant maintenance of the convection fan ensures that your oven reaches its set temperature quickly and maintains a consistent thermal environment. If you notice a clicking sound or a vibrating sensation during the convection cycle, it is a sign that the blades are unbalanced by uneven grease deposits. Periodic inspection and wiping of these blades will extend the lifespan of the motor and improve the quality of baked goods by ensuring optimal airflow.
Safe Solutions for Interior Metal Surfaces
The interior walls of ovens, toasters, and air fryers are typically made of galvanized steel, stainless steel, or porcelain enamel. Using the wrong chemicals can lead to corrosion or the release of toxic fumes when the heating elements are later activated. For a safe and effective clean, natural acids and mild abrasives are preferred over caustic oven cleaners. A mixture of white vinegar and lemon juice works excellently to cut through light grease films while providing a fresh scent that does not linger like synthetic perfumes.
- Spray the interior metal surfaces with a 50/50 vinegar and water solution.
- Sprinkle baking soda over the damp areas to create a foaming action.
- Scrub the surfaces with a non-scratch nylon sponge.
- Wipe clean with a damp cloth and buff dry with a paper towel.
For stainless steel interiors, always rub in the direction of the metal grain to prevent micro-scratches. Avoid using bleach-based products, as they can cause permanent pitting and discoloration on metal surfaces exposed to high heat cycles.
Scrubbing Carbon Buildup in Toaster Slots
Toasters utilize delicate mica sheets and thin nichrome wires as heating elements. These are extremely fragile and can be easily snapped if cleaned with too much force. Carbon buildup occurs when crumbs fall onto the wires and burn repeatedly. To clean these areas, first empty the crumb tray located at the bottom of the unit. Invert the toaster over a sink or trash can and shake it gently to dislodge loose debris that has become trapped between the heating wires and the outer cage.
For stuck-on carbon, use a soft, dry pastry brush or a clean toothbrush to flick the debris away from the wires. Never use a wet cloth or liquid cleaners inside the toaster slots, as this can cause the mica plates to swell or the wires to rust. If you encounter a stubborn piece of bread wedged against the element, use a wooden skewer to carefully nudge it loose. Metal utensils must never be inserted into the slots, even if the unit is unplugged, to avoid damaging the delicate internal circuitry or bending the heating grids.
Clearing Air Fryer Exhaust Systems
Air fryers rely on high-speed fans and concentrated heating elements to mimic deep frying. The exhaust system at the rear of the unit is a common collection point for grease and steam. If this vent becomes blocked, the internal temperature can spike, potentially melting plastic components or triggering a thermal cutoff switch. To maintain the exhaust system, use a vacuum cleaner with a brush attachment to pull dust and lint from the external slats. This prevents the intake of debris that could eventually coat the heating element.
For the internal side of the exhaust, a damp cloth with a mild degreaser should be used to wipe the area surrounding the vent. It is important to check for "grease rain," which occurs when oil vapors condense on the ceiling of the air fryer and drip back onto the element. Regular cleaning of the exhaust area ensures that the hot air can escape efficiently, reducing the risk of smoke and ensuring the appliance operates within its intended safety parameters. Always keep the air fryer at least six inches away from walls during use to facilitate proper ventilation.
Neutralizing Odors to Stop Smoke
Residual oils and food splatters on heating elements are the primary cause of smoke in the kitchen. Even a small drop of oil can produce a significant amount of acrid smoke when it reaches 400 degrees Fahrenheit. Neutralizing these odors requires more than just surface cleaning; it requires deep-cleaning the environment where the heating occurs. Placing a heat-safe bowl filled with water and vanilla extract or lemon slices inside a warming oven can help steam-clean the surfaces and neutralize lingering smells.
For more aggressive odors, such as burnt plastic or fish, a bowl of activated charcoal or coffee grounds left inside the cold appliance overnight can absorb the volatile organic compounds responsible for the scent. It is essential to address these odors immediately, as the particles causing the smell are often the same ones that will eventually ignite and cause smoke. Ensuring that the heating elements are "burned off" for a few minutes at high heat after cleaning will also help dissipate any remaining cleaning agents before you begin cooking food, preventing off-flavors from transferring to your meals.
Checking Internal Seals for Residue
The gaskets and seals around oven doors and air fryer lids are designed to keep heat contained. However, grease and sugary residues often collect in the folds of these seals, preventing a tight closure. A compromised seal allows heat to escape, forcing the heating elements to work harder and stay on longer, which shortens their lifespan and increases energy consumption. Inspect these seals regularly for signs of hardening, cracking, or sticky buildup that could cause the seal to tear when the door is opened.
- Wipe the seal with a mixture of warm water and mild dish soap.
- Use a soft cloth to reach into the crevices of the gasket.
- Avoid using harsh chemical degreasers that can dry out the rubber or silicone.
- Check for "flat spots" where the seal is no longer making contact with the frame.
If the seal is made of fiberglass rope, use only a dry brush to remove debris, as moisture can break down the fibers. Keeping these components clean ensures maximum thermal efficiency and prevents the outer control knobs and panels from being damaged by escaping heat.
Essential Tools for Narrow Component Access
Properly maintaining kitchen heating elements often requires reaching into tight spaces where standard sponges cannot fit. Having a dedicated kit of specialized tools will make the cleaning process significantly more effective and prevent damage to delicate parts. Microfiber cloths are essential for their ability to grab grease without needing excessive moisture, while various brushes provide the agitation necessary to break up carbon deposits. Using the right tool for the job ensures that you can clean effectively without overextending or bending sensitive metal components.
| Tool | Primary Use |
|---|---|
| Angled Detail Brush | Cleaning around igniters and element bases |
| Wooden Skewers | Dislodging debris from toaster slots safely |
| Flexible Bottle Brush | Reaching behind convection fan blades |
| Vacuum Crevice Tool | Removing loose crumbs and dust from vents |
Additionally, a small mirror can be helpful for inspecting the underside of heating elements in ovens or the top of air fryer chambers. By using these specialized tools, you can ensure a comprehensive clean that reaches every hidden corner where grease and food particles might hide.


Comments