
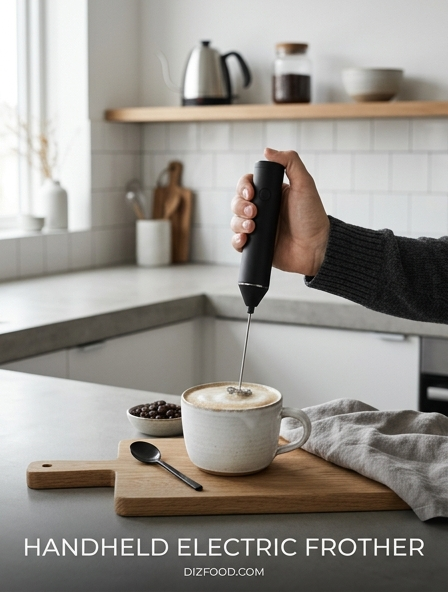
Essential Handheld Frother Tools
To achieve cafe-quality results with a handheld electric frother, you must assemble a specific set of tools that complement the device. While the frother itself is the star, the vessel you choose significantly impacts the final texture of your milk. A stainless steel frothing pitcher is ideal because it allows you to feel the temperature of the milk through the metal, though a tall, narrow glass or ceramic mug also works well to prevent splashing during the high-speed whisking process.
Beyond the pitcher, consider these essential accessories:
- Digital Thermometer: Critical for ensuring the milk reaches the sweet spot of 140-155 degrees Fahrenheit without scalding.
- High-Torque Frother: Look for a model with at least 10,000 RPM to create tight microfoam rather than large, unstable bubbles.
- Kitchen Scale: Essential for measuring exact ratios of coffee to milk for consistent flavor profiles.
- Microfiber Cloth: Necessary for immediate cleaning of the whisk head to prevent dried milk buildup.
Having these tools organized in your coffee station ensures a smooth workflow, allowing you to focus on the delicate technique required for perfect foam.
Best Milk Types for Microfoam
The success of your handheld frother depends largely on the chemical composition of the milk you select. Protein provides the structural integrity that traps air bubbles, while fat adds the velvety mouthfeel associated with professional lattes. For beginners, whole milk is often considered the gold standard because its high fat content creates a stable, rich foam that lingers on the palate. However, lower-fat options can also yield impressive results if handled correctly.
Consider the following milk types and their characteristics:
| Milk Type | Foam Quality | Stability |
|---|---|---|
| Whole Milk | Rich and Creamy | High |
| 2% Milk | Light and Airy | Medium |
| Skim Milk | Stiff and Voluminous | Low |
Skim milk often produces the most volume because it lacks the heavy fats that weigh down protein structures, but it can result in a "dry" foam that lacks flavor. If you prefer a balance of taste and texture, 2% milk is an excellent middle ground, offering enough protein for structure and enough fat for a satisfying finish.
Optimal Milk Temperature for Frothing
Temperature is perhaps the most critical variable when using a handheld electric frother. If the milk is too cold, the proteins will not unfold sufficiently to trap air; if it is too hot, the proteins denature, and the lactose sugars burn, resulting in a flat, bitter taste. The industry standard for the perfect latte or cappuccino ranges between 140°F and 155°F (60°C to 68°C). At this specific range, the milk reaches its peak perceived sweetness as the lactose breaks down into simpler sugars.
To achieve this at home, you can heat milk in a saucepan or microwave before frothing. It is vital to stop heating before reaching 160°F, as the temperature will continue to rise slightly after the heat source is removed. Using a digital thermometer helps you monitor this progression in real-time. Cold frothing is also an option for iced beverages, but the resulting foam will be less stable and will dissipate faster than foam created with heated milk. Always start with fresh, chilled milk before heating to ensure the proteins are in their best state for aeration.
Handheld Frother Technique Basics
Mastering the handheld frother requires more than just turning the device on; it requires a disciplined approach to positioning and movement. Start by inserting the whisk head into the milk at a slight angle, roughly 45 degrees, just below the surface. This position allows the frother to pull air into the liquid, creating the initial volume. Once you see the milk begin to expand, submerge the whisk slightly deeper to create a vortex. This swirling motion is essential for breaking down large bubbles into tiny, uniform microfoam.
Follow these steps for a consistent result:
- Place the whisk at the bottom of the pitcher and turn it on.
- Slowly raise the whisk until it is just below the surface to "stretch" the milk.
- Maintain this position for 10 to 15 seconds as the volume increases.
- Tilt the pitcher slightly to maintain a steady whirlpool, integrating the foam with the liquid.
- Turn off the frother before removing it from the pitcher to avoid messes.
The goal is to produce a texture that looks like wet white paint, devoid of large visible bubbles.
Frothing Dairy Free Milk Alternatives
Plant-based milks behave differently than dairy because they lack the specific whey and casein proteins that facilitate easy frothing. However, with the rise of "Barista Edition" products, achieving microfoam with alternatives is easier than ever. These versions are usually fortified with extra fats and stabilizers like dipotassium phosphate to mimic the behavior of cow's milk. Oat milk is widely regarded as the best dairy-free option for handheld frothers due to its high carbohydrate content and naturally creamy texture.
When working with alternatives, consider these tips:
- Oat Milk: Requires less "stretching" time than dairy; focuses on the vortex for smoothness.
- Soy Milk: Highly stable but can curdle if the coffee is too acidic or the milk is too hot.
- Almond Milk: Often produces thin foam; use a higher speed and keep the whisk near the surface longer.
- Coconut Milk: Provides great flavor but lacks the protein for a dense, long-lasting head.
Always shake the carton vigorously before pouring, as plant-based fats tend to settle at the bottom, which can ruin your chances of a successful froth.
Common Milk Frothing Mistakes
Even seasoned home baristas encounter issues when using a handheld electric frother. One of the most frequent mistakes is "over-stretching" the milk, which occurs when the whisk is kept at the surface for too long. This creates a stiff, "soapy" foam that sits on top of the coffee rather than blending with it. To avoid this, limit the aeration phase to the first few seconds of the process. Another common error is neglecting the "tap and swirl" technique. After frothing, tapping the pitcher on the counter helps burst any remaining large bubbles, while swirling keeps the milk and foam integrated.
Other pitfalls to watch for include:
- Low Battery Power: A weak motor won't create enough speed to form microfoam.
- Using Old Milk: Milk nearing its expiration date loses its protein structure and won't hold air.
- Incorrect Pitcher Size: If the pitcher is too large, the whisk cannot create a proper vortex.
- Removing the Whisk While On: This leads to splattering and uneven texture.
By identifying these habits, you can refine your technique and produce much smoother, more professional results.
Preparing a Strong Espresso Base
A handheld frother is only half the equation; the coffee base must be strong enough to stand up to the added milk. Since most home users lack a commercial espresso machine, creating a concentrated base is essential. You can achieve this using a Moka pot, an AeroPress, or even high-quality instant espresso powder. The key is to aim for a 1:2 or 1:3 coffee-to-water ratio. If the base is too watery, the milk will overwhelm the flavor, resulting in a bland beverage that lacks the characteristic kick of a latte.
For those using an AeroPress, try the inverted method with two filters to increase pressure and clarity. If you prefer a Moka pot, use pre-boiled water in the base to prevent the coffee grounds from scorching during the heating process. Once your concentrate is brewed, pour it into your mug first. Adding the frothed milk to the coffee-rather than the other way around-allows for better integration of flavors. This method ensures that every sip contains a balanced mix of bold coffee and sweet, aerated milk, mimicking the experience of a cafe-poured drink.
Electric Frother Cleaning and Care
Maintaining your handheld electric frother is vital for both hygiene and the longevity of the motor. Milk residue dries quickly and can become a breeding ground for bacteria, especially within the tight coils of the whisk head. The most effective cleaning method is to rinse the whisk immediately after every use. Simply submerge the whisk in a glass of warm, soapy water and turn it on for several seconds. Follow this with a rinse in clean water and a final spin in the air to dry the components.
For long-term care, follow these guidelines:
- Avoid the Dishwasher: Never submerge the handle or motor housing in water, as this will short-circuit the device.
- Deep Clean Monthly: Soak the metal whisk in a mixture of vinegar and water to remove mineral buildup.
- Battery Maintenance: Replace batteries at the first sign of slowing; use rechargeable batteries for consistent power.
- Straighten the Shaft: Ensure the metal rod is not bent, as an off-center whisk creates vibration and poor foam.
Proper storage is also key; using a dedicated stand prevents the whisk from becoming bent or damaged in a crowded kitchen drawer.
Handheld Frother versus Steam Wands
Understanding the difference between a handheld electric frother and a traditional steam wand is essential for managing expectations. A steam wand uses high-pressure water vapor to simultaneously heat and aerate milk, which creates a very specific type of creamy microfoam that is difficult to replicate perfectly with a battery-operated tool. However, the handheld frother offers distinct advantages in terms of convenience, price, and versatility. It is much easier to clean and requires significantly less counter space than a full espresso machine setup.
| Feature | Handheld Frother | Steam Wand |
|---|---|---|
| Heating | Requires external heat | Heats automatically |
| Portability | High (Battery) | None (Stationary) |
| Texture | Aerated/Foamy | Velvety/Integrated |
| Price | Budget-friendly | Expensive |
While the steam wand is superior for latte art due to the density of the foam it creates, the handheld frother is an excellent entry-point for enthusiasts who want to upgrade their home coffee game without a massive financial investment.
Customizing Lattes with Syrups and Spices
The final step in the handheld frothing process is customization, which allows you to tailor your beverage to your specific palate. Unlike commercial coffee shops that often add syrups at the end, the best way to incorporate flavor at home is to add your syrups or spices to the milk before you froth. This ensures the flavor is evenly distributed throughout the foam rather than sinking to the bottom of the mug. For example, adding a teaspoon of vanilla extract or a dash of cinnamon to the cold milk before heating creates a fragrant, infused foam.
Common additions include:
- Maple Syrup or Honey: Adds natural sweetness and improves foam stability.
- Cocoa Powder: For a mocha-style drink; ensure it is whisked well to avoid clumps.
- Pumpkin Spice or Nutmeg: Ideal for seasonal beverages; the frother helps suspend the spices.
- Lavender or Rose Water: Provides a floral aroma that pairs well with light-roast espresso.
Experimenting with these additions can turn a standard coffee into a gourmet experience. Just remember that oil-based flavorings may slightly hinder the frothing process, so use them sparingly to maintain a thick, lasting head of foam.





Comments