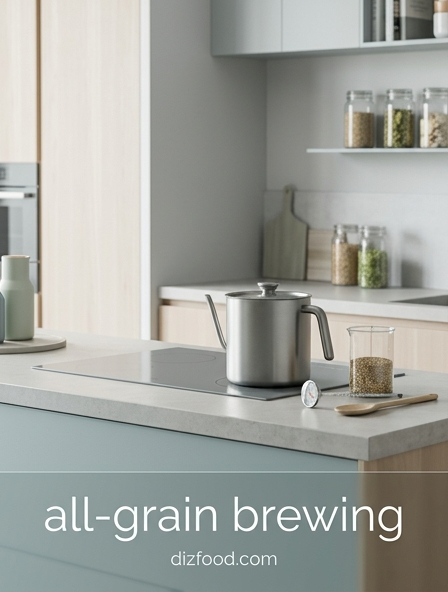
Ready to elevate your homebrewing? This deep dive into all-grain brewing explores the professional-grade techniques required to master your craft and produce world-class beer from your own kitchen. By transitioning from pre-made kits to a full mashing process, you gain total control over complex flavor profiles, mouthfeel, and aroma. We cover essential topics like temperature precision, water chemistry, and grain selection to help you achieve brewery-quality results and true consistency across every batch you brew. To better understand which brewing method fits your lifestyle and flavor goals, explore our comprehensive guide on malt extract vs all grain brewing.
Mastering Water Chemistry and Mash pH
Water chemistry is the foundation of professional-grade all-grain brewing. Beyond simple filtration, an advanced brewer must manipulate the ionic composition to favor specific malt profiles and enzyme activity. Calcium is the primary ion of concern, as it promotes yeast health and aids in protein flocculation. However, the true secret lies in managing residual alkalinity to achieve a mash pH between 5.2 and 5.4. This range ensures optimal amylase activity and prevents the extraction of harsh tannins from grain husks.
Adjusting your brewing liquor requires a balance of salts and acids. Depending on your water profile, you may need to add gypsum to highlight hop bitterness or calcium chloride to enhance the malt's silkiness. Monitoring the interaction between your source water and the buffering capacity of specialty malts is essential for consistency.
- Sulfate: Enhances dryness and hop crispness.
- Chloride: Increases perceived body and sweetness.
- Magnesium: Acts as a vital yeast nutrient in small doses.
- Lactic Acid: Useful for precise downward pH adjustments.
Precision Milling for Optimal Extract Efficiency
The crush of the grain is a pivotal variable that dictates the efficiency of your brewhouse. A precision mill setup aims to crack the endosperm into small, accessible pieces while keeping the husk intact. Intact husks are crucial because they act as a natural filter bed during the lautering process. If the mill gap is too wide, you will suffer from poor starch conversion; if it is too narrow, you risk a stuck sparge and high levels of astringency.
To achieve a professional-level crush, many brewers utilize a feeler gauge to set their roller gap between 0.035 and 0.045 inches. Furthermore, grain conditioning-the process of lightly moisturizing the grain before milling-can improve husk elasticity, ensuring they remain whole even with a tighter gap.
- Measure your roller gap using a precision feeler gauge.
- Condition grain with 1-2% water by weight to toughen husks.
- Check the grist for uncracked kernels and excessive flour.
- Adjust mill speed to prevent shearing the husks into fine dust.
Advanced Step Mashing and Temperature Control
While single-infusion mashes are convenient, advanced step mashing allows for greater control over the fermentability and mouthfeel of the finished beer. By targeting specific temperature rests, you can activate different enzymes to tailor the wort's carbohydrate profile. This is particularly useful when working with undermodified malts or high percentages of adjuncts like rye or wheat. Precise temperature control ensures that the beta-amylase and alpha-amylase enzymes work in harmony to produce the desired attenuation.
| Rest Type | Temperature Range | Primary Function |
|---|---|---|
| Acid Rest | 95°F - 113°F | Lower pH and break down glucans. |
| Protein Rest | 113°F - 131°F | Break down large proteins to reduce haze. |
| Saccharification | 142°F - 162°F | Convert starches into fermentable sugars. |
| Mash-Out | 168°F - 170°F | Stop enzyme activity and thin the wort. |
Pro Level Lautering and Sparge Techniques
Lautering is the process of separating the sweet wort from the spent grain. Success in this stage depends on the integrity of the grain bed and the speed of the runoff. Professional brewers focus on the "vorlauf" step, where the initial wort is recirculated until it runs clear, ensuring that fine particles are trapped within the grain matrix. This clarity is essential for producing a clean beer free of "grainy" off-flavors caused by suspended solids.
When sparging, temperature and flow rate are the most critical factors. The sparge water should ideally be kept at 168°F. If the temperature exceeds 175°F, or if the pH of the runoff rises above 5.8, you risk extracting polyphenols. Slow, steady sparging prevents channeling, where water finds the path of least resistance, leaving valuable sugars behind in the grain.
- Maintain at least one inch of water above the grain bed.
- Limit the runoff flow rate to avoid compacting the bed.
- Monitor gravity to stop collection before reaching 1.008 SG.
Maximizing Hop Utilization in the Boil
The boil serves several purposes: sterilization, protein coagulation, and the isomerization of hop alpha acids. Maximizing hop utilization requires an understanding of how wort gravity and boil vigor affect bitterness. High-gravity worts typically reduce the efficiency of alpha acid isomerization, meaning more hops are required to reach the same IBU levels as a lower-gravity beer. Additionally, the timing of hop additions dictates the balance between bitterness, flavor, and aroma.
In modern brewing, late-boil additions and whirlpool hopping have become standard for hop-forward styles. By adding hops at temperatures below boiling, brewers can preserve volatile oils that would otherwise be lost to evaporation. This technique results in a saturated hop character with less perceived harshness. Managing the "hot break"-the coagulation of proteins-is also vital during this stage to ensure a stable and clear final product.
- 60 Minute Addition: Primary source of bitterness.
- 15 Minute Addition: Balance of flavor and bitterness.
- 0 Minute (Flameout): Maximum aromatic oil retention.
- Whirlpool: Intense flavor without heavy bitterness.
Efficient Wort Chilling and Cold Break Management
Rapidly cooling the wort from boiling to yeast pitching temperature is critical for beer quality. This "cold crash" promotes the formation of the cold break, where proteins and polyphenols precipitate out of the liquid. Fast chilling also minimizes the time the wort is vulnerable to DMS (dimethyl sulfide) production and bacterial infection. Professional setups often utilize plate chillers or high-efficiency immersion chillers to achieve this transition in under twenty minutes.
Once the wort reaches the target temperature, removing the trub (precipitated solids) is essential for clean fermentation. Allowing too much cold break into the fermenter can lead to sulfurous off-flavors and yeast stress. However, a small amount of lipids found in the break material can actually assist yeast health. Finding the right balance through whirlpooling and careful transfer is a hallmark of an advanced brewer.
- Sanitize the chiller thoroughly before the boil ends.
- Recirculate wort to create a central trub cone.
- Monitor temperature closely using an inline thermometer.
- Oxygenate the cooled wort immediately before pitching yeast.
Yeast Vitality and Fermentation Kinetics
Fermentation is where the wort truly becomes beer, and yeast vitality is the most important factor in this transformation. Advanced brewers do not simply "pitch and forget"; they manage fermentation kinetics through precise temperature control and proper pitch rates. Using a yeast starter ensures that the cell count is sufficient for the gravity of the wort, reducing the lag phase and preventing the production of unwanted esters or fusel alcohols.
Monitoring the fermentation profile involves tracking gravity drops and managing the "diacetyl rest." For lagers, this means raising the temperature slightly toward the end of fermentation to allow the yeast to reabsorb vicinal diketones. For ales, maintaining a steady temperature prevents the yeast from stalling or producing harsh phenolic compounds. Proper yeast management also includes harvesting and storing healthy cells for future batches, requiring a deep understanding of yeast morphology.
- Lag Phase: Initial uptake of oxygen and nutrients.
- Exponential Phase: Rapid sugar consumption and CO2 release.
- Stationary Phase: Final attenuation and cleanup of byproducts.
Professional Sanitation and Brewhouse Hygiene
The difference between a good brewer and a great one is often their commitment to sanitation. In a kitchen brewing environment, the risk of cross-contamination from food particles and wild yeasts is high. Professional hygiene involves a two-step process: cleaning and sanitizing. Cleaning removes organic soils and biofilms using alkaline cleaners like PBW, while sanitizing kills remaining microorganisms using acid-based solutions like Star San.
Every piece of equipment that touches the wort after the boil must be chemically sanitized. This includes fermenters, airlocks, hoses, and even the lip of the yeast package. Advanced brewers also pay attention to "hidden" contamination points, such as ball valves and gaskets, which must be disassembled and cleaned regularly. Maintaining a "sanitary mindset" means assuming everything is contaminated until proven otherwise through rigorous protocols.
- Disassemble and soak all valves after every three brew days.
- Replace scratched plastic equipment to avoid bacterial hideouts.
- Ensure a minimum contact time for sanitizers to be effective.
Calibrating Equipment for Consistent Batch Yields
Consistency in brewing is impossible without calibrated equipment. A brewer must know their system's specific loss variables to accurately calculate the target original gravity and final volume. This involves measuring the "dead space" in the mash tun, the hourly boil-off rate of the kettle, and the shrinkage that occurs when wort cools. Without these metrics, recipe software will provide inaccurate predictions, leading to missed targets.
| Metric | Definition | Impact on Batch |
|---|---|---|
| Boil-off Rate | Volume lost to steam per hour. | Affects final gravity and volume. |
| Mash Retention | Water absorbed by the grain. | Determines strike water volume. |
| Trub Loss | Liquid left in the kettle/fermenter. | Dictates the actual packaged yield. |
| Cooling Shrink | 4% volume reduction when cooling. | Affects final volume measurements. |
Advanced Recipe Design and Malt Profiles
Designing a complex recipe requires an understanding of how different malts interact to create layers of flavor. Beyond simply choosing a base malt, the advanced brewer considers the diastatic power-the enzymatic strength-of the grist to ensure full conversion. Specialty malts like Crystal, Munich, or roasted grains are used to adjust color, body, and aroma. The key is balance; too much roasted grain can lead to an acrid finish, while too much Crystal malt can result in an overly cloying sweetness.
Advanced design also involves predicting the "Residual Alkalinity" requirements for the specific malt bill. For example, dark malts naturally lower the pH more than pale malts, requiring different water adjustments. Professional brewers often use the SRM (Standard Reference Method) scale to predict color and the BU:GU ratio to balance bitterness against the original gravity, ensuring the beer fits the intended style profile perfectly.
- Base Malts: Provide the bulk of fermentable sugars and enzymes.
- Kilned Malts: Add biscuit, toasted, or nutty notes.
- Caramel Malts: Enhance mouthfeel and add caramel sweetness.
- Roasted Malts: Provide coffee, chocolate, and dark color.


Comments