
Selecting the Best Grains for Density
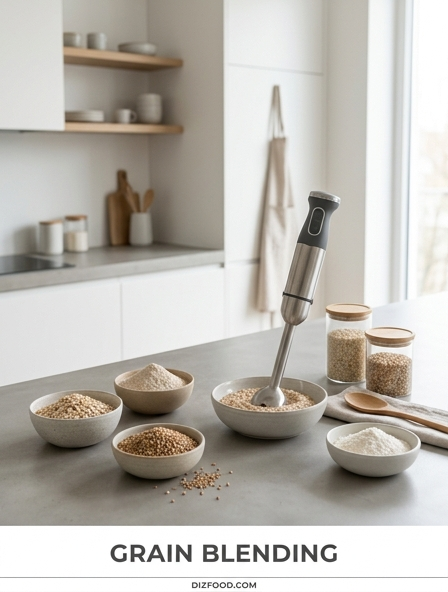
In the art of kitchen blending, the foundational step involves identifying which grains provide the desired structural integrity and viscosity. Not all grains respond to high-speed blending in the same manner; therefore, understanding their physical properties is essential for achieving a dense, creamy result. Oats are the most popular choice due to their high beta-glucan content, which creates a rich, milk-like consistency. However, secondary grains like white rice, millet, and buckwheat offer unique densities that can be leveraged for specific culinary applications.
- Rolled Oats: Best for immediate creaminess and a thick, heavy body.
- White Rice: Provides a neutral base with high starch density for thicker sauces.
- Quinoa: Offers a lighter density but adds a significant protein-based structural boost.
- Millet: Excellent for a slightly sweet, velvety density that remains stable when cold.
When selecting grains, the moisture content and processing method (raw versus toasted) play a significant role. Toasted grains generally yield a thinner liquid but provide more robust flavor profiles, whereas raw, soaked grains maximize the release of thickening agents during the mechanical blending process.
The Science of Starch and Sliminess
The primary challenge in grain blending is the management of starch molecules, specifically amylose and amylopectin. When grains are subjected to the mechanical force of blender blades, these starch granules rupture. If the temperature of the liquid rises too high during this process, the starches undergo gelatinization. This physical transformation is what leads to the "slime" or "gooey" texture often associated with poorly executed oat or rice milks. Amylopectin, a highly branched glucose polymer, is particularly prone to creating a viscous, sticky network when over-agitated in warm water.
To control this, one must understand that the "sliminess" is essentially an over-extraction of soluble fibers and starches. When the blending time exceeds a certain threshold, the friction generates enough heat to trigger a semi-cooked state. This state traps water within a carbohydrate matrix, resulting in a texture that is unappealing for beverages. By keeping the starches in a suspended rather than a gelatinized state, the blender can produce a clean, crisp liquid that mimics the mouthfeel of traditional dairy without the structural failure of a mucilaginous breakdown.
Temperature Control During the Blending Process
Temperature is perhaps the most critical variable when blending grains to a smooth consistency. High-speed blenders are notoriously efficient at converting mechanical energy into thermal energy. Within sixty seconds of operation, a standard blender can raise the temperature of its contents by several degrees, which is often enough to cross the gelatinization threshold of grain starches. To mitigate this risk, it is imperative to start with the coldest materials possible.
- Use Ice-Cold Water: Always blend with refrigerated water or even a portion of crushed ice to offset the heat generated by the blades.
- Pre-Chill Grains: After soaking and rinsing, keep the grains in the refrigerator until the exact moment of blending.
- Short Pulse Intervals: Instead of a long, continuous run, use high-speed pulses to keep the friction heat from accumulating.
Maintaining a temperature below 100°F (37°C) throughout the process ensures that the starch granules remain intact and suspended. If the mixture feels warm to the touch after blending, it is a sign that the texture may have already begun to degrade into a heavier, stickier consistency.
Using Amylase Enzymes to Prevent Slime
For those seeking a professional-grade grain milk or base, the introduction of amylase enzymes is a transformative technique. Amylase is a biological catalyst that specifically targets the alpha-bonds of large starch molecules, breaking them down into simpler, shorter-chain sugars like maltose. This molecular breakdown prevents the long-chain starches from forming the thick, slimy lattice that typically ruins grain blends. In a kitchen setting, this is often achieved by adding a small amount of sprouted grain powder or a liquid enzyme solution to the soak.
The process requires a brief incubation period where the enzymes can work before the final blend. By reducing the starch complexity, the resulting liquid remains thin and fluid even when heated later for coffee or cooking. This enzymatic intervention not only fixes the texture issues but also naturally enhances the sweetness of the grain without the need for added refined sugars. It is the secret behind many commercial oat milks that remain perfectly liquid and stable. Using enzymes allows the chef to utilize high starch grains while bypassing the structural pitfalls of traditional mechanical blending.
Ideal Water to Grain Ratios for Richness
The ratio of liquid to solid is the primary determinant of the final product's "richness" or "thinness." Achieving the perfect balance requires precision, as even a small deviation can result in a watery liquid or a thick paste that won't filter correctly. For most culinary applications, a higher concentration of grain is used for "cream" substitutes, while a lighter ratio is preferred for drinking milk.
| Product Type | Grain Volume | Water Volume | Resulting Texture |
|---|---|---|---|
| Concentrated Base | 1 Cup | 2 Cups | Heavy, like heavy cream |
| Standard Milk | 1 Cup | 4 Cups | Balanced, like 2% milk |
| Light Refreshment | 1 Cup | 6 Cups | Thin, refreshing |
When calculating these ratios, one must account for the water absorbed during the soaking phase. Grains like quinoa or rice can double in weight after soaking, which can throw off measurements if using weight-based ratios. For consistent results, measure the grains while dry before the soaking process begins to ensure the final richness remains uniform across different batches.
Blender Speed and Duration Best Practices
The mechanical execution of the blend is just as important as the ingredients used. The goal is to pulverize the grain into the smallest particles possible to ensure a smooth mouthfeel, but this must be balanced against the risk of over-processing. High speed is generally preferred because it shears the grain quickly, but the duration must be strictly monitored. Most high-performance blenders require only 30 to 45 seconds to achieve total homogenization of soaked grains.
- Start Low: Begin at the lowest speed for 5 seconds to break up the large grain structures.
- Rapid Ramp-Up: Quickly move to the highest speed setting to maximize shearing force.
- The 40-Second Limit: Cease blending before the 40-second mark to prevent heat buildup and excessive starch release.
Over-blending past the one-minute mark is a common mistake that leads to "gummy" milk. The high-speed rotation creates a vortex that incorporates air; while this might look creamy initially, the air bubbles will eventually dissipate, leaving behind a compromised starch structure. Precision in timing ensures a stable emulsion that maintains its integrity during filtration and subsequent storage.
Mechanical Filtration for a Smooth Finish
No matter how powerful the blender, a grain-based liquid will contain some level of insoluble fiber and particulate matter. Mechanical filtration is the essential final step to transform a "blended grain soup" into a professional-grade beverage or base. The choice of filtration tool determines the final clarity and mouthfeel of the product. Using the wrong mesh size can result in a gritty texture or a clogged filter that makes the process labor-intensive.
- Nut Milk Bags: The gold standard for grain blending, offering a very fine nylon mesh that captures even the smallest silt.
- Fine Mesh Strainers: Generally insufficient for grains like oats but work well for larger grains like almonds or cashews.
- Cheesecloth: Effective when layered, but can be difficult to squeeze without tearing or losing product.
To filter correctly, pour the blended mixture into the bag and allow it to gravity-drain first. Avoid the urge to squeeze the bag aggressively at the start; this can force starches through the mesh, leading to a slimier result. A gentle, steady pressure toward the end of the process will maximize yield while keeping the sediment trapped within the filter.
Enhancing Mouthfeel with Natural Fats
Grains are naturally low in lipids compared to dairy or nuts, which can result in a "flat" or "watery" sensation on the palate even if the liquid is thick. To replicate the luxurious mouthfeel of whole milk or cream, it is often necessary to reintroduce fats during the blending stage. These fats act as emulsifiers, coating the tongue and carrying the grain's flavor more effectively. Since grains are mostly carbohydrate-based, adding a lipid source creates a more balanced nutritional profile and a more stable emulsion.
Common additions include a neutral oil like sunflower or grapeseed, or a small handful of high-fat nuts such as cashews or macadamias. About one tablespoon of oil or a quarter cup of soaked nuts per quart of liquid is usually sufficient. When these fats are blended at high speed with the grains and water, they undergo micronization, breaking into tiny droplets that remain suspended in the liquid. This process prevents the "watery" separation that can occur and gives the grain milk a rich, opaque appearance and a satisfying, lingering finish that mimics traditional culinary fats.
The Importance of Cold Water Rinsing
Properly preparing grains before they ever touch the blender is a step that cannot be overlooked. Grains are covered in a fine layer of surface starch and dust, which, if left on, contributes significantly to an unpleasant "chalky" taste and a thicker-than-desired viscosity. Cold water rinsing serves to strip away these loose particulates, ensuring that the only starches present in the blend are those contained within the grain itself. This leads to a cleaner flavor profile and a more predictable texture.
- Initial Rinse: Wash the dry grains under cold running water until the water runs clear.
- The Soak: Submerge grains for 4 to 8 hours to soften the outer hull.
- The Final Rinse: This is the most crucial step. After soaking, the water will be cloudy and thick with "leached" starches. Discard this water and rinse the grains thoroughly one last time.
By removing this external starch layer, you significantly reduce the "slime factor" during blending. The final liquid will be much more stable and have a brighter, fresher taste, free from the heavy, earthy odors that can persist in unwashed grains.
Preserving Texture During Storage and Heating
Once the grain blend is perfected, maintaining that quality during storage and reheating presents its own set of challenges. Grain-based milks and creams are prone to separation because they are mechanical suspensions rather than true solutions. Over time, the heavier grain particles will naturally settle at the bottom of the container. To prevent this from becoming a permanent sediment, storage containers should be shaken vigorously before each use. Additionally, these blends have a shorter shelf life than dairy, typically lasting 3 to 5 days in a cold refrigerator.
Heating the mixture requires extreme care. Because the starches are still present, bringing a grain blend to a rapid boil will almost certainly turn it into a thick porridge or pudding. If you intend to use the blend in coffee or for a warm sauce, heat it slowly over low to medium heat while whisking constantly. This constant motion prevents the starches from settling on the bottom of the pan and "clumping" together. If the mixture thickens too much during heating, a small splash of cold water or a quick whisking can often restore the desired fluidity without compromising the flavor.





Comments