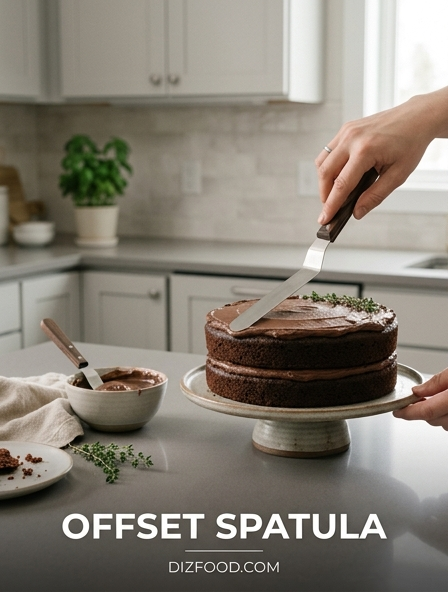
Achieving that flawless, bakery-quality finish at home is much easier when you master the use of a professional offset spatula. This essential tool features a unique cranked handle that keeps your fingers away from the icing, allowing you to smooth buttercream with incredible precision and control. By maintaining a steady hand and a slight angle, you can create those sharp, clean edges and perfectly level surfaces seen in high-end cake boutiques. It is the ultimate secret for spreading batter evenly or lifting delicate pastries without breakage. Understanding your equipment is key to success, so take a moment to learn about the specific uses of an offset spatula vs. straight spatula to enhance your decorating technique.
Choosing the Right Professional Offset Spatula Size
Selecting the appropriate offset spatula size is fundamental for achieving professional results in pastry work. These tools are typically categorized by blade length, each serving a distinct purpose in the kitchen. A small 4-inch blade provides the highest level of maneuverability for intricate tasks, such as smoothing chocolate garnishes or spreading icing on cupcakes. Conversely, larger blades are designed for high-volume tasks and structural leveling.
| Blade Size | Primary Application | Best For |
|---|---|---|
| 4 to 4.5 inches | Detail work and small treats | Cupcakes, cookies, and petit fours |
| 7 to 9 inches | Standard cake decorating | 6-inch to 10-inch round cakes |
| 12+ inches | Large surface areas | Sheet cakes and wedding tiers |
When choosing, consider the "crank"-the bend in the metal. A deeper crank allows your hand to stay further away from the frosting, preventing accidental smudges. Professionals often keep a complete set to ensure they have the specific leverage required for different cake diameters and depths.
Mastering the Smooth Crumb Coat Technique
A crumb coat is the thin, initial layer of frosting applied to a cake to seal in loose crumbs. This step is essential for a pristine final finish. To begin, place a generous dollop of frosting on the center of the top layer. Using your offset spatula, spread it toward the edges with a back-and-forth motion. The offset design allows you to keep the blade flat against the surface without your knuckles digging into the cake.
- Apply frosting thinly enough that the cake layers remain visible.
- Use a steady, sweeping motion to push excess frosting over the sides.
- Smooth the sides by holding the spatula vertically while rotating the turntable.
- Chill the cake for at least 30 minutes until the coating is firm to the touch.
The goal is not perfection, but containment. By creating this structural base, you prevent dark crumbs from bleeding into your final decorative layer. The flexibility of a professional stainless steel blade is crucial here, as it provides the tactile feedback necessary to feel the cake's surface without tearing the delicate sponge.
Achieving Perfectly Level Cake Layers
Precision starts before the oven door even closes. An offset spatula is the ideal tool for leveling cake batter in the pan to ensure an even bake. Once the cake is baked and cooled, the tool becomes indispensable for distributing frosting between layers. Uneven filling leads to leaning cakes and structural instability, which can be disastrous for multi-tiered assemblies.
- Place a scoop of frosting in the center of the bottom layer.
- Hold the spatula handle slightly elevated so the blade remains parallel to the cake.
- Spread the frosting outward in a spiral motion toward the perimeter.
- Check the level by eye or with a small spirit level before adding the next layer.
Consistency in pressure is the secret to a level finish. If you apply more pressure on one side, the cake will inevitably tilt. The offset spatula's ergonomic design assists in maintaining a neutral wrist position, allowing for long periods of work without fatigue. By mastering this leveling process, you ensure that every slice of cake features symmetrical layers of sponge and cream.
The Art of Spreading Uniform Filling
Filling a cake requires a delicate balance between volume and stability. Whether using ganache, buttercream, or fruit preserves, the offset spatula allows for a controlled distribution that prevents the filling from bulging out the sides. It is often helpful to create a "dam" using a stiffer frosting around the edge before spreading softer fillings in the center.
| Filling Type | Spreading Technique | Recommended Blade |
|---|---|---|
| Fruit Preserves | Thin, even sweep | Small 4-inch offset |
| Whipped Mousse | Light, folding motion | Medium 9-inch offset |
| Thick Ganache | Firm, sweeping pressure | Stiff stainless steel blade |
The key is to avoid lifting the spatula off the surface too abruptly, which can pull the filling upward and create air pockets. Instead, slide the blade off the edge of the cake to finish each stroke. This technique ensures a uniform thickness across the entire diameter, providing a consistent flavor profile and a professional aesthetic to the interior of your dessert.
Creating Professional Frosting Swirls and Textures
While a perfectly smooth cake is a hallmark of skill, textured finishes offer a modern and artisanal appeal. The tip of an offset spatula is a versatile stylus capable of creating a wide variety of patterns. For a classic rustic swirl, place the tip of the blade against the frosting at the base of the cake and slowly move it upward in a "C" or "S" motion while rotating the turntable.
- The Horizontal Stripe: Hold the tip steady against the side while spinning the cake.
- The Petal Effect: Use small, vertical upward strokes to create overlapping scales.
- The Stucco Finish: Use short, random strokes in multiple directions for a textured look.
- The Concentric Spiral: Start at the outer edge of the top and work toward the center.
These techniques hide imperfections while adding visual interest. The rounded tip of a professional-grade spatula is specifically designed to glide through buttercream without leaving harsh drag marks. By varying the angle of the blade and the speed of your rotation, you can transition from subtle waves to dramatic, deep ridges with ease.
Precision Handling for Delicate Pastries
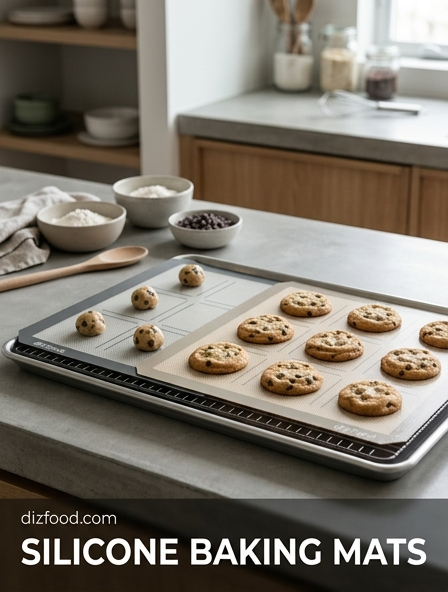
Beyond cake decorating, the offset spatula serves as a precision lifting tool. Its thin, flexible blade can slide under fragile items without causing breakage. This is particularly useful for transferring chilled cookies from a baking sheet to a cooling rack, or moving delicate tartlets onto a serving platter. The offset handle ensures that your hand does not come into contact with the delicate edges of the pastry.
In the world of chocolate work, the tool is used to spread tempered chocolate into paper-thin layers for shards and curls. The ability to apply even, light pressure is what differentiates a professional finish from a clumpy one. When working with puff pastry or phyllo dough, the spatula can be used to gently lift layers to check for browning or to tuck in stray edges. Because the blade is usually made of high-quality stainless steel, it maintains its shape even when used to lift relatively heavy items, providing a reliable extension of the chef's hand during high-stakes plating.
Essential Grip and Angle for Maximum Control
Control over an offset spatula starts with the proper grip. Most beginners make the mistake of gripping the handle like a hammer. Instead, a professional grip resembles holding a pencil or a paint brush. Place your thumb on the top of the handle near the bolster (where the metal meets the wood or plastic) and wrap your fingers underneath. This allows for fine motor movements dictated by the wrist rather than the entire arm.
- Position the blade at a 45-degree angle for spreading.
- Flatten the blade to 15 degrees for final smoothing.
- Keep your elbow tucked close to your body for stability.
- Maintain a light touch; let the tool do the work.
The angle of the blade determines how much frosting is moved versus how much is smoothed. A steep angle "plows" the frosting, while a shallow angle compresses and levels it. Mastering these nuances allows you to manipulate various icing consistencies, from stiff royal icing to soft whipped cream, with total confidence and zero frustration.
Seamless Icing Application for Sharp Edges
The hallmark of a professional cake is the "sharp edge"-the crisp, 90-degree angle where the top of the cake meets the sides. Achieving this requires a specific sequence of movements using the offset spatula. First, ensure the frosting on the sides extends slightly above the top surface of the cake, creating a crown or "lip" of excess icing. This extra material is the key to a sharp corner.
Holding the spatula horizontally, pull the excess frosting from the outer edge toward the center of the cake. Use a clean blade for every single stroke to avoid dragging old frosting back onto the surface. The motion should be quick and light, almost like a skimming action. It is helpful to have a damp cloth nearby to wipe the blade frequently. By pulling the frosting inward rather than pushing it outward, you prevent the rounded edges that characterize amateur decorating. This technique, combined with a steady hand and a quality offset tool, results in a clean, architectural finish that mimics the precision of fondant using only buttercream.
Professional Tools versus Standard Kitchen Spatulas
While a standard flat spatula or a butter knife can spread frosting, they lack the ergonomic advantages of a professional offset model. The primary difference lies in the "offset" or "cranked" handle. This design lifts the handle above the blade, allowing the user to keep their fingers clear of the work surface. This is essential for maintaining a perfectly flat plane when smoothing large sheet cakes or wide rounds.
| Feature | Professional Offset | Standard Flat Spatula |
|---|---|---|
| Handle Clearance | High (prevents smudging) | None (fingers hit the cake) |
| Blade Flexibility | High (tapered stainless steel) | Low (often rigid) |
| Precision | Excellent for edges/corners | Poor for detail work |
Furthermore, professional spatulas are often made from high-carbon stainless steel that is taper-ground. This means the blade is thicker near the handle for strength and thinner at the tip for flexibility. This graduation allows for a sensitive "feel" that rigid standard spatulas cannot provide, making it easier to detect uneven spots in the frosting before they become visible to the eye.
Maintaining Your Stainless Steel Offset Spatula
To ensure the longevity and performance of a professional offset spatula, proper maintenance is required. Most high-quality blades are made of stainless steel, which is resistant to rust but not immune to it. After each use, the spatula should be washed in warm, soapy water. Avoid using abrasive scouring pads, as these can create microscopic scratches on the blade's surface, which may catch on delicate frosting or harbor bacteria.
- Hand wash instead of using the dishwasher to preserve handle integrity.
- Dry immediately with a soft lint-free cloth to prevent water spots.
- Store in a dedicated tool roll or a flat drawer to avoid bending the tip.
- Periodically check the "crank" to ensure it hasn't lost its specific angle.
If your spatula has a wooden handle, it will occasionally require food-grade mineral oil to prevent the wood from drying out or cracking. A well-maintained spatula will remain perfectly flat and flexible for decades, becoming a trusted extension of your hands in the kitchen. Consistency in care reflects the same precision required in the baking craft itself.

Comments