Selecting High Quality Modern Fondant Formulas
The success of a professional cake finish begins with the chemical composition of the fondant itself. Modern commercial formulas have evolved significantly, moving away from the brittle, overly sweet pastes of the past toward highly elastic, marshmallow-based or white chocolate-infused compounds. When selecting a formula, bakers must prioritize "workability," which refers to the fondant's ability to stretch without developing "elephant skin" or micro-cracks at the edges. High-quality brands often include specialized humectants like vegetable glycerin and professional-grade glucose, which maintain moisture levels during the rolling process.
- Elasticity: Look for brands that permit thin rolling without tearing.
- Flavor Profile: Ensure the paste complements the cake rather than overpowering it with synthetic vanilla.
- Pigment Absorption: The formula should take gel colors evenly without breaking down the structural integrity.
- Climate Resistance: Certain formulas are specifically engineered for high-humidity environments.
Choosing a premium product reduces the need for excessive additives like CMC powder or Tylose, which can alter the mouthfeel and drying time of the final coating.
Preparing a Flawless Ganache Base Foundation
Before the fondant is even touched, the substrate must be perfectly level and structurally sound. While buttercream is common, many professional decorators prefer a firm chocolate ganache foundation because it sets like a shell, providing a stable surface that does not shift under the weight of the fondant. The ratio of chocolate to cream is critical for achieving the necessary hardness; a higher chocolate content ensures the sharp edges of the cake remain crisp during the draping process.
| Chocolate Type | Chocolate to Cream Ratio | Best Environment |
|---|---|---|
| Dark (50-70%) | 2:1 or 3:1 | Warm/Humid |
| Milk Chocolate | 3:1 | Temperate |
| White Chocolate | 3:1 or 4:1 | Cool/Dry |
Once applied, the ganache should be chilled until firm and then scraped with a heated metal bench scraper. This "hot scraping" technique melts the outer molecular layer just enough to fill any microscopic voids, creating a glass-like surface that prevents the fondant from telegraphing imperfections.
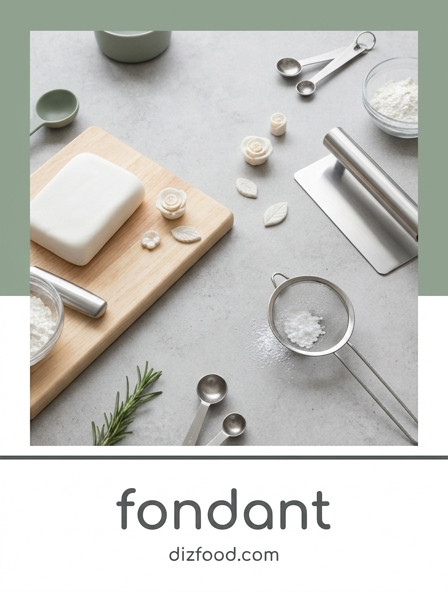
Essential Tools for a Mirror Smooth Finish
Achieving a professional result requires a specific kit of tools designed to manipulate sugar paste without leaving indentations. While the hands are useful for initial positioning, mechanical tools provide the even pressure necessary for a mirror finish. A heavy-duty non-stick rolling pin, preferably made of high-density polyethylene, is essential for maintaining consistent thickness. Furthermore, every decorator should possess a pair of flexible acetate smoothers, which allow for a delicate touch on curved surfaces where rigid plastic smoothers might fail.
- Large Silicone Mat: Provides a calibrated workspace and prevents sticking without excessive cornstarch.
- Precision Scalpel: Used for trimming the base of the fondant with surgical accuracy.
- Flexi-Smoothers: Essential for rounding the shoulders of the cake and creating sharp top edges.
- Turntable with Ball Bearings: Ensures a continuous, smooth rotation during the buffing phase.
The quality of these tools directly impacts the speed of the workflow. Investing in a heavy, leveled turntable, for instance, allows for the steady application of pressure that is impossible on a standard wobbly rotating stand.
The Science of Proper Fondant Kneading
Kneading is not merely a mixing step; it is a thermal and structural preparation of the sugar's crystalline lattice. When fondant is pulled from its packaging, it is often cold and "short," meaning it breaks easily when stretched. The friction from kneading warms the vegetable fats and gelatin (or marshmallow) binders, aligning the molecules for maximum pliability. However, over-kneading can incorporate air, leading to the dreaded "fondant bubbles" that mar a smooth surface.
- Wash and dry hands thoroughly to prevent lint or moisture transfer.
- Apply a microscopic layer of vegetable shortening to the work surface.
- Fold the fondant into itself using the heels of the palms.
- Continue until the paste is warm, supple, and shows no visible streaks of color.
- Test the elasticity by pulling a small piece; it should stretch significantly before snapping.
By controlling the temperature and movement during this phase, the baker ensures the fondant will behave predictably once it is draped over the cake, preventing premature drying.
Precision Rolling for Uniform Surface Thickness
An uneven thickness in fondant leads to a litany of aesthetic issues, including sagging, "elephant skin" at the top corners, and translucency where the paste is too thin. To achieve a uniform surface, decorators must utilize a systematic approach to rolling. Starting from the center and rolling outward, the pressure must be consistent and radial. Rotating the fondant by 90 degrees after every few passes is vital to ensure it does not stick to the mat and that the shape remains roughly circular or rectangular, depending on the cake's geometry.
Professional results are typically achieved at a thickness of approximately 1/8th of an inch (3mm). Using guide rings on the ends of the rolling pin can assist beginners, but experienced decorators rely on tactile feedback. If the fondant is too thick, the cake will look bulky and be unpleasant to eat; if too thin, every minor bump on the ganache base will be magnified. Periodically lifting the fondant to check for air pockets or sticking points is a mandatory part of the process before the final lift and drape.
Mastering the Seamless Draping Technique
Draping is the most critical moment in cake decoration, requiring a combination of speed and gentleness. Once the fondant is rolled to the correct diameter-calculating the top width plus twice the height of the cake-it must be transferred immediately to prevent drying. The goal is to land the fondant centered on the cake in a single movement. Once draped, the "pleats" or "skirts" that form around the base must be managed before they can set or cause tearing at the top edge.
- Gently lift the skirt of the fondant with one hand while the other hand smooths the top.
- Work from the top edge downward, using a "lift and tuck" motion to eliminate folds.
- Use the side of your hand or a smoother to press the fondant against the cake's sides.
- Ensure no air is trapped between the fondant and the ganache as you work toward the base.
This technique prevents the weight of the overhanging fondant from pulling down on the top edges, which is the primary cause of tearing and uneven thickness in the finished product.
Eliminating Air Bubbles and Surface Blemishes
Even with perfect kneading, air bubbles can occasionally appear beneath the surface after draping. These are caused by air trapped between the fondant and the cake base or by air incorporated during the rolling process. Addressing these blemishes requires a delicate touch. A thin acupuncture needle or a very fine pin should be used to prick the bubble at an angle. Once the air is released, the smoother is used in a circular motion to press the fondant back down and "heal" the tiny puncture site.
For surface blemishes like lint or small cracks, a tiny amount of vegetable shortening can act as a blending agent. For more significant gouges, a "fondant paste" can be created by mixing a scrap of the fondant with a drop of water until it reaches a glue-like consistency. This can be used to fill the blemish, followed by vigorous buffing to blend the repair into the surrounding area. Prevention remains the best strategy, which includes keeping the workspace meticulously clean and avoiding the use of excessive cornstarch, which can dry out the surface and lead to micro-cracking.
Creating Sharp Professional Cake Edges
The "sharp edge" look is the hallmark of modern professional cake design. Achieving this requires the use of two smoothers simultaneously-one on the top of the cake and one on the side. By bringing these two tools together at the corner, the fondant is gently squeezed and pushed upward to form a crisp, defined ridge. This process requires a firm base, such as ganache, which provides the resistance needed to "sharpen" the sugar paste against the corner of the cake.
- The Pinch: Use two flexible acetate scrapers to gently pinch the fondant at the top rim.
- The Slide: Move the scrapers in opposite directions to level the ridge.
- The Polish: Buff the edge to remove any lines left by the scrapers.
This technique takes advantage of the fondant's elasticity. If the fondant has already begun to dry, a very light mist of water or a steam pass can reactivate the surface, allowing for further manipulation. Sharp edges provide a clean, architectural look that elevates the cake from a home-style bake to a professional centerpiece.
The Buffing Method for Porcelain Shine
A "porcelain shine" is achieved through the physical buffing of the fondant surface, which aligns the sugar crystals and removes the matte residue left by cornstarch or powdered sugar. This is best performed once the fondant has been perfectly smoothed and the edges sharpened. Using a clean, dry smoother-or better yet, a piece of leftover fondant rolled into a ball-the decorator applies light, rapid circular motions across the entire surface of the cake. The friction generates a microscopic amount of heat, which brings the oils to the surface, creating a subtle, elegant glow.
For a higher gloss finish, some decorators use a handheld steamer. A quick pass of steam melts the uppermost micron of sugar, creating a temporary wet look that dries into a satin sheen. However, buffing by hand remains the preferred method for a sophisticated, professional finish because it avoids the risk of "sweating" or water droplets marring the surface. The result of proper buffing is a cake that looks less like a confection and more like polished stone or fine ceramic, providing the perfect canvas for further decoration.
Maintaining Finish Integrity During Storage
The environmental conditions following the application of fondant are just as important as the application itself. Fondant is highly hygroscopic, meaning it absorbs moisture from the air. If stored in a high-humidity environment, the sugar will begin to dissolve, leading to a "weeping" effect where the surface becomes sticky and loses its shape. Conversely, a refrigerator that is too cold or has inconsistent humidity can cause the fondant to sweat profusely when the cake is brought to room temperature.
| Storage Method | Duration | Pros/Cons |
|---|---|---|
| Cool Room Temp | 2-3 Days | Best for finish integrity; risks spoilage of some fillings. |
| Cardboard Box | Variable | Protects from light and dust; absorbs minor humidity. |
| Professional Fridge | 5-7 Days | Maintains freshness; risk of condensation upon removal. |
To preserve a mirror finish, it is best to store the cake in a cardboard box, which allows the fondant to "breathe" while protecting it from light and dust. If refrigeration is mandatory, a humidity-controlled environment is essential to prevent the degradation of the carefully buffed surface.


Comments