
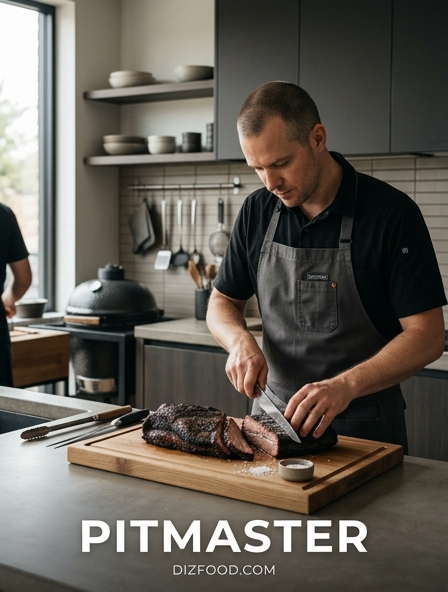
Selecting Wood for Flavor and Heat
Choosing the right wood is the foundation of any pitmaster's craft. Hardwoods are the standard, as they burn longer and more consistently than softwoods, which often contain resin that produces unpleasant soot. The density of the wood dictates how much heat it generates and how long the embers will last. For heavy meats like brisket or beef ribs, pitmasters often choose woods that provide a robust profile, whereas lighter meats require a more delicate touch to avoid overpowering the natural flavors of the protein.
| Wood Type | Flavor Intensity | Best Food Pairing |
|---|---|---|
| Hickory | Strong/Bacon-like | Pork Shoulders, Ribs |
| Oak | Medium/Versatile | Beef Brisket, Sausages |
| Apple | Mild/Sweet | Poultry, Pork Loin |
| Mesquite | Very Intense | Steaks, Quick Grilling |
Moisture content also plays a critical role. Seasoned wood, which has been dried for six to twelve months, is ideal because it ignites easily and burns cleanly. Green wood produces excessive moisture and heavy smoke, which can lead to a bitter taste known as creosote buildup on the meat.
Mastering Airflow and Vent Control
Airflow is the engine of the smoker. Oxygen feeds the fire, and the pitmaster controls the temperature by regulating how much air enters and exits the cooking chamber. Most smokers feature an intake vent near the firebox and an exhaust vent or chimney on the opposite end. Managing these two points creates a vacuum effect that pulls heat and smoke across the food. Closing the intake lowers the temperature by starving the fire of oxygen, while opening it causes the fire to roar and temperatures to spike.
- Intake Vent: Primary control for temperature regulation and fire intensity.
- Exhaust Vent: Controls the draw of smoke and prevents stagnant air.
- The Chimney Effect: Hot air rises and creates a natural pull through the system.
The exhaust vent should generally remain at least partially open to ensure that "stale" smoke does not linger. If smoke remains in the chamber too long, it cools and deposits soot on the food. Fine-tuning the intake in small increments allows for precise temperature stability, preventing the drastic fluctuations that can ruin a long cook.
Creating Strategic Two Zone Heat
Two-zone cooking is a fundamental technique that allows a pitmaster to manage different cooking speeds and food types simultaneously. By concentrating the fuel on one side of the grill, you create a direct heat zone for searing and an indirect heat zone for roasting. This setup acts as an oven, where the ambient heat circulates around the meat without the risk of burning the exterior before the interior is properly cooked. It is the most effective way to handle thick cuts of meat that require a low and slow approach.
- Place all hot coals or burners on one side of the cooking grate.
- Position the meat on the "cool" side for steady, indirect roasting.
- Monitor the internal temperature until it nears the target range.
- Move the meat to the "hot" side for a final sear to develop a crust.
This method provides a "safety zone" where food can be moved if flare-ups occur. It is also perfect for reverse-searing steaks, allowing the meat to reach a perfect medium-rare internally before finishing with a high-heat char that provides texture and visual appeal.
Achieving Consistent Clean Blue Smoke
The hallmark of an expert pitmaster is the presence of "Thin Blue Smoke." This nearly invisible, translucent vapor indicates that the fire is burning at an optimal temperature and consuming fuel efficiently. In contrast, thick white smoke is a sign of incomplete combustion, often caused by poor airflow or wet wood. White smoke contains large particles and chemicals that impart a bitter, acrid flavor to the meat. Achieving the blue tint requires a delicate balance between fuel load and oxygen supply, ensuring the fire is "happy" and not smoldering.
To maintain this state, the firebox must stay hot enough to immediately ignite any new wood added to the coals. Pre-warming wood logs on top of the firebox can help them reach ignition temperature faster, reducing the "burp" of white smoke that occurs when cold wood hits a hot fire. Once the fire is stabilized, the pitmaster should see a gentle shimmer of heat and a faint blue hue. This signifies that the aromatic compounds in the wood are being released cleanly, resulting in a subtle, sweet smokiness that enhances rather than masks the flavor of the ingredients.
Managing Coals for All Day Cooking
Long cooks, such as a twelve-hour brisket, require a disciplined approach to fuel management. You cannot simply dump a large amount of charcoal into the pit and walk away; instead, you must build a sustainable coal bed. The coal bed serves as the thermal battery of the smoker, providing the consistent radiant heat needed to keep the cooking chamber steady. Pitmasters often use the "Minion Method" or the "Snake Method" to ensure a slow, controlled burn of fuel over many hours.
- The Coal Bed: A thick layer of glowing embers that provides steady heat.
- Fuel Rotation: Adding small amounts of fresh wood or charcoal at regular intervals.
- Ash Removal: Preventing ash buildup from choking the airflow to the fire.
As the cook progresses, ash will inevitably accumulate. If left unmanaged, it can insulate the coals and prevent oxygen from reaching the fire, leading to a drop in temperature. Using a poker to gently agitate the coals and allowing ash to fall through the grate ensures the fire remains oxygenated. Consistency is key; adding fuel before the temperature begins to drop is far more effective than trying to recover from a dying fire.
Essential Tools for Active Fire Control
A pitmaster is only as good as the tools used to manipulate the fire. Precision and safety are paramount when dealing with high temperatures and live embers. While thermometers are essential for monitoring the meat, specific fire-tending tools are required to manage the heat source itself. These tools allow for the repositioning of logs and the clearing of obstructions without exposing the cook to excessive radiant heat or direct flames. Investing in high-quality, durable equipment ensures that the pitmaster remains in total control of the environment.
| Tool | Function | Material |
|---|---|---|
| Fire Poker | Moving logs and breaking up coals | Wrought Iron/Steel |
| Ash Shovel | Removing excess debris during long cooks | Galvanized Steel |
| Heat-Resistant Gloves | Protecting hands during fuel additions | Kevlar/Silicone |
| Chimney Starter | Rapidly igniting charcoal without chemicals | Aluminized Steel |
Beyond these, a simple spray bottle filled with water or apple juice is a vital tool for flare-up control and moisture management. It allows the pitmaster to douse small flames that might scorch the meat while simultaneously adding a layer of humidity to the cooking chamber, which helps smoke adhere to the surface of the food.
Adapting to Outdoor Weather Variables
The environment plays a massive role in how a smoker performs. Unlike indoor ovens, outdoor pits are subject to wind, ambient temperature, and humidity. Wind is perhaps the most challenging variable, as it can force air into the intake vents, causing temperatures to soar, or pull heat out of the exhaust too quickly. Pitmasters often use windbreaks or position their cookers in shielded areas to mitigate these effects. On cold days, the metal of the smoker loses heat rapidly, requiring significantly more fuel to maintain the desired internal cooking temperature.
Humidity also influences the "stall"-the period where the meat's internal temperature stops rising due to evaporative cooling. In high-humidity environments, evaporation is slower, which can alter the timing of the cook. Rain poses another set of problems, as water hitting a hot smoker can cause rapid cooling and potential warping of the metal. Successful pitmasters develop a sixth sense for these changes, adjusting their vent settings and fuel consumption rates to compensate for the atmosphere. Learning to read the weather is just as important as learning to read the fire itself, ensuring a successful outcome regardless of the season.
Maintaining the Perfect Cooking Temperature
Consistency is the secret to tender, succulent barbecue. Fluctuating temperatures can cause the muscle fibers in meat to contract and relax, which often results in a tough final product. The goal is to find a "sweet spot"-usually between 225°F and 275°F for low and slow cooking-and hold it there for the duration of the process. This requires a combination of high-quality thermometers and a deep understanding of how your specific cooker reacts to fuel and air adjustments.
- Calibrate your thermometers regularly using the boiling water test.
- Place probes at the grate level near the meat for accurate readings.
- Make small vent adjustments and wait 15 minutes to see the effect.
- Avoid "peeking" by keeping the lid closed to retain heat and moisture.
Every time the lid is opened, heat escapes and the temperature drops, extending the cooking time. A steady temperature allows the collagen in the meat to break down into gelatin gradually, which is what creates the "melt-in-your-mouth" texture associated with professional barbecue. Monitoring the trend of the temperature is more important than reacting to every single degree of change; focus on maintaining a stable average over the hours.
Safety Protocols for Backyard Grilling
Operating a live fire requires a commitment to safety to prevent property damage or personal injury. A pitmaster must always be aware of the surroundings, ensuring the smoker is placed a safe distance from wooden decks, vinyl siding, and overhanging branches. Embers can pop and travel significant distances, especially in dry or windy conditions. Maintaining a clean workspace is equally important, as grease buildup inside the smoker can lead to dangerous grease fires that are difficult to extinguish once they take hold.
- Keep a fire extinguisher or a bucket of sand within arm's reach.
- Never leave a lit pit unattended for long periods.
- Dispose of cooled ashes in a metal container, never in plastic bins.
- Ensure all fuel is completely extinguished before ending the session.
Proper attire is also a safety consideration. Avoid loose-fitting clothing that could catch fire when leaning over the coals, and always use insulated tools and gloves when handling hot grates or firebox doors. By following these protocols, the pitmaster ensures that the focus remains on the food and the craft, minimizing the risks associated with high-heat cooking and open flames in a residential setting.
Balancing Fire Tending and Socializing
One of the greatest challenges for a backyard pitmaster is managing the fire while entertaining guests. Barbecue is inherently social, yet the fire demands constant attention. Success lies in preparation and the use of technology. By doing all the prep work-trimming the meat, applying the rub, and prepping the wood-well before guests arrive, the pitmaster can minimize time spent away from the group. Establishing a stable fire early in the day is also crucial, as a well-managed coal bed requires less frequent intervention than a newly started fire.
Modern technology offers a significant advantage in this area. Wireless meat thermometers and pit controllers allow the cook to monitor temperatures from a smartphone, providing alerts if the heat drifts outside the target range. This "set and forget" mentality, while still requiring vigilance, frees up the pitmaster to enjoy a drink and conversation without constantly hovering over the vents. The goal is to have the heavy lifting of the fire management done in the early hours of the cook, so that by the time the party starts, the smoker is cruising along smoothly, leaving the host free to engage with their friends and family.




Comments