Benefits of Natural Kettle Descaling
Kettle descaling with vinegar offers numerous advantages over commercial chemical cleaners. First and foremost, vinegar is a food-safe product that poses no risk of toxic ingestion if a small residue remains. It is an affordable, readily available household staple that eliminates the need for specialized, often expensive, descaling powders. From an environmental perspective, vinegar is biodegradable and does not introduce harsh synthetic chemicals into the water system. Furthermore, regular descaling prevents the buildup of mineral crusts that can cause heating elements to burn out prematurely.
By maintaining a clean interior, you extend the operational lifespan of your kitchen appliances significantly. This natural method also preserves the integrity of the kettle's internal materials, such as stainless steel or glass, which can sometimes be etched or damaged by more aggressive acidic compounds. Using vinegar ensures that your morning tea or coffee remains pure, free from the metallic or chalky aftertaste often associated with heavy limescale accumulation. It is the most sustainable choice for any modern, health-conscious kitchen, providing peace of mind alongside professional-grade cleaning results.
Essential Supplies for Vinegar Cleaning
To perform a thorough vinegar soak, you only need a few basic household items that are likely already in your pantry. The primary ingredient is distilled white vinegar, which contains approximately five percent acetic acid-the ideal concentration for breaking down mineral bonds without damaging the kettle's interior components. Avoid using flavored or colored vinegars like apple cider or balsamic, as these can leave behind sugars and stains.
- Distilled White Vinegar: The core acidic agent for dissolving calcium deposits.
- Fresh Filtered Water: Used to dilute the vinegar and for the final rinsing stages.
- Measuring Cup: Ensures the correct ratio for the cleaning solution.
- Soft Microfiber Cloth: For wiping down the exterior and removing loosened scale.
- Old Toothbrush: Useful for scrubbing hard-to-reach areas around the spout.
Having these supplies ready ensures the process is efficient and prevents interruptions. This minimalist approach to cleaning highlights the versatility of simple kitchen ingredients in maintaining high-performance appliances without relying on synthetic alternatives or complex tools.
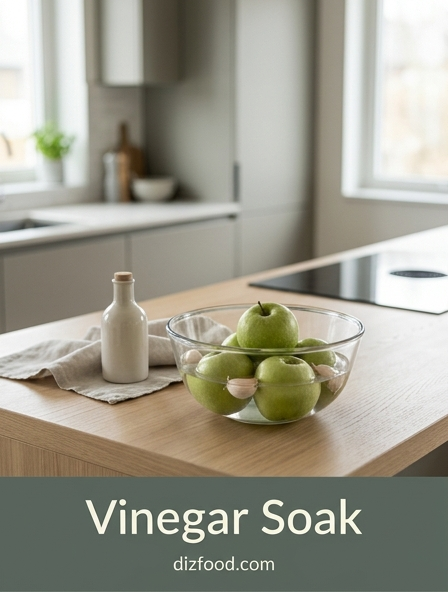
Preparing the Perfect Vinegar Solution
Creating the ideal vinegar solution is a matter of balancing acidity with volume. For a standard domestic kettle, a 1:1 ratio of distilled white vinegar to water is generally recommended. This concentration is potent enough to attack thick calcium carbonate layers while remaining mild enough to prevent any corrosive damage to the heating element or internal seals.
| Scale Level | Vinegar Amount | Water Amount |
|---|---|---|
| Light Maintenance | 1 Cup | 3 Cups |
| Standard Buildup | 2 Cups | 2 Cups |
| Heavy Limescale | 3 Cups | 1 Cup |
Always pour the water into the kettle first, followed by the vinegar, to ensure even mixing. If you are dealing with a particularly large kettle, ensure the solution covers all visible white spots and reaches just below the maximum fill line. This preparation stage is crucial because an improperly balanced solution may either be too weak to remove the minerals or unnecessarily pungent, making the subsequent rinsing phase more difficult than required.
The Step by Step Soaking Process
The soaking phase is where the chemical reaction between the acetic acid and the alkaline limescale takes place. Patience is key during this stage to ensure the minerals are fully softened before boiling or scrubbing. Follow these steps for an effective soak:
- Unplug the kettle and ensure it is completely cool before starting.
- Pour your pre-mixed vinegar and water solution into the kettle reservoir.
- Ensure the solution covers all areas affected by mineral deposits.
- Let the mixture sit undisturbed for at least 30 to 60 minutes.
- For severe cases, allow the kettle to soak overnight to penetrate deep layers.
- Periodically swirl the liquid to help detach any loose flakes.
During this time, you may notice small bubbles forming on the surface of the scale; this is a sign that the acid is actively dissolving the calcium. By allowing the vinegar sufficient time to work at room temperature, you reduce the amount of physical scrubbing needed later. This passive cleaning method is both effortless and highly effective for routine maintenance.
Safe Boiling for Mineral Removal
Once the initial soaking period is complete, the next step is to heat the solution. Boiling the vinegar and water mixture accelerates the descaling process by increasing the kinetic energy of the acid molecules, allowing them to penetrate the crystalline structure of the limescale more aggressively. As the liquid reaches its boiling point, you will see the white mineral sheets begin to lift away from the stainless steel base.
It is vital to stay near the kettle during this process. Vinegar can sometimes foam more than plain water, and you must ensure it does not boil over the spout. Once the kettle automatically switches off, let it sit for another fifteen minutes. The residual heat continues to work on any remaining stubborn spots. Ensure the room is well-ventilated, as boiling vinegar releases a sharp, pungent steam that can be overwhelming in enclosed spaces. Opening a window or turning on a kitchen exhaust fan will help dissipate the fumes quickly, leaving the appliance ready for the final steps of the cleaning cycle.
Rinsing Away Remaining Vinegar Odors
Removing the vinegar solution is only half the task; ensuring your next cup of tea doesn't taste like salad dressing is equally important. After discarding the hot vinegar mixture, the kettle's interior must be thoroughly neutralized. Begin by rinsing the kettle three to four times with cold tap water, swirling it vigorously to catch any loose sediment trapped in the spout or the mesh filter.
To completely eliminate the pungent aroma, fill the kettle to its maximum capacity with fresh water and bring it to a full boil. Discard this water immediately and repeat the process at least once more. If a faint scent persists, adding a tablespoon of baking soda to the second rinse boil can help neutralize the remaining acidity. Check the internal filter specifically, as small particles of scale often lodge themselves in the fine mesh during the draining process. Once the water runs perfectly clear and the vinegar scent is no longer detectable, the kettle is safe to use for beverage preparation. This meticulous rinsing ensures a clean, flavor-neutral environment for your water.
Eliminating Stubborn Limescale Deposits
Occasionally, a single soak and boil cycle is insufficient for kettles that have been neglected for many months. Stubborn limescale often appears as thick, grey, or brownish crusts that feel rock-hard. In these instances, a more concentrated approach is required. You may need to increase the vinegar ratio to seventy-five percent or even use undiluted vinegar for a focused treatment on the heating element.
- Apply undiluted vinegar directly to the thickest deposits.
- Use a plastic or nylon brush to gently agitate the surface after a long soak.
- Avoid using metal scouring pads, as these can scratch the interior.
- Repeat the boiling cycle twice with a fresh vinegar solution if necessary.
For the most persistent "hot spots" where the scale has calcified into a thick layer, a combination of vinegar and a few hours of heat retention can break the bond. Persistence is the key; even the most heavily scaled kettles can be restored to a like-new condition with repeated natural treatments. Never attempt to chip away at the scale with a knife, as this can cause permanent damage to the appliance.
Why Eco Friendly Cleaning Matters
Choosing vinegar over commercial descalers is a powerful statement in favor of eco-friendly kitchen management. Traditional cleaning chemicals often contain phosphoric or sulfamic acids, which can be harmful to aquatic life once they are washed down the drain and enter the water table. Vinegar, by contrast, is a natural byproduct of fermentation and is entirely biodegradable. It breaks down into harmless components that do not disrupt the delicate balance of septic systems or municipal waste treatments.
Furthermore, eco-friendly cleaning reduces the amount of plastic waste generated by single-use chemical bottles. By utilizing a multi-purpose gallon of white vinegar, you minimize your household's carbon footprint and reduce the demand for industrial chemical production. This approach also improves indoor air quality, as it eliminates the volatile organic compounds often found in synthetic fragrances. Embracing these natural alternatives fosters a safer home environment for children and pets, ensuring that the heart of your home remains a place of health and purity rather than a repository for industrial solvents.
Maintaining a Limescale Free Kettle
Preventing limescale is far easier than removing it. Once your kettle is pristine, implementing a few simple habits will keep it that way for much longer. The most effective strategy is to never leave standing water in the kettle overnight. When water sits, minerals have time to settle and bond with the heated surfaces. Consistent maintenance prevents the need for aggressive scrubbing.
- Empty the kettle completely after each use.
- Rinse the interior with fresh water every morning.
- Use filtered or distilled water if you live in a hard water area.
- Perform a light vinegar rinse once every two weeks.
- Wipe the exterior to prevent water spots and mineral dullness.
If you use a water softener or a charcoal filter jug, you will notice a significant decrease in the rate of calcium accumulation. By integrating these small steps into your daily kitchen routine, you ensure that the heating element remains efficient and the interior stays sparkling. Consistent maintenance not only saves time on deep cleaning but also protects your investment in high-quality kitchenware.
Enhancing Water Taste and Efficiency
A clean kettle is not just about aesthetics; it directly impacts the quality of your beverages and the efficiency of your home. Limescale acts as an unwanted layer of insulation between the heating element and the water. This means the kettle must run longer and consume more electricity to reach a boil, leading to higher energy bills and unnecessary wear on the appliance's motor and sensors over time.
Moreover, the taste of your water is significantly improved when the kettle is free of mineral buildup. Limescale can impart a hard, chalky, or metallic flavor to tea and coffee, masking the delicate notes of premium blends. In some cases, small flakes of calcium may even end up in your cup, creating an unappealing texture. By maintaining a scale-free environment, you ensure that the water remains soft and neutral, allowing the true flavors of your beverages to shine. Efficiency and excellence go hand-in-hand; a well-maintained kettle boils faster, lasts longer, and provides the purest possible base for every hot drink you prepare.


Comments