Why Detail Brushes Outperform Standard Sponges
Standard kitchen sponges are designed for surface area coverage, excelling at wiping down flat countertops or washing broad plates. However, their porous and soft structure fails significantly when faced with the mechanical requirements of precision cleaning. A detail brush, often designed like a reinforced toothbrush, provides a rigid handle and concentrated bristle density that allows for targeted pressure. This mechanical advantage is essential for dislodging solidified grease and mineral deposits that a sponge would simply glide over. Because sponges compress easily, they cannot penetrate the recessed tracks of sliding windows or the thin gaps surrounding a built-in stovetop.
Furthermore, sponges tend to harbor bacteria within their inner pores, often spreading contaminants across surfaces during a deep clean. Detail brushes, conversely, feature non-porous synthetic bristles that are easier to sanitize and quick to dry. The slender profile of the brush head ensures that every stroke reaches the bottom of a crevice, whereas the bulk of a sponge prevents it from contacting the innermost corners of kitchen hardware. By utilizing a tool specifically engineered for high-impact agitation in small spaces, homeowners can achieve a level of sanitation that is physically impossible with traditional wiping tools alone.
Targeting Grime in Faucet Base Seams
The seam where the faucet meets the sink deck is a primary collection point for stagnant water, soap residue, and organic debris. Over time, this mixture hardens into a dark, unsightly ring that standard cleaning cloths cannot reach. A detail toothbrush is the ideal instrument for this task because its fine bristles can slide into the microscopic gap between the metal fixture and the porcelain or stone surface. To effectively clean this area, one should apply a mild surfactant and allow it to sit for several minutes to soften the accumulation before beginning the agitation process.
- Apply a cleaning solution directly to the seam to break down surface tension.
- Angle the detail brush at a forty-five-degree angle to ensure bristles penetrate the undercut.
- Use short, back-and-forth strokes to lift the debris away from the base.
- Rinse with a targeted stream of water or a damp microfiber cloth to reveal the hidden shine.
Consistent maintenance of this specific area prevents the long-term degradation of silicone seals and gaskets. When grime is allowed to sit, it can become acidic, eventually pitting the finish of the faucet or eroding the adhesive that prevents water from leaking into the cabinetry below the sink. Using a detail brush weekly ensures these vital components remain functional and aesthetically pleasing.
Restoring Shine to Intricate Handle Joints
Modern kitchen hardware often features knurled textures, decorative ribbing, or complex pivoting joints that serve as magnets for oil and fingerprints. These intricate designs are difficult to polish because the valleys of the texture are inaccessible to fingers or flat rags. A detail brush acts as a precision polisher, reaching into every groove to remove the film of kitchen grease that dulls the metal's luster. This is particularly important for brushed gold, matte black, or oil-rubbed bronze finishes where buildup can be more visible against the specialized coating.
When cleaning handle joints, focus on the area where the lever meets the main body of the faucet. This pivot point often traps lime and skin oils, which can lead to stiff movement or "sticking" over time. By using a detail brush, you can work a small amount of lubricant or cleaner into the joint without over-saturating the internal cartridges. The result is a fixture that not only looks brand new but also operates with the smooth tactile response intended by the manufacturer. Regularly detailing these joints prevents the "crusty" appearance that often plagues older kitchen installations, maintaining the home's overall value and cleanliness.
The Best Bristle Types for Delicate Finishes
Not all detail brushes are created equal, and selecting the wrong bristle type can lead to permanent scratching on expensive kitchen surfaces. The hardness of the bristle should be matched to the material being cleaned to ensure effectiveness without damage. For example, a stainless steel sink can handle stiffer nylon, whereas a gold-plated faucet or a hand-painted tile backsplash requires a much softer touch.
| Bristle Material | Ideal Surface | Aggression Level |
|---|---|---|
| Soft Nylon | Plated Finishes, Lacquer | Low |
| Medium Synthetic | Stainless Steel, Grout | Moderate |
| Natural Boar Hair | Marble, Natural Stone | Very Low |
| Brass / Stiff Poly | Cast Iron, Grates | High |
When in doubt, always start with the softest bristle available and increase stiffness only if the grime remains. It is also important to consider the density of the bristles; a densely packed head will provide more scrubbing power but may not flex as easily into tight, 90-degree corners. High-quality detail brushes often feature tapered bristles that allow for maximum reach while maintaining a gentle contact point on the surface finish.
Scrubbing Grout Lines Between Tile and Sink
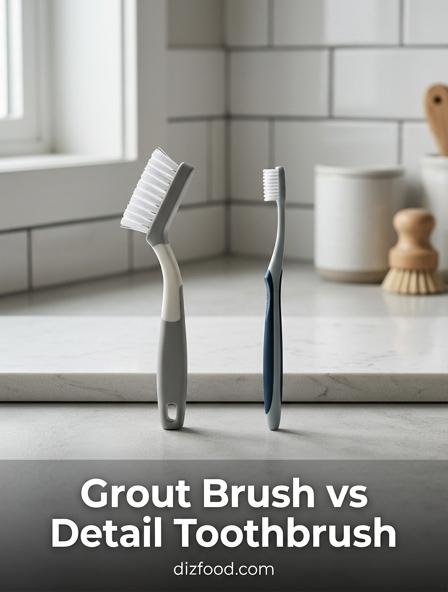
The transition between the kitchen backsplash and the sink is a high-moisture zone where grout is frequently exposed to splashes. Because grout is porous, it easily absorbs colored liquids like coffee, wine, or pasta sauce, leading to deep-set staining. A detail brush is the most effective tool for agitated cleaning in these narrow channels. Unlike a large floor grout brush, the detail brush allows for focused pressure on a single inch of grout at a time, ensuring that the cleaning agent is worked deep into the pores of the cementitious material.
To clean these lines, create a paste of baking soda and water or use a specialized oxygen-based cleaner. Apply the paste and use the detail brush in a scrubbing motion following the line of the grout. The narrow head ensures you aren't unnecessarily abrading the surrounding tile glazes. This localized scrubbing is especially important for maintaining the integrity of the caulk line that often sits at the base of the tile. By removing mold and food particles promptly with a brush, you extend the life of the waterproof seal and prevent the need for premature re-caulking or regrouting of the kitchen's wet areas.
Deep Cleaning the Aerator and Spout Rim
The aerator at the tip of a kitchen faucet is often overlooked until the water flow becomes uneven or spray starts shooting at odd angles. This is caused by a buildup of mineral scale and sediment inside the small mesh screen. While soaking the aerator in vinegar is a common solution, the internal rim of the spout also requires mechanical cleaning to remove the biofilm that accumulates in the dark, damp environment. A detail brush is small enough to be inserted into the spout opening to scrub the internal threads where the aerator attaches.
- Unscrew the aerator component from the end of the faucet spout.
- Dip the detail brush into a descaling solution or white vinegar.
- Scrub the internal threads of the spout to remove lime and mold.
- Clean the mesh screen of the aerator by brushing from both sides to dislodge trapped sand.
- Rinse the components thoroughly before reassembling the unit.
This process ensures that the water exiting your faucet is not passing through a layer of bacterial buildup. Detailed brushing of the spout rim also prevents "creeping" scale, which can eventually bond to the exterior finish and cause permanent discoloration or corrosion of the metal plating.
Eliminating Mold from Backsplash Corner Crevices
Kitchen corners, particularly where the backsplash meets the countertop, are notorious for trapping moisture. If the air circulation is poor, this dampness quickly leads to the growth of black mold or pink serratia marcescens bacteria. Because these corners are 90-degree intersections, standard cleaning tools like cloths or sponges cannot exert enough pressure into the vertex of the angle to remove the fungal spores. A detail brush with an angled head or "power tip" is specifically designed to reach into these sharp junctions to physically disrupt the mold colony.
Using a fungicidal cleaner in conjunction with a detail brush allows you to penetrate the textured surface of the sealant. It is vital to scrub gently but thoroughly, ensuring the bristles reach the very back of the crevice. After scrubbing, it is equally important to dry the area completely with a focused blast of air or a dry towel, as mold thrives in the residual moisture left behind after cleaning. Frequent detailing of these corners prevents the mold from getting beneath the silicone, which would otherwise require the complete removal and replacement of the sealant to fix the infestation.
Effective Solutions for Hard Water Calcium Deposits
Hard water contains high concentrations of minerals like calcium and magnesium, which leave behind "scale" or "limescale" as the water evaporates. These deposits are rock-hard and chemically bonded to kitchen fixtures. While chemical dissolvers are helpful, the most efficient removal method involves a combination of acidic treatment and mechanical agitation. A detail brush provides the necessary friction to break the crystalline structure of the scale once it has been softened by a cleaning agent like citric acid or vinegar.
For heavy buildup around the base of handles or sprayer buttons, a detail brush can be used to "work" the acid into the layers of the deposit. By brushing the area, you continuously remove the top layer of dissolved minerals, allowing the fresh acid to reach the next layer. This "scrub-and-soak" cycle is much faster than soaking alone. Additionally, the detail brush can reach into the tiny spray holes of a pull-out kitchen faucet head, which are often too small for any other tool. Keeping these apertures clear of calcium ensures a strong, even spray pattern for rinsing dishes and cleaning the sink basin.
The Circular Motion Technique for Tight Spaces
To maximize the efficiency of a detail brush in the kitchen, the technique used is just as important as the tool itself. While many people instinctively use a linear back-and-forth motion, a circular motion is often more effective for cleaning complex geometries. Small, tight circles allow the bristles to approach a piece of debris from multiple angles, increasing the likelihood of dislodging it from a textured surface or a tight corner. This is particularly useful when cleaning the "dimpled" surfaces of certain sink designs or the knurled knobs of a premium stove.
The circular technique also minimizes the risk of splashing cleaning chemicals onto surrounding surfaces. Because the motion is contained and controlled, the energy is directed downward into the grime rather than flicking the bristles outward at the end of a long stroke. When cleaning around delicate components like the base of a soap dispenser or the edges of a countertop switch, this controlled agitation ensures that the cleaning solution stays exactly where it is needed. Applying light pressure and letting the tips of the bristles do the work-rather than mashing the sides of the bristles against the surface-will result in a deeper clean with significantly less physical effort from the user.
Maintaining Your Detail Brush for Maximum Hygiene
A detail brush is a high-performance cleaning tool, but it can quickly become a reservoir for the very bacteria you are trying to eliminate if not properly maintained. Because it is used in the dirtiest parts of the kitchen-such as sink drains and backsplash corners-it requires a strict sanitation protocol. After every use, the brush should be thoroughly rinsed under hot running water to remove any visible debris or grease trapped between the bristles. If the brush was used to tackle mold or food waste, a more intensive disinfection step is necessary to ensure it is safe for future use.
To keep your detail brush in top condition, consider the following maintenance steps:
- Run the brush through a dishwasher cycle in the utensil basket once a week.
- Soak the bristles in a solution of water and bleach or high-percentage isopropyl alcohol for ten minutes.
- Store the brush upright in a well-ventilated area to allow the bristles to dry completely between uses.
- Replace the brush as soon as the bristles become frayed or splayed, as worn bristles lose their ability to reach into tight crevices.
By treating the detail brush as a precision instrument rather than a disposable scrap, you ensure that your kitchen deep-cleaning routine remains both effective and hygienic over the long term.

Comments