Achieving a luxurious, velvet froth is the hallmark of a truly exceptional coffee experience. The secret to creating that dense, silky microfoam lies in the delicate balance of temperature control and precise aeration. By starting with chilled milk and carefully positioning your steam wand to create a gentle whirlpool effect, you can transform simple liquid into a creamy masterpiece that holds its structure and sweetness. Whether you are perfecting a modern latte or enjoying a time-honored brew, mastering this texture elevates every sip. To see how these rich foam traditions compare across different cultures, explore our guide on Turkish Coffee Vs Greek Coffee.
Selecting Optimal Milk for Microfoam
Achieving a dense, velvety kaimaki begins with the chemical composition of your base liquid. While many assume any milk will suffice, the ratio of proteins to fats is the primary determinant of foam quality. Freshness is paramount; as milk ages, free fatty acids develop, which can inhibit the stabilization of air bubbles. For the most resilient microfoam, full-fat cow's milk remains the industry standard due to its balanced structural integrity.
| Milk Type | Fat Content | Foam Stability |
|---|---|---|
| Whole Milk | 3.25% - 4% | High / Velvety |
| Reduced Fat | 2% | Moderate / Airy |
| Skim Milk | 0% - 0.5% | Low / Rigid |
When selecting your milk, ensure it is kept at a constant refrigeration temperature of approximately 4°C. Cold milk allows for a longer "stretching" phase before reaching the terminal temperature, providing more time to break down large bubbles into the microscopic spheres required for a true kaimaki finish.
Understanding Protein and Fat Dynamics
The physics of milk foam relies on the complex interplay between proteins and lipids. Proteins, specifically caseins and whey, act as the structural "bricks" of the foam. When steam is introduced, these proteins denature and coat the air bubbles, creating a protective film that prevents them from collapsing. This process is what gives the kaimaki its characteristic lift and body.
- Casein Proteins: Provide the primary scaffolding for large-scale bubble formation.
- Whey Proteins: Contribute to the elastic nature of the foam, allowing it to stretch.
- Lipids: While fats provide a creamy mouthfeel, excessive lipids can actually destabilize foam by interfering with protein-air interfaces.
A common misconception is that more fat equals better foam. In reality, homogenized milk is preferred because the fat globules are broken down into smaller, uniform sizes. This prevents the fats from puncturing the protein-lined air bubbles, ensuring the microfoam remains stable for the duration of the drink's consumption. Understanding these dynamics allows the home barista to manipulate the texture by choosing milks with specific nutritional profiles.
Precision Temperature Control for Texture
Temperature is the most critical variable in the pursuit of perfect kaimaki. If the milk is too cool, the proteins will not have denatured enough to trap air effectively; if it is too hot, the proteins suffer permanent thermal damage, causing the foam to collapse and the milk to take on a scalded, sulfurous flavor. The "sweet spot" for microfoam is between 60°C and 65°C.
- Initial Phase (4°C - 37°C): The aeration or "stretching" phase where air is introduced.
- Transformation Phase (38°C - 55°C): The "rolling" phase where air is integrated into the liquid.
- Final Polish (56°C - 65°C): Achieving the glossy, paint-like sheen.
Exceeding 70°C results in the breakdown of lactose and the curdling of proteins, leading to a thin, watery consistency that lacks the sweetness characteristic of properly steamed milk. Using a high-quality analog or digital thermometer is essential until the barista develops "hand-feel" intuition. Consistent temperature control ensures that every cup maintains a thick, persistent layer of kaimaki that enhances the overall sensory experience.
Essential Tools for Home Baristas
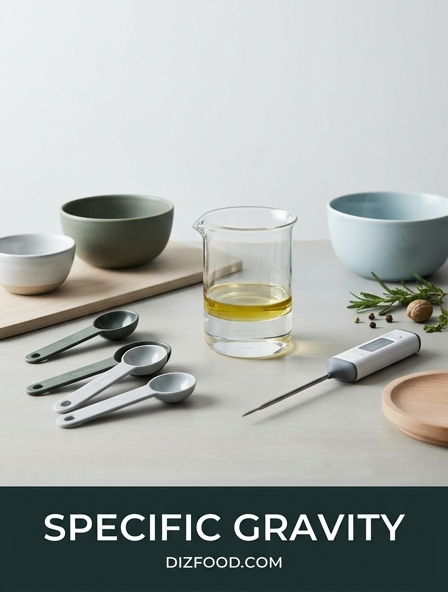
Producing professional-grade kaimaki at home requires a specific set of tools designed for thermal management and fluid dynamics. While the espresso machine's steam wand is the heart of the operation, the accessories used can make or break the final texture. A stainless steel pitcher is non-negotiable, as it provides the necessary heat conductivity to gauge temperature through the palm of the hand.
- Milk Pitcher: Ideally with a narrow spout for precision pouring and a tapered neck to facilitate a vortex.
- Thermometer: A fast-read digital probe to prevent overheating during the critical final seconds.
- Microfiber Cloth: Dedicated solely to the steam wand to prevent cross-contamination and milk stone buildup.
- Timer: To track aeration duration for consistent results across different milk volumes.
The size of the pitcher should correspond to the volume of milk being steamed; a pitcher that is too large will not allow the milk to circulate in a proper whirlpool, while one that is too small will overflow during the expansion phase. Investing in these specialized tools transitions the process from guesswork to a repeatable culinary science.
Mastering Aeration and Stretching Techniques
The "stretch" is the most delicate part of creating kaimaki. It involves positioning the steam wand tip just below the surface of the milk to introduce air. This should sound like intermittent paper tearing. The goal is to create tiny "micro-bubbles" rather than large "macro-bubbles," which are difficult to incorporate and lead to a soapy texture. Mastery requires a steady hand and a keen ear for the specific pitch of the steam.
- Submerge the tip slightly and turn on the steam fully.
- Lower the pitcher slowly until the "chirping" sound begins.
- Monitor the volume; the milk should expand by roughly 20-30%.
- Once the pitcher feels warm (near body temperature), submerge the wand deeper to stop aeration.
After the stretching phase, the "rolling" phase begins. By tilting the pitcher slightly, the steam pressure creates a whirlpool. This vortex pulls the newly created bubbles down into the liquid, shearing them into smaller units until they are invisible to the naked eye. This dual-phase process is the secret to a kaimaki that reflects light like liquid silk.
Steam Wand Maintenance and Hygiene
Residual milk is the primary enemy of both machine longevity and kaimaki quality. Because milk contains proteins and sugars, it quickly bakes onto the hot surface of the steam wand, creating a "milk stone" that can harbor bacteria and obstruct steam holes. A clogged wand provides uneven pressure, making it impossible to create a consistent vortex for microfoam. Hygiene must be an integrated part of the steaming workflow.
- Pre-Purge: Clear the wand of condensed water before inserting it into the milk.
- Immediate Wipe: Use a damp microfiber cloth to clean the wand the moment it leaves the pitcher.
- Post-Purge: Blast steam for two seconds to eject any milk that may have been sucked into the tip via vacuum.
Deep cleaning should occur weekly using a specialized milk surfactant solution. This involves soaking the wand (not the entire arm) to dissolve internal protein deposits. A clean wand ensures that the steam remains dry and powerful, allowing for the precise aeration required for the perfect foam. Neglecting this step will eventually result in a sour aftertaste and poor mechanical performance.
The Science of Bubble Stabilization
The longevity of a kaimaki layer is dictated by surface tension and the "interfacial film" created by milk proteins. In fluid dynamics, small bubbles have a higher internal pressure than larger bubbles. Through a process called Ostwald Ripening, smaller bubbles naturally want to merge into larger ones to reach a lower energy state. To prevent this, the barista must create a microfoam where the bubbles are so uniform that this pressure gradient is minimized.
| Factor | Effect on Stability |
|---|---|
| Surfactants | Lower surface tension, aiding foam formation. | Slower drainage of liquid from bubble walls. |
| Protein Type | Beta-lactoglobulin provides elastic strength. |
Stabilization is also affected by the coffee's acidity. Highly acidic espresso can "shock" the foam, causing it to separate more quickly. By focusing on a tight, integrated rolling phase, you maximize the surfactant properties of the milk proteins. This results in a kaimaki that can sit for several minutes without "pilling" or separating into a dry, stiff head and a watery base.
Troubleshooting Thin or Soapy Foam
If your kaimaki appears "soapy" or collapses instantly, the issue usually lies in the aeration timing or the cleanliness of your equipment. Large, translucent bubbles (often called "sea foam") are caused by introducing air too late in the heating cycle or failing to create a sufficient vortex to break them down. Conversely, thin milk with no foam usually results from a steam wand tip submerged too deeply, preventing any air from being incorporated.
- Issue: Large Bubbles. Solution: Position the tip higher and ensure a stronger whirlpool.
- Issue: Thin/Hot Milk. Solution: Start the aeration earlier when the milk is still cold.
- Issue: Bitter Taste. Solution: Check if milk was overheated beyond 70°C.
Another culprit for poor foam is residual detergent on the pitcher or steam wand. Even a trace amount of dish soap acts as a powerful anti-foaming agent, breaking the surface tension of the protein films. Always rinse equipment thoroughly with hot water. If the milk is old, the proteins may have already started to degrade, making it impossible to achieve the necessary structural tension for microfoam.
Alternative Milk Frothing Best Practices
The rise of plant-based diets has introduced new challenges for creating kaimaki. Unlike cow's milk, alternative milks like oat, almond, and soy lack the same protein structures. Oat milk is generally considered the best alternative because its carbohydrate and fat content closely mimic the behavior of dairy. However, most plant milks require "Barista Edition" formulations, which include added stabilizers like dipotassium phosphate to prevent curdling when hitting the acidic coffee.
- Oat Milk: Requires less aeration than dairy; focus on the rolling phase.
- Almond Milk: Very temperamental; tends to separate if heated above 55°C.
- Soy Milk: Produces a very stiff foam; requires careful integration to avoid "clumping."
When working with plant-based options, the temperature threshold is usually lower than dairy. Aim for 55°C to 58°C to maintain the integrity of the alternative proteins. Because these milks lack the natural sweetness of lactose, the timing of the steam is even more vital to prevent the "beany" or "nutty" flavors from becoming overpowering or bitter through over-steaming.
Final Polishing and Pouring Secrets
Once the steaming is complete, the kaimaki must be "polished" before it reaches the cup. This involves a two-step process: tapping and swirling. Tapping the pitcher firmly on the counter collapses any remaining stray large bubbles. Swirling the milk in a circular motion keeps the foam and liquid integrated. If the milk sits still for more than a few seconds, it will begin to "set," losing the fluid, paint-like consistency required for latte art or a smooth pour.
- The Thump: A single, sharp vertical drop onto a flat surface.
- The Swirl: Vigorous circular movement until the surface reflects light like a mirror.
- The Pour: Start high to pierce the crema, then move low to lay the foam on top.
The speed of your pour is the final secret. A slow, tentative pour allows the liquid to slip out from under the foam, leaving you with a dry lump of kaimaki at the end. A confident, steady flow ensures the microfoam and espresso merge into a harmonious beverage. Success is visible when the surface of the drink remains glossy and the first sip provides a creamy, unified texture.


Comments