
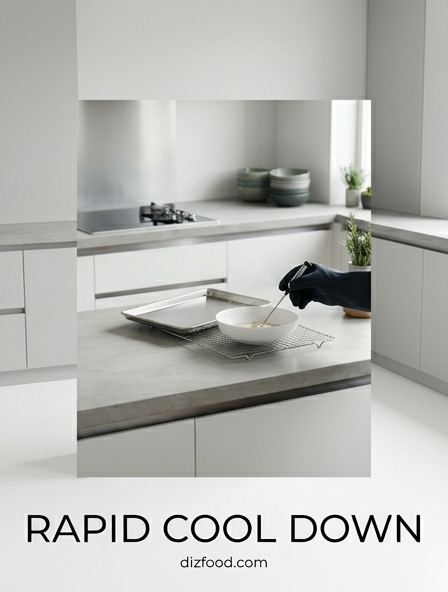
Avoiding the Bacterial Danger Zone
In the culinary world, the "Danger Zone" refers to the temperature range between 40°F and 140°F (4°C to 60°C), where foodborne pathogens like Salmonella and E. coli proliferate most rapidly. When hot food is left to cool naturally at room temperature, it lingers in this hazardous window for far too long, allowing bacteria to double every twenty minutes. To ensure food safety, professional kitchens adhere to a strict two-stage cooling process. The first stage requires reducing the food temperature from 140°F to 70°F within two hours. This is the most critical phase, as it spans the temperatures where bacteria thrive most aggressively. The second stage involves dropping the temperature from 70°F down to 41°F or lower within an additional four hours. If the food fails to meet these benchmarks, it must be discarded or reheated to 165°F and cooled again. Maintaining these standards is not merely a regulatory requirement but a fundamental practice to prevent foodborne illnesses and ensure the longevity of the ingredients.
Choosing the Best Heat Conductive Containers
The material of the storage container plays a pivotal role in the speed of the cooling process. Metals are significantly better at transferring heat than plastics or glass, making them the preferred choice for rapid temperature reduction. Stainless steel is the industry standard due to its durability and high thermal conductivity, allowing heat to escape from the food into the surrounding environment efficiently. In contrast, plastic acts as an insulator, trapping heat inside the container and prolonging the time spent in the bacterial danger zone. When selecting equipment for cooling, consider the following material properties:
| Material | Conductivity Level | Best Use Case |
|---|---|---|
| Stainless Steel | High | Stocks, sauces, and thick stews. |
| Aluminum | Very High | Sheet pan items and thin liquids. |
| Polycarbonate | Low | Cold storage only, not for cooling. |
| Ceramic/Glass | Medium-Low | Small batches or home use. |
Utilizing thin-walled metal pans ensures that the core temperature of the food drops at a rate that meets safety guidelines while preserving the quality of the product.
The Ice Bath Method for Large Stockpots
Large volumes of liquid, such as stocks and soups, hold an immense amount of thermal energy and can take hours to cool if left unattended. The ice bath method is one of the most effective ways to accelerate this process. This technique involves submerging the hot stockpot into a sink or larger basin filled with a mixture of ice and water. A 50/50 ratio of ice to water is essential, as water conducts heat more effectively than air gaps between ice cubes. To maximize efficiency, follow these steps:
- Fill the sink with enough ice and water to reach the level of the liquid inside the pot.
- Place the pot into the bath, ensuring no water splashes into the food.
- Stir the food frequently to move the colder exterior portions toward the center.
- Monitor the water temperature and add more ice as it melts.
- Add salt to the ice bath to lower the freezing point, further accelerating the cooling.
By constantly agitating both the food and the ice water, you facilitate convection, which pulls heat away from the core of the liquid much faster than static cooling.
Benefits of Dividing Batches into Shallow Pans
One of the simplest yet most effective strategies for rapid cooling is increasing the surface area of the food. Large, deep containers trap heat in the center, creating a "hot core" that remains in the danger zone long after the edges have cooled. By transferring hot food into shallow hotel pans-ideally no more than two inches deep-you maximize the surface area exposed to the air. This allows steam and heat to dissipate quickly from the top while the metal bottom transfers heat to the cooling rack. This method is particularly beneficial for dense foods like mashed potatoes, thick casseroles, or heavy sauces that do not circulate easily. When the food is spread thin, the distance heat must travel to escape is significantly reduced. This uniform cooling not only ensures safety but also prevents the overcooking of delicate ingredients that might otherwise continue to soften in their own residual heat. Always leave pans uncovered or loosely draped with parchment paper during the initial cooling phase to allow steam to escape freely without trapping moisture.
Utilizing Cooling Paddles for Rapid Temperature Drop
Cooling paddles, often referred to as "ice paddles," are specialized tools designed to cool liquids from the inside out. These are hollow, food-grade plastic wands that are filled with water and frozen solid before use. When inserted into a hot pot of soup, sauce, or chili, they provide an immediate, direct cold source at the very center of the mass-the area that typically takes the longest to cool. Using these paddles in conjunction with an external ice bath creates a "dual-cooling" effect that can slash cooling times by more than half. To use them effectively, the paddle must be thoroughly sanitized before being submerged. Once in the liquid, use the paddle to stir the contents. This movement serves two purposes: it prevents the food from insulating the cold paddle and ensures that the entire batch is exposed to the freezing surface. Because the heat is being drawn out from both the exterior walls of the pot and the interior core via the paddle, the food reaches the safe 70°F threshold with remarkable speed, significantly reducing microbial risk.
Monitoring Internal Temps with Precision Thermometers
Accurate temperature monitoring is the only way to verify that a cooling process is successful and compliant with health safety standards. Relying on touch or visual cues like the absence of steam is dangerous and often misleading. Digital thermocouple thermometers are the preferred tool for professional kitchens due to their speed and precision. When checking temperatures, it is vital to probe the "thermal center"-the very middle and deepest part of the food-as this is where the heat lingers longest. To maintain a rigorous safety program, consider the following practices:
- Calibrate thermometers daily using the ice-point method (32°F).
- Sanitize the probe with an alcohol wipe before and after every insertion.
- Record temperatures in a dedicated cooling log at 30-minute intervals.
- Use specialized "T-stick" disposable indicators for high-volume batches.
- Ensure the probe does not touch the bottom or sides of a metal pan.
Consistent data collection allows kitchen managers to identify bottlenecks in their cooling procedures and provides a verifiable paper trail for health inspectors, ensuring the highest standards of food safety are maintained.
Proper Airflow and Ventilation Techniques
Airflow is a critical, yet often overlooked, component of the cooling cycle. In a commercial setting, blast chillers are the gold standard because they use high-velocity fans to blow frigid air over food surfaces, stripping away the boundary layer of heat. However, even in standard walk-in coolers, airflow can be optimized. Never stack warm pans directly on top of one another, as this creates a large, insulated mass that will remain hot for hours. Instead, place pans on wire shelving units that allow air to circulate underneath and around all sides of the container. Proper spacing is essential; leaving at least two inches of space between pans ensures that the cold air can move freely. Additionally, avoid placing hot food directly under the evaporator fans of a refrigerator, as this can raise the ambient temperature of the unit and put other stored items at risk. If possible, utilize a dedicated cooling rack in a well-ventilated, cooler area of the kitchen before moving items into final cold storage. This initial "pre-cooling" phase utilizes ambient airflow to drop the first few critical degrees of heat.
Maintaining Texture and Flavor During Chilling
Rapid cooling is not only a safety concern but also a matter of culinary quality. When food stays hot for too long, it undergoes "carry-over cooking," which can turn crisp vegetables into mush and toughen delicate proteins. Furthermore, slow cooling promotes the development of "warmed-over flavor" (WOF), a stale or metallic taste caused by the oxidation of lipids. By chilling food quickly, you "shock" the ingredients, stopping the cooking process and locking in the vibrant colors and fresh flavors. For example, green vegetables like broccoli or asparagus should be plunged into an ice-water shock (blanching) to deactivate enzymes that cause browning and softening. In the case of emulsions or starch-based sauces, rapid cooling prevents the separation of fats and the formation of a skin on the surface. For liquids, stirring during the cooling process ensures that the fats stay integrated rather than settling into a thick layer at the top. Ultimately, the faster the temperature drops, the closer the final chilled product will be to its original, freshly-prepared state, ensuring customer satisfaction and reducing food waste.
Preventing Condensation and Moisture Buildup
One of the most common mistakes in the kitchen is sealing a container while the food is still warm. When hot food is covered with a lid or plastic wrap, the rising steam hits the cold cover and condenses back into liquid water. This moisture drips back onto the food, which can ruin the texture of fried items, dilute sauces, and create a soggy environment that is highly conducive to mold and bacterial growth. To prevent this, food should be left uncovered or "vented" during the cooling process. A common technique involves placing the lid ajar or using a perforated pan cover that allows steam to escape while providing some protection from contaminants. Once the food reaches 41°F, it should then be sealed tightly to prevent cross-contamination and dehydration. Using moisture-absorbent liners or parchment paper can also help manage residual steam for specific items. By managing the humidity during the chilling phase, you preserve the structural integrity of the dish and prevent the "sweating" that leads to premature spoilage and off-textures in refrigerated storage.
Standard Operating Procedures for Safe Cold Storage
Once the rapid cooling process is complete and the food has reached 41°F (5°C), it must be transitioned into permanent cold storage following strict Standard Operating Procedures (SOPs). Proper organization in the walk-in or reach-in cooler is essential for maintaining food safety and inventory control. Every container must be clearly labeled with the product name, the date it was prepared, and the "use-by" date. Following the FIFO (First In, First Out) method ensures that older stock is used before newer batches, reducing waste. Additionally, the placement of food on shelving is governed by the required final cooking temperatures of the items. Consider the following storage hierarchy:
- Top Shelves: Ready-to-eat foods and cooked items.
- Middle Shelves: Whole cuts of seafood and beef.
- Lower Shelves: Ground meats and pork.
- Bottom Shelves: Raw poultry and items with the highest risk.
By keeping cooled, cooked foods at the top, you eliminate the risk of raw juices dripping onto safe-to-eat products. Regular temperature logs of the cooling units themselves should be maintained twice daily to ensure the equipment is functioning at peak efficiency.

Comments